What Is the Finder OPTA 8A Series?
Finder OPTA is the 8A series programmable logic relay (PLR) developed by Finder and Arduino. It combines Finder's industrial know-how in relays and DIN-rail hardware with the open-source ecosystem of Arduino Pro. In practice, OPTA sits between a classic smart relay (such as Siemens LOGO!) and a compact PLC: it is small and affordable, but it can be programmed in the standard PLC languages and connected to the cloud.
The 8A series range includes three models that share the same I/O and differ in connectivity:
- OPTA Lite - USB-C for programming and an Ethernet port
- OPTA Plus - adds an RS-485 port, useful for Modbus RTU devices such as energy meters or drives
- OPTA Advanced - adds Wi-Fi and Bluetooth Low Energy on top of Ethernet and RS-485
Every model has 8 inputs that can be configured as digital or analog (0-10 V) and 4 relay outputs, is powered from 12-24 V DC and mounts on a standard DIN rail. Inside there is a dual-core STM32H747 microcontroller (Arm Cortex-M7 and Cortex-M4) and a secure element for encrypted connections to the cloud.
How Do You Program a Finder OPTA?
There are two ways to program the OPTA logic relay:
- Arduino PLC IDE - the PLC-style environment. It supports the IEC 61131-3 standard languages: Ladder Diagram (LD), Function Block Diagram (FBD), Structured Text (ST), Sequential Function Chart (SFC) and Instruction List (IL). You can also run an Arduino sketch alongside the PLC program in the same project.
- Arduino IDE - classic Arduino sketches in C++, which gives you access to thousands of open-source libraries and examples.
For an automation engineer this means you can write ladder logic exactly as on a traditional PLC, and still use Arduino code for tasks like custom protocols or data processing. If you are new to the languages, see our overview of PLC programming languages.
Typical OPTA Automation Projects
- Building automation: lighting, HVAC, shutters, pumps and access control
- Small machines for OEMs that need a few I/O points and a remote connection
- Industrial IoT: sending real-time data from the machine to Arduino Cloud over Ethernet or Wi-Fi
- Energy monitoring with Modbus RTU meters on the RS-485 port (Plus and Advanced)
- Predictive maintenance applications based on run hours, counters and alarms
Thanks to Arduino Cloud you also get over-the-air (OTA) firmware and program updates, so a device installed far away can be updated without a site visit. We showed this workflow in remote programming of the Finder OPTA with Arduino Cloud.
Available Extension Modules for Finder OPTA
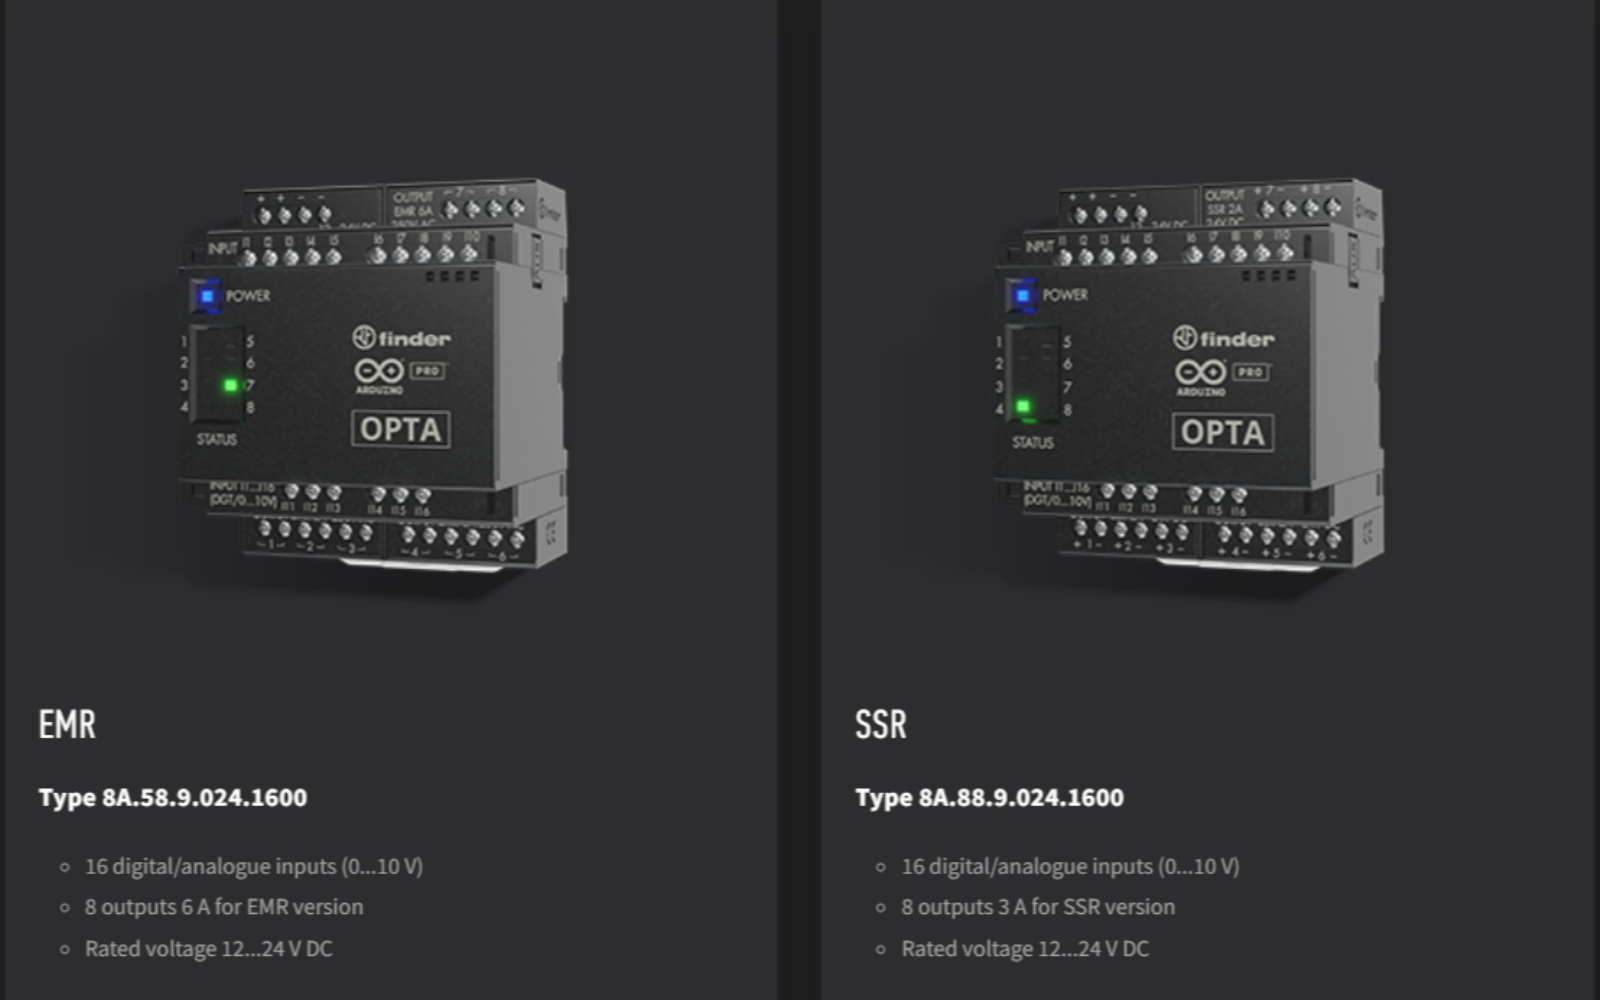
Currently, there are two types of extension modules available:
EMR Module (8A.58)
- 16 digital/analog inputs (0-10V)
- 8 EMR outputs with 6A capacity
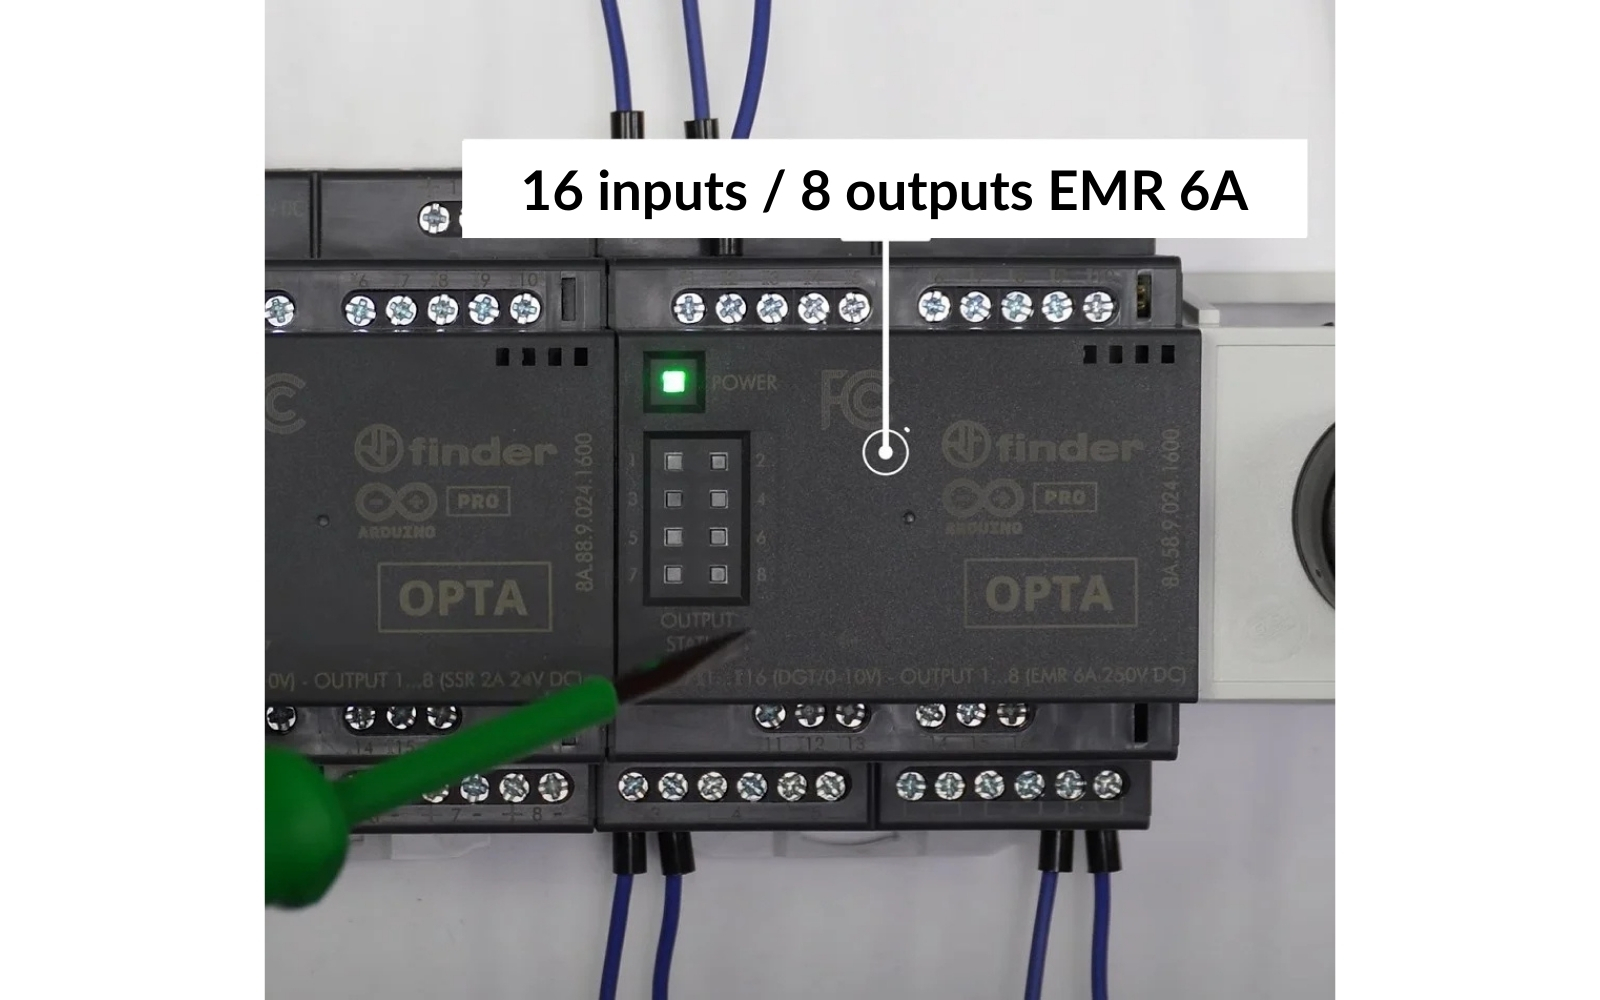
SSR Module (8A.88)
- 16 digital/analog inputs (0-10V)
- 8 SSR outputs with 2A capacity
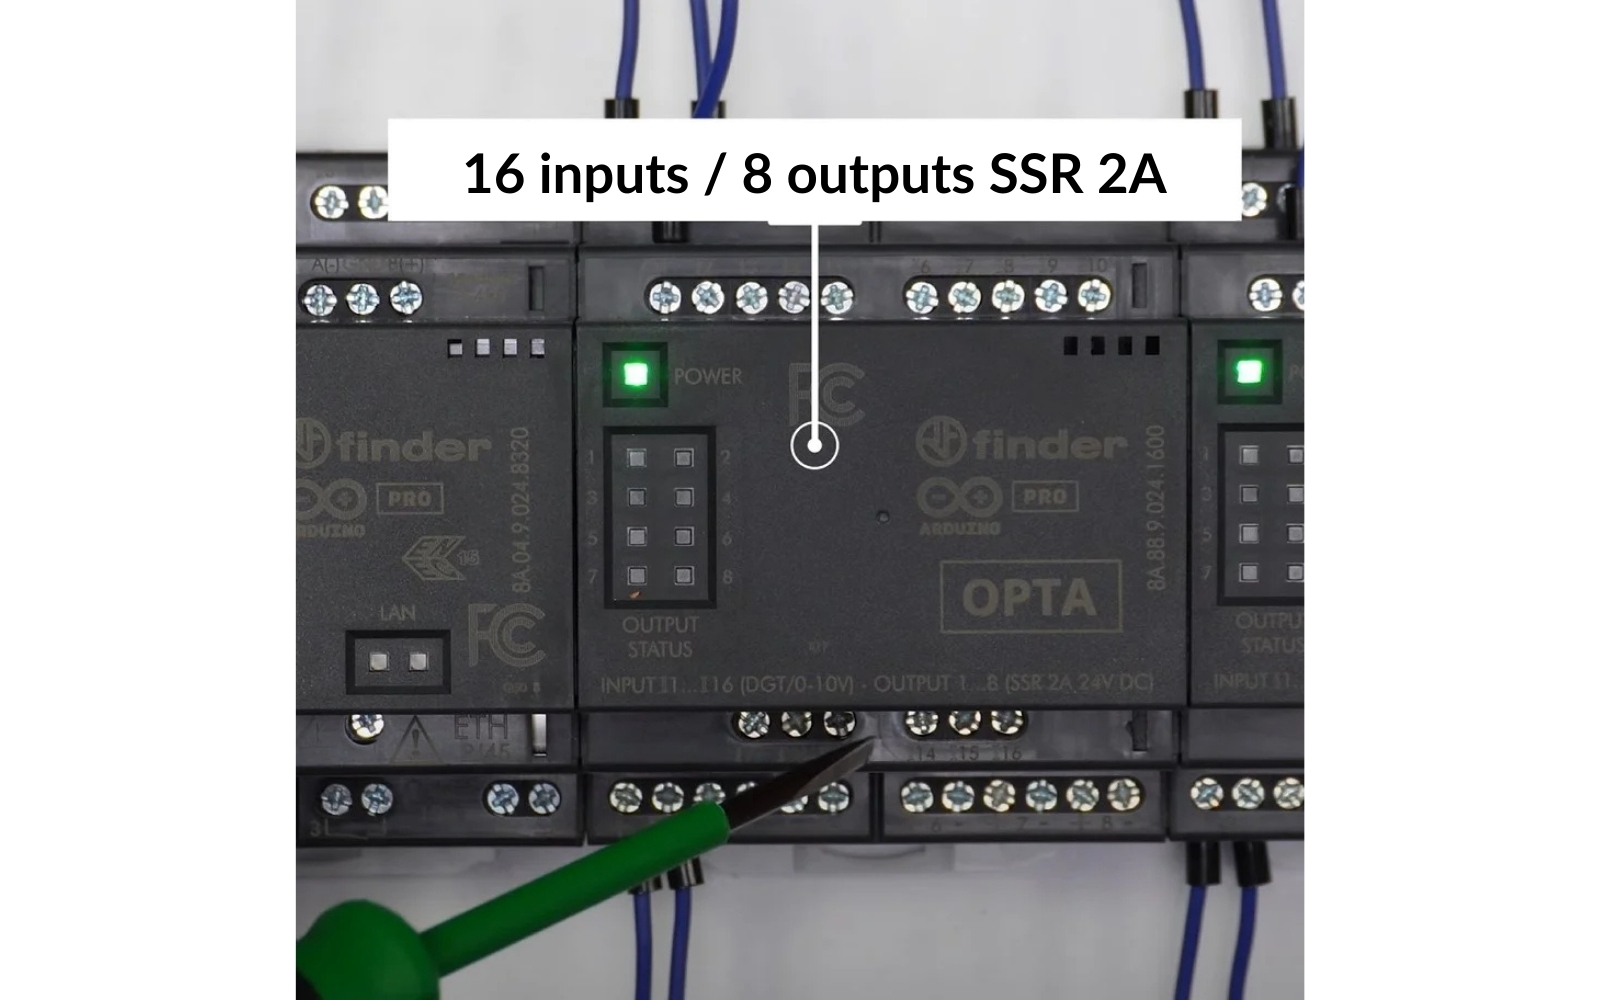
The EMR (8A.58) and SSR (8A.88) modules are compatible with every version of the Finder OPTA controller: Lite, Plus, and Advanced.
How to Connect Extension Modules to Arduino OPTA
Connecting the modules to the controller is straightforward. Use the AUX port located under a cover on the side of the controller.
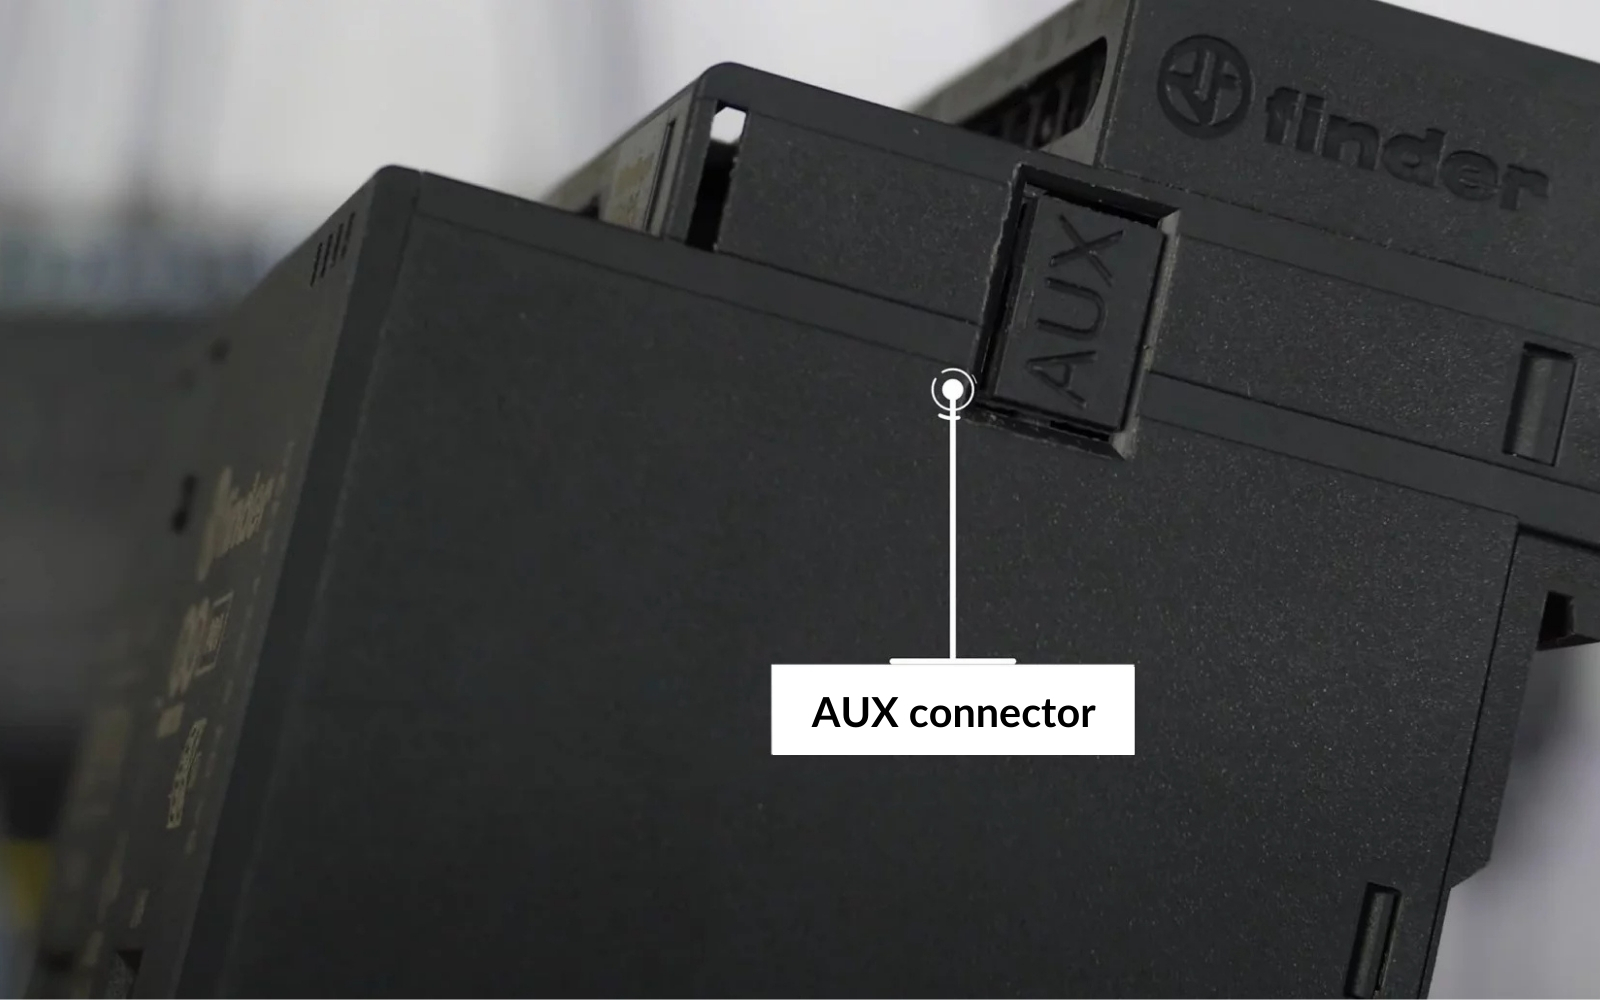
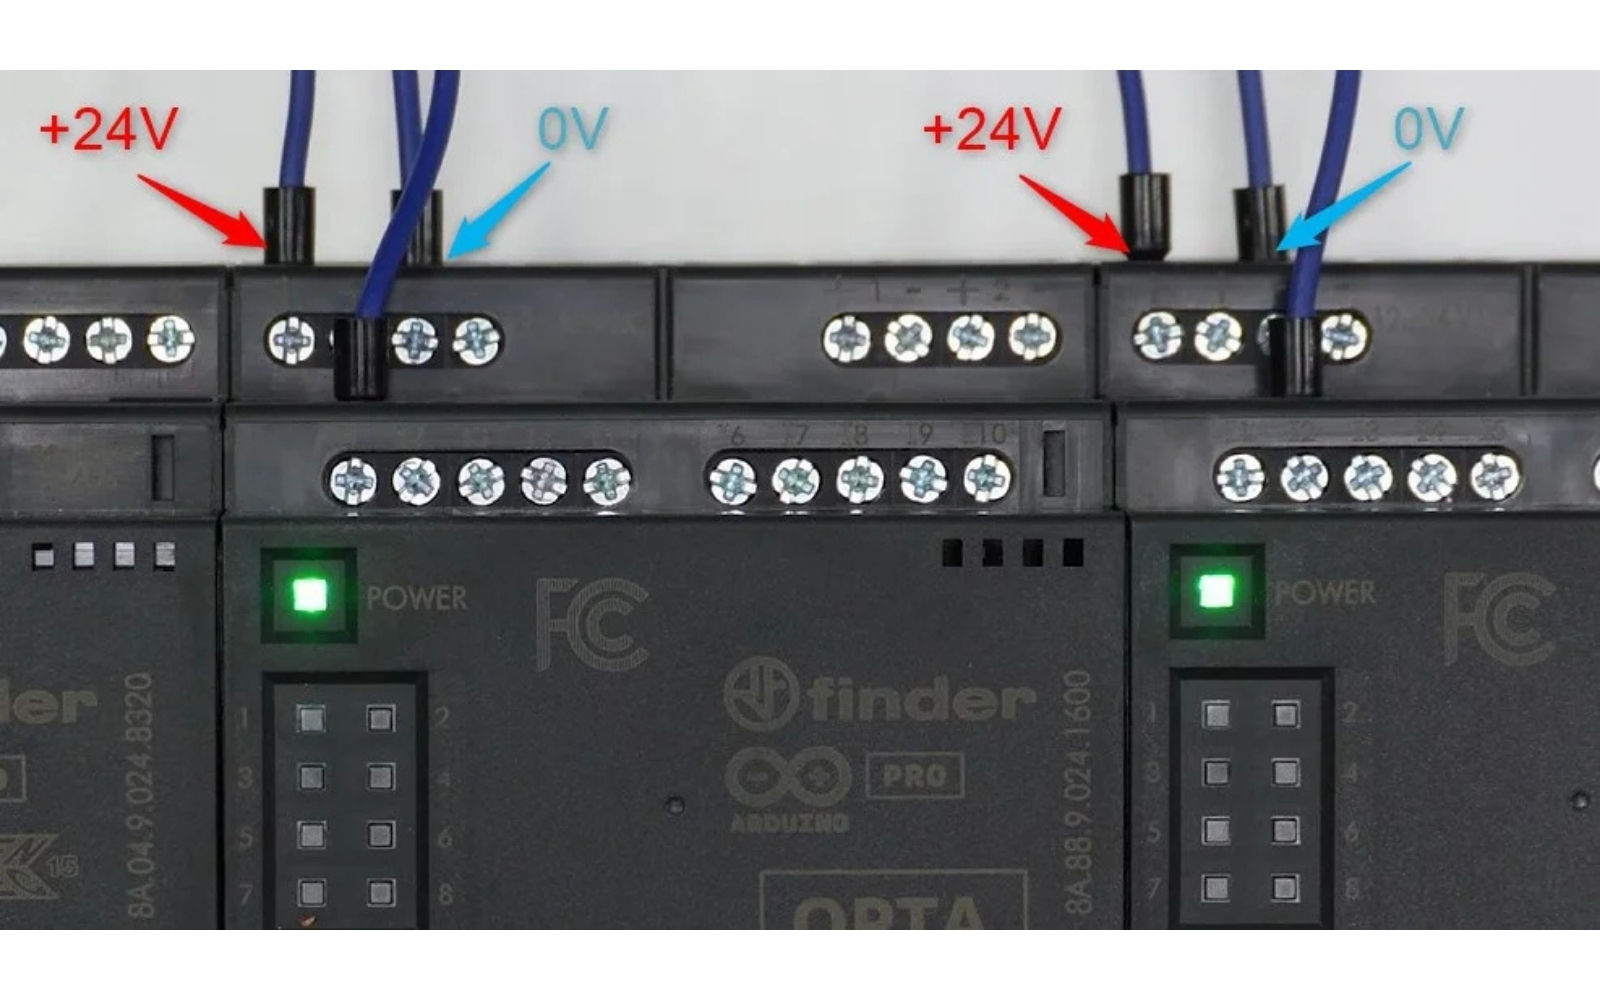
Simply snap off the plastic cover, and you can attach up to five modules to the controller on the DIN rail. Remember to provide proper power to the modules.
Once connected, power on the controller, and proceed to configure and program the modules.
Configuration of Finder OPTA Extension Modules
To begin with, you’ll need the Arduino PLC IDE software for configuring and programming the modules. When this article was first written, the expansions could not be used from the Arduino IDE; Arduino has since published the Arduino_Opta_Blueprint library for sketch-based projects, but the PLC IDE remains the simplest way if you program in ladder logic or FBD.
Start by creating or opening your current project. Go to the I/O Expansions tab and click the Scan button to detect connected modules.
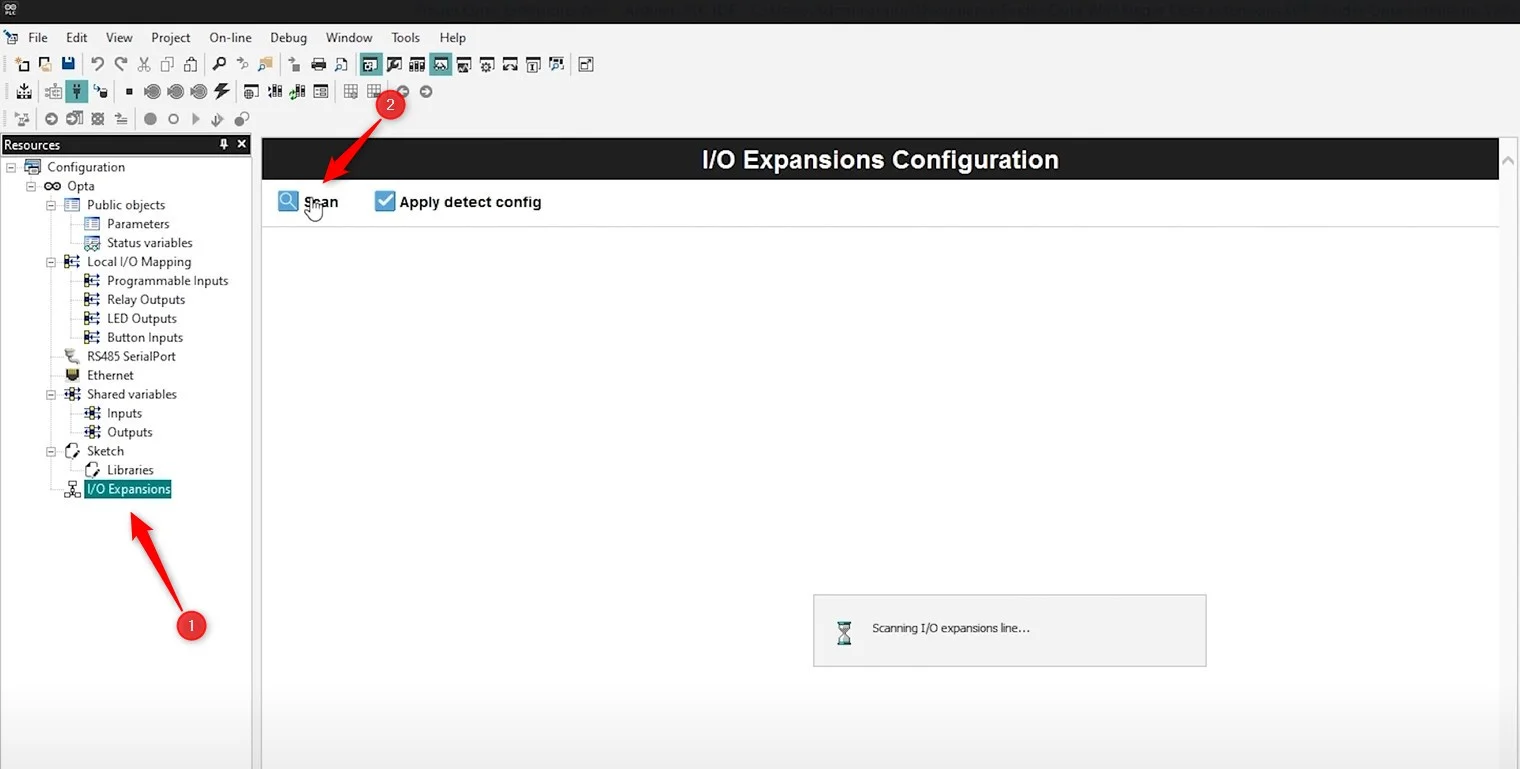
After the modules are detected, click Apply Detect Config to save the settings. The saved configuration will display as green module names.
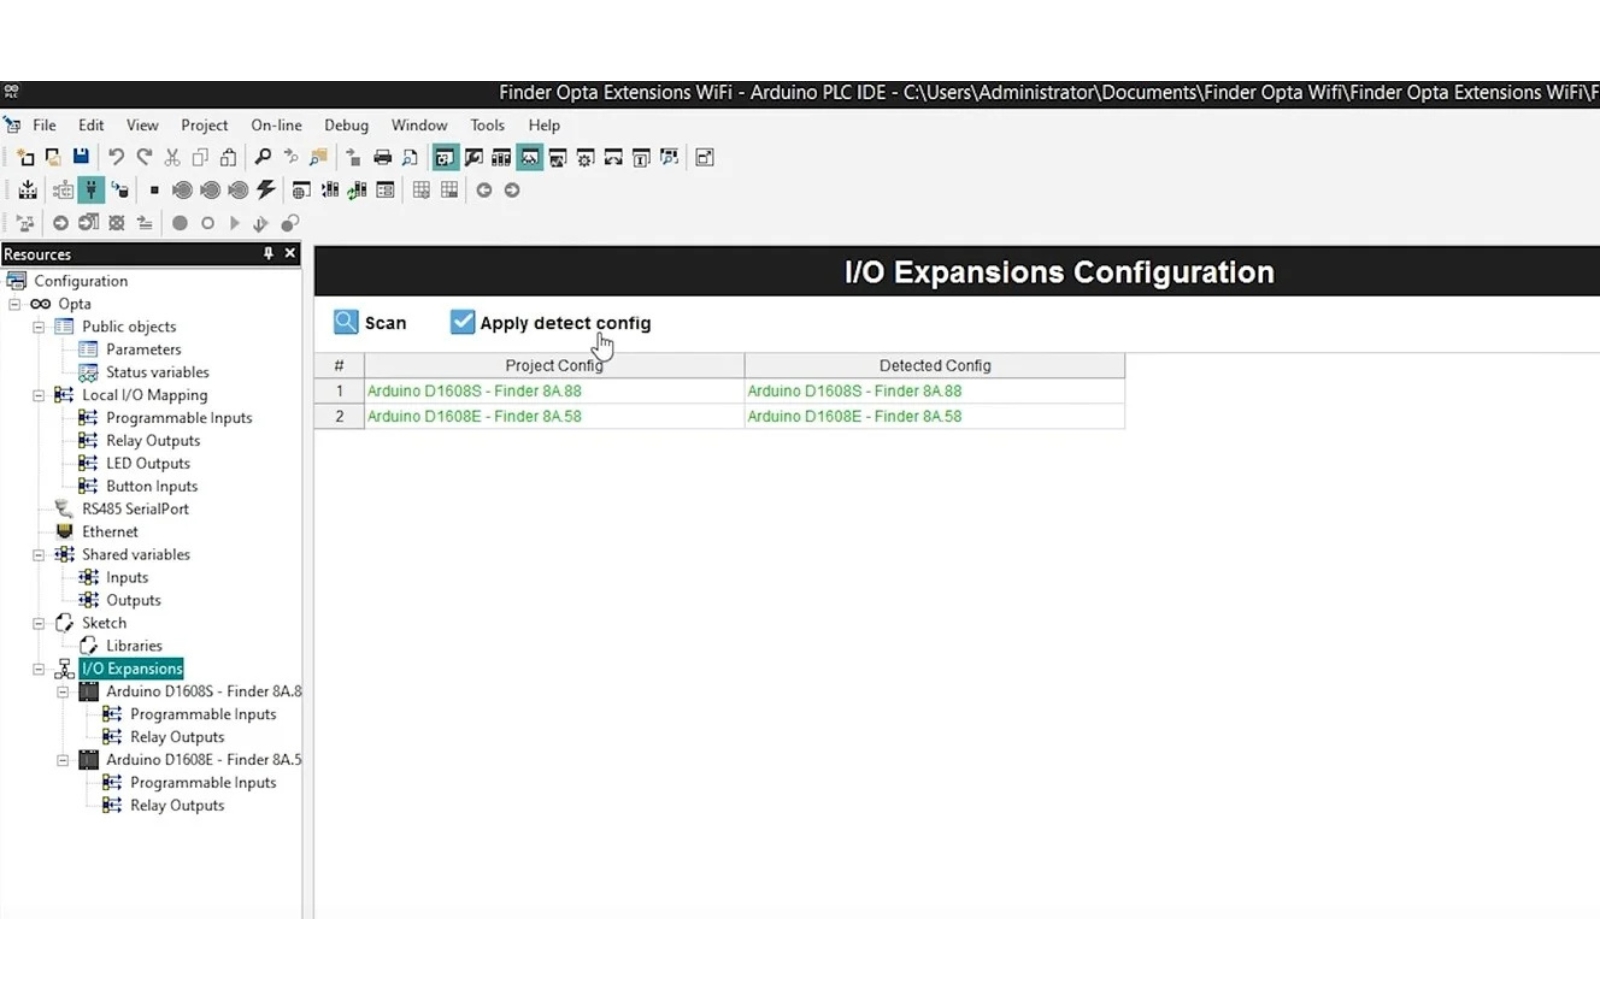
That completes the configuration. Now, define variables and integrate them into the program for the Finder OPTA. Inputs are defined under Programmable Inputs, while outputs are set in Relay Outputs.
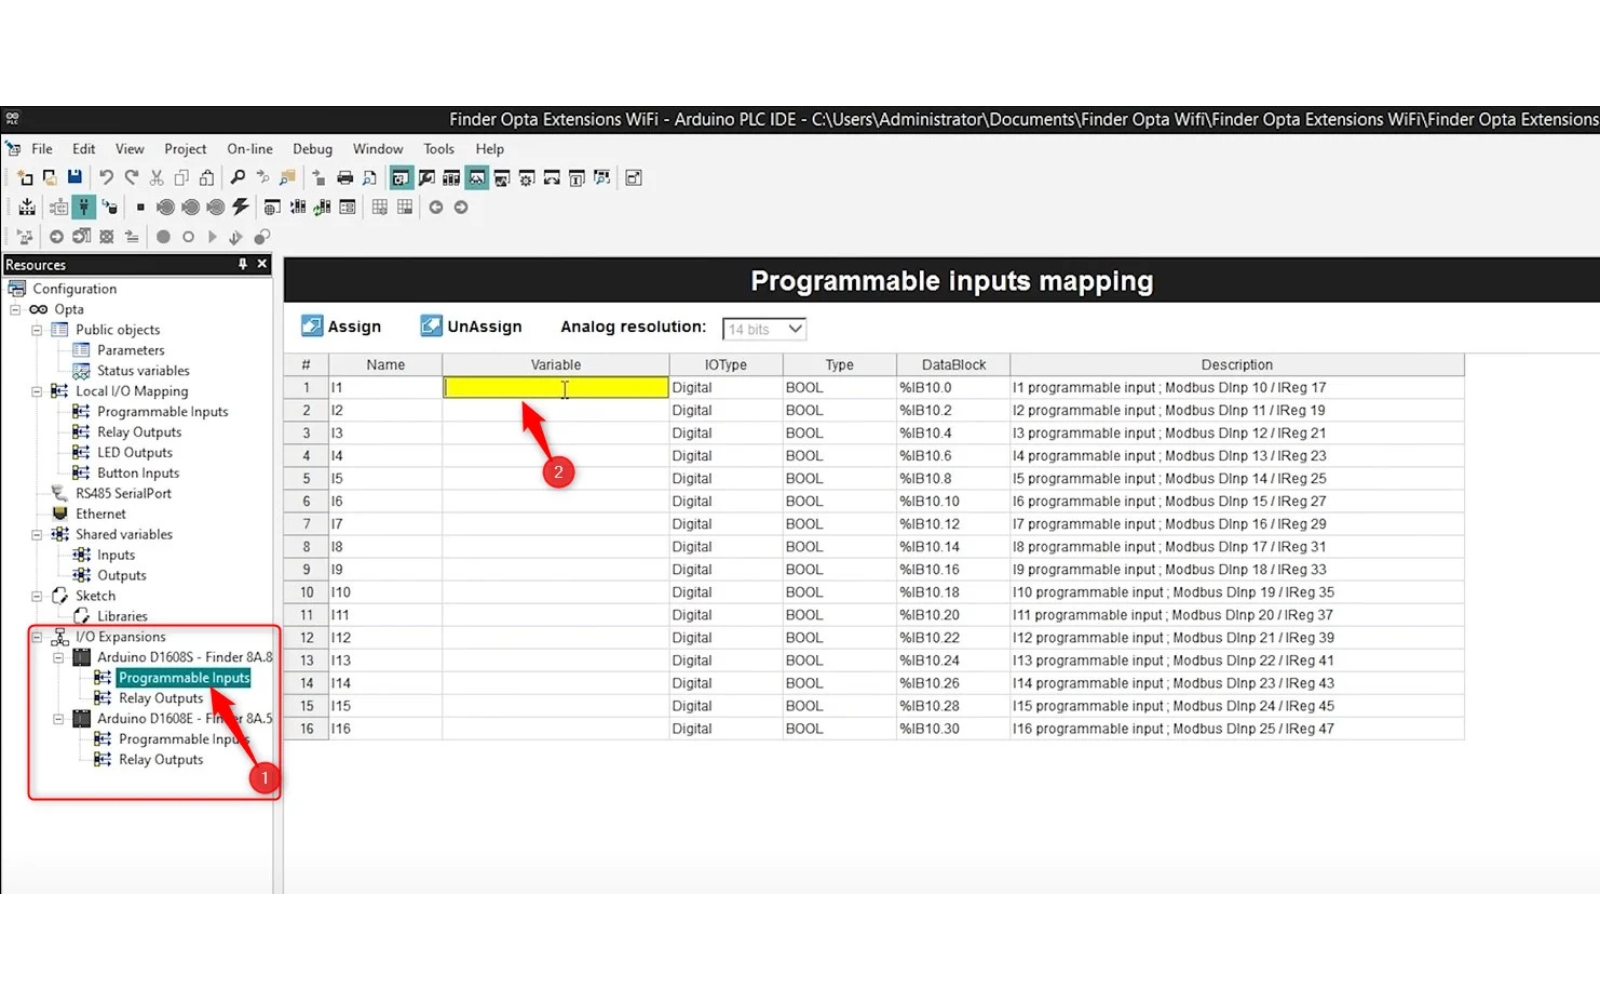
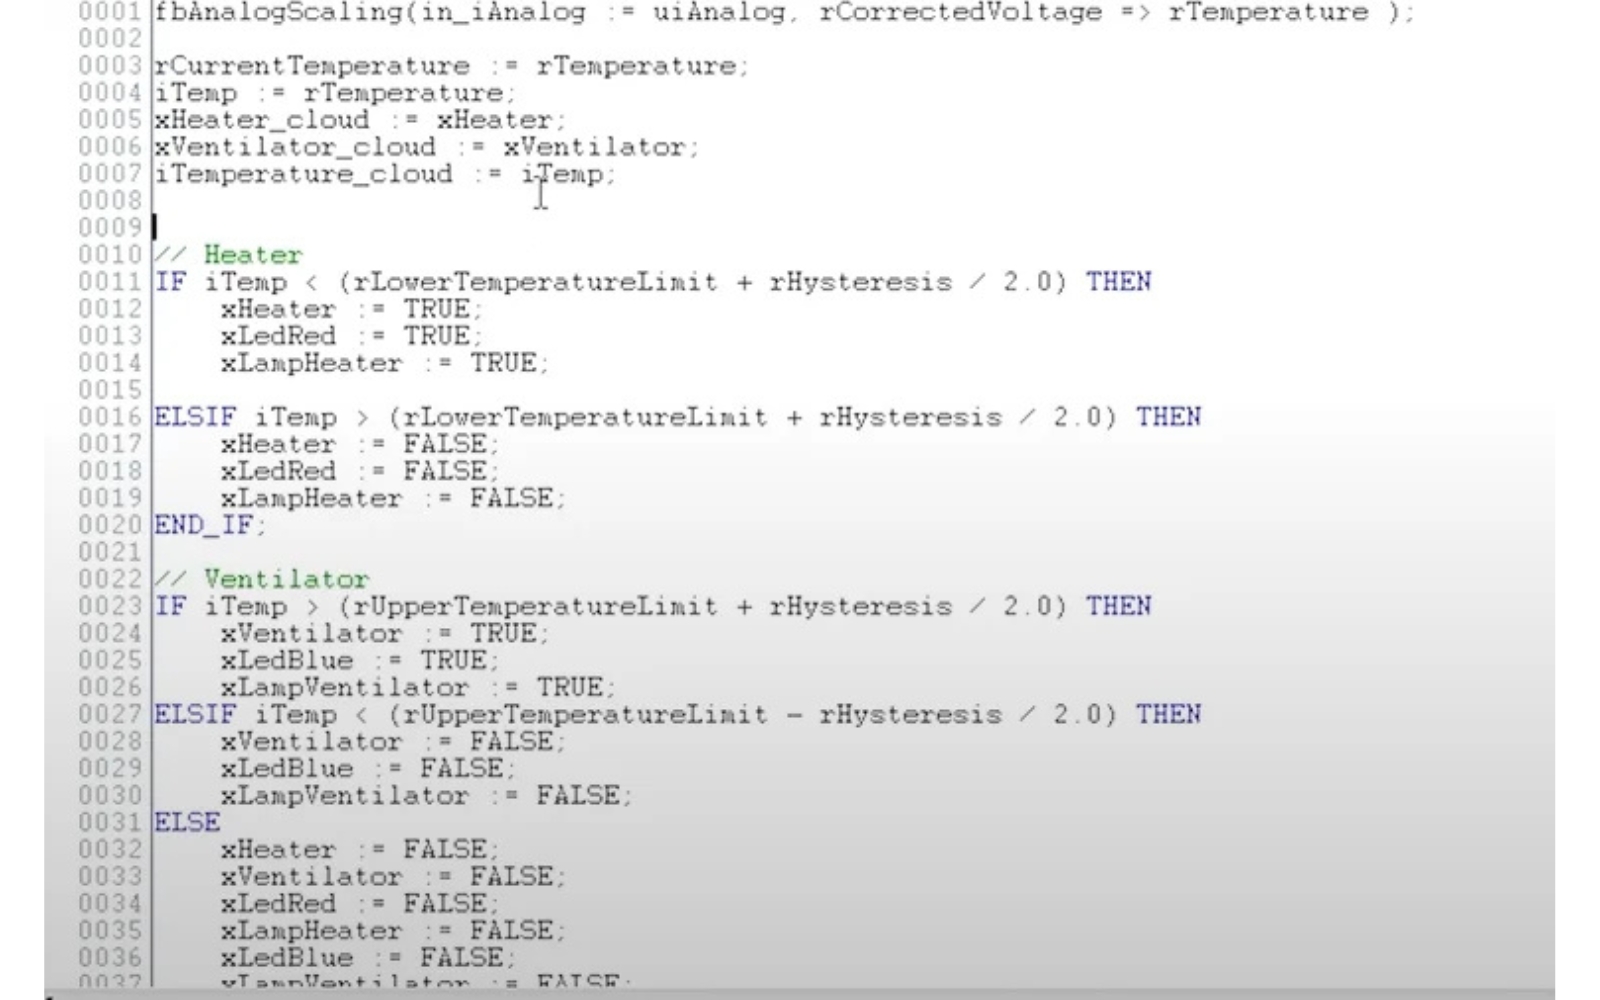
This completes the programming of extension modules, and these variables can now be used in your PLC program. An example is provided below.
Finder OPTA vs a Classic Smart Relay
- Programming languages: OPTA supports the full IEC 61131-3 set (LD, FBD, ST, SFC, IL) plus Arduino sketches; most smart relays offer only FBD or LD.
- Connectivity: Ethernet on every model, RS-485 and Wi-Fi/BLE on the higher versions, with native Arduino Cloud support for industrial IoT dashboards.
- Expansion: up to five EMR or SSR modules on the AUX port, so one controller can handle a medium-size panel.
- Community: open-source code examples from the Arduino community, which is a big advantage for prototyping and education.
The limits are also worth knowing. OPTA is not a replacement for an S7-1500 or a ControlLogix in a large line. For small automation projects, building automation and IoT retrofits, however, it is a very cost-effective choice.
Is it Worth Investing in the Finder OPTA and Extension Modules?
In my opinion, absolutely YES! The controller alone provides incredible capabilities, such as simple cloud IoT communication setup via WiFi! Based on Arduino, it offers access to a vast array of nearly ready-to-use projects. The new extension modules only reinforce this potential. It’s worth comparing the price difference between a set like LOGO + modules versus Finder OPTA + modules.
Finder OPTA - FAQ
Is the Finder OPTA a PLC or a relay?
Finder calls it a programmable logic relay (PLR). Functionally it behaves like a compact PLC: it runs a cyclic program written in IEC 61131-3 languages, reads inputs and switches relay outputs, but it comes in the form factor and price class of a smart relay.
Can I program the Finder OPTA in ladder logic?
Yes. In the Arduino PLC IDE you can create programs in Ladder Diagram (LD), Function Block Diagram (FBD), Structured Text and the other IEC 61131-3 languages, and combine them with an Arduino sketch.
What is the difference between OPTA Lite, Plus and Advanced?
All three have the same 8 inputs and 4 relay outputs. Lite has USB-C and Ethernet, Plus adds RS-485, and Advanced adds Wi-Fi and Bluetooth Low Energy on top of that.
If you want to learn the ladder and Structured Text skills you need for controllers like OPTA, start with our Industrial Automation Basics course.