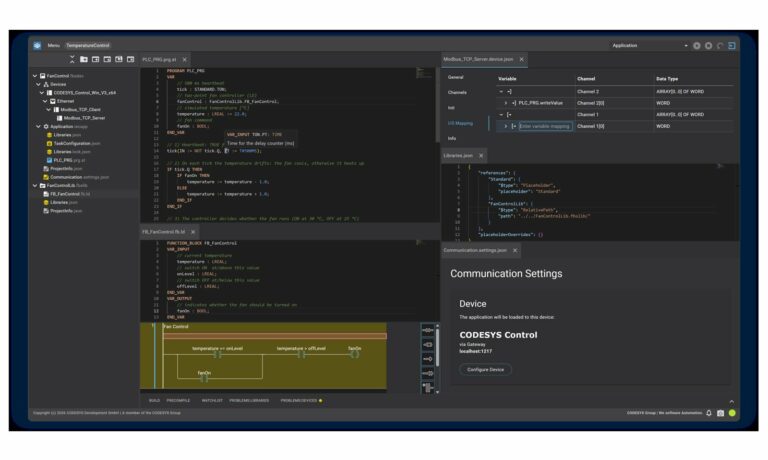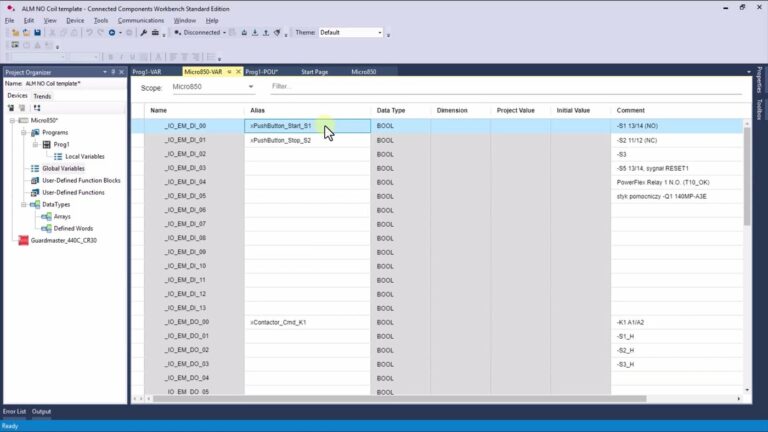
Efficiently managing the flow of execution is crucial in PLC programming. In CODESYS, conditional statements and loops allow automation systems to make decisions and execute tasks dynamically. This section explores the IF, IF...ELSE, CASE...OF statements, and the FOR loop, providing examples of their usage.
Introduction to Program Flow Control
Control flow statements enable developers to execute specific parts of the program based on conditions. This is essential for handling decision-making processes and optimizing repetitive tasks in automation systems.
Why Use Flow Control?
- Make real-time decisions based on input conditions.
- Optimize system efficiency by executing only necessary logic.
- Reduce redundant code through loops and conditionals.
IF Statement in CODESYS
The IF statement is the most basic conditional statement. It executes a block of code only if a specified condition is TRUE.
Syntax:
IF condition THEN
   // Code to execute if condition is met
END_IF;
Example: Simple IF Statement
VAR
   xButton1 : BOOL;
   xSensor : BOOL;
   iCounter : INT := 0;
END_VAR

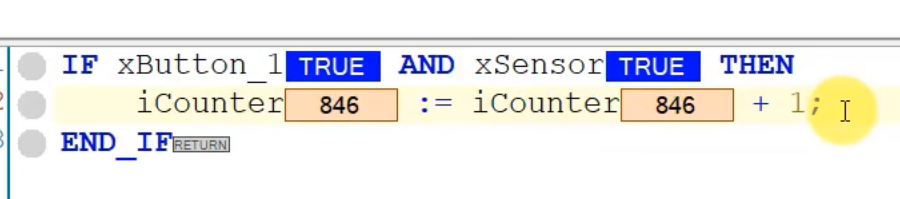
IF xButton1 AND xSensor THEN
   iCounter := iCounter + 1;
END_IF;
Explanation: If both xButton1 and xSensor are TRUE, the counter increments.
Testing the IF Condition in a PLC Simulator
- Log in to the PLC simulator.
- Set xButton1 to TRUE.
- Set xSensor to TRUE.
- Observe iCounter incrementing.
Understanding the PLC Scan Cycle
The PLC cycle determines how often logic is executed in an automation system:
- Input Scan - Reads sensor and switch statuses.
- Program Execution - Executes logic based on inputs.
- Output Update - Sends signals to actuators.
- Housekeeping Tasks - Maintains communication and internal functions.
This cycle runs continuously, ensuring real-time automation control.
Understanding the PLC Execution Cycle
The PLC execution cycle determines how often logic is executed in an automation system. Each cycle consists of the following steps:
- Input Scan - Reads the status of sensors and switches.
- Program Execution - Executes logic based on input conditions.
- Output Update - Sends control signals to actuators.
- Housekeeping Tasks - Manages internal system functions and communication.
The PLC executes this cycle continuously at predefined intervals, ensuring real-time control over automation processes. In CODESYS, programs are executed cyclically, and the execution interval can be adjusted in milliseconds.
Configuring the Execution Cycle in CODESYS
To control execution speed:
- Open Task Configuration.
- Click on Main Task.
- Modify the execution interval (default: 20ms).
- Adjust it to 2000ms (2 seconds) to slow execution.
- Observe the effect on program execution speed.
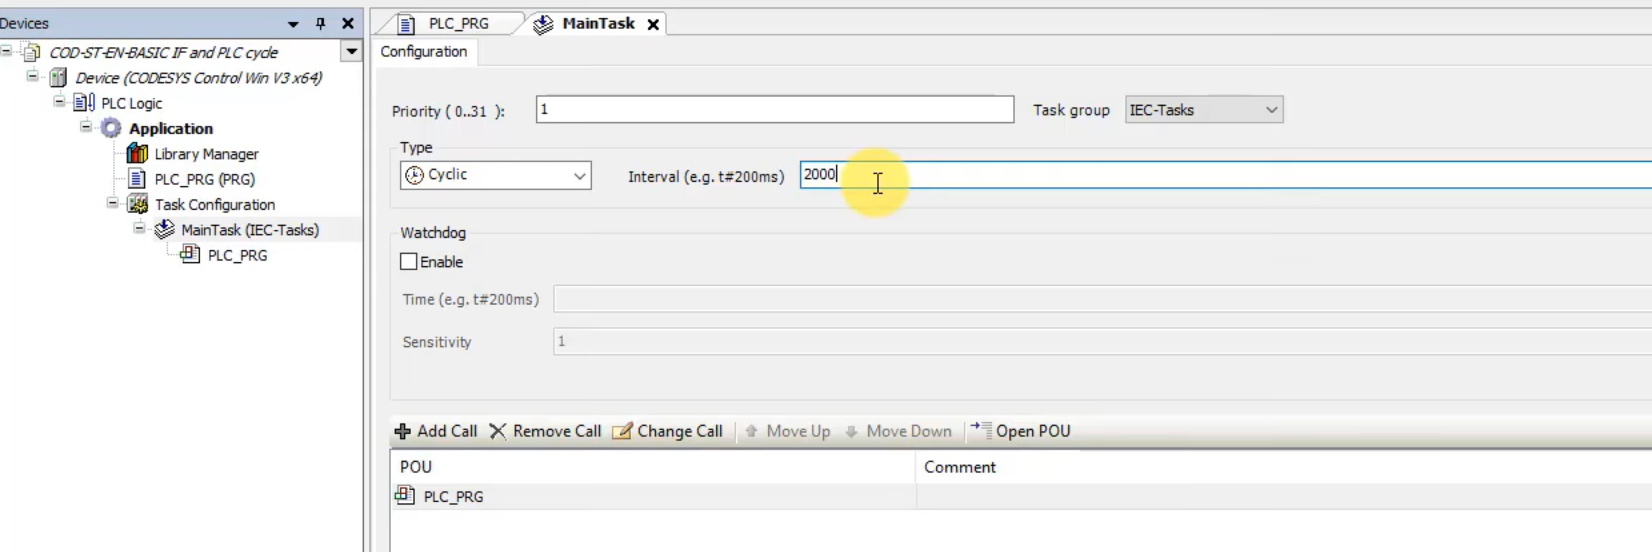
With an interval of 2000ms, logic updates every 2 seconds, causing slower incrementation in counters.
Implementing IF…ELSE in CODESYS
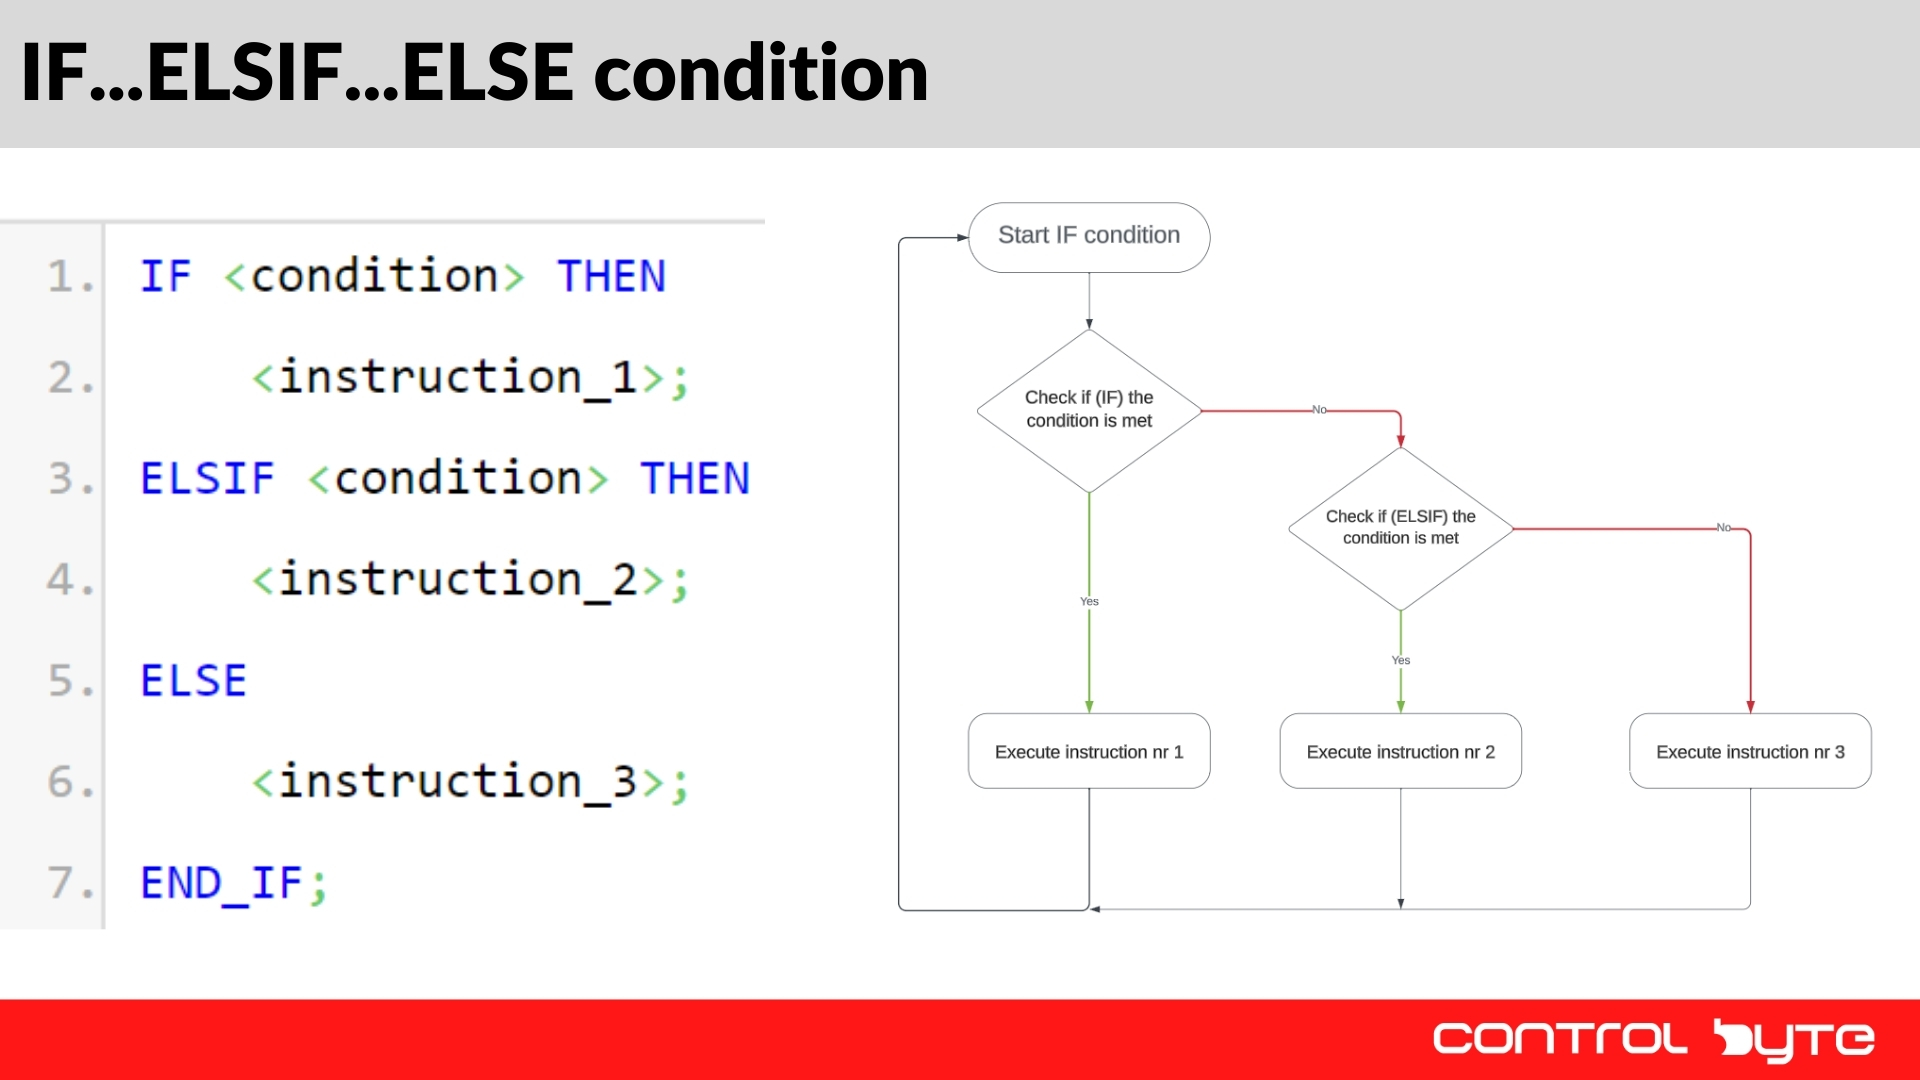
The IF…ELSE statement allows structured decision-making by executing different blocks of code depending on conditions.
Syntax of IF...ELSE Statement
IF condition THEN
   // Code executed if condition is met
ELSIF another_condition THEN
   // Code executed if first condition is FALSE, but this condition is met
ELSE
   // Code executed if no conditions are met
END_IF;
Example: Using IF…ELSE with Counters
VAR
   xButton1 : BOOL;
   xButton2 : BOOL;
   iCounter : INT := 0;
END_VAR

IF xButton1 THEN
   iCounter := iCounter + 1;
ELSIF xButton2 THEN
   iCounter := iCounter - 1;
ELSE
   iCounter := 0;
END_IF;
Explanation:
- If xButton1 is pressed, the counter increments.
- If xButton2 is pressed, the counter decrements.
- If neither button is pressed, the counter resets to 0.
Testing IF…ELSE in a PLC Simulator
- Log into CODESYS simulator.
- Press xButton1 → Observe iCounter incrementing.
- Press xButton2 → Observe iCounter decrementing.
- Release both buttons → Observe iCounter resetting.
Debugging with Breakpoints
CODESYS provides a debugging tool that helps examine program execution by pausing at breakpoints.
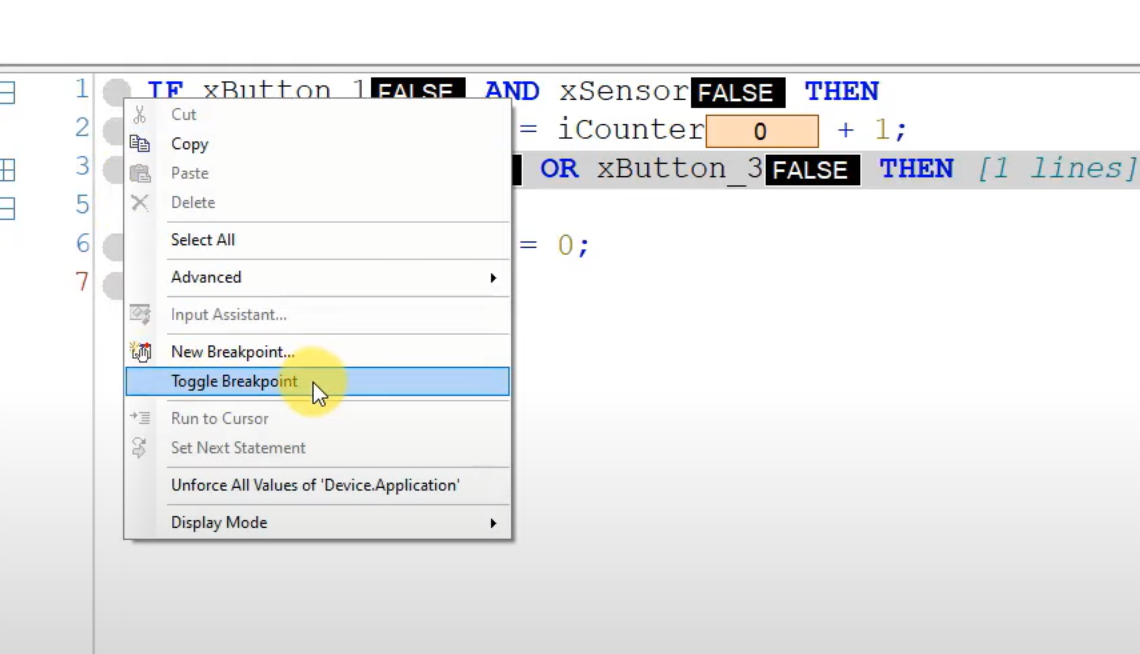
Setting a Breakpoint in CODESYS
- Right-click on the desired line of code.
- Select Toggle Breakpoint.
- Run the program.
- The PLC pauses execution when it reaches the breakpoint.
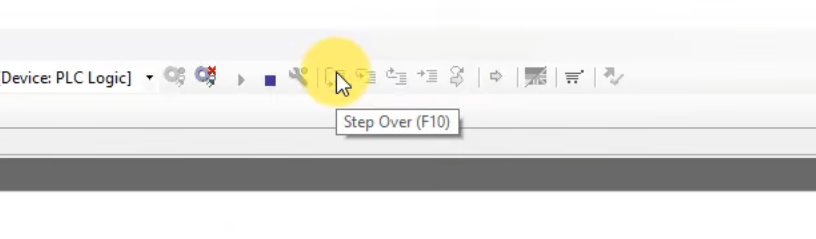
At this stage, you can use Step Over to execute the next line and analyze logic execution step by step.
Analyzing Execution Flow
- If the first condition is met, the program executes its block and skips the ELSIF and ELSE parts.
- If the first condition is FALSE, it evaluates the ELSIF condition.
- If neither condition is met, it defaults to the ELSE block.
Using breakpoints and step-by-step debugging, developers can identify logic errors and optimize program execution.
Using the CASE Statement for Flow Control
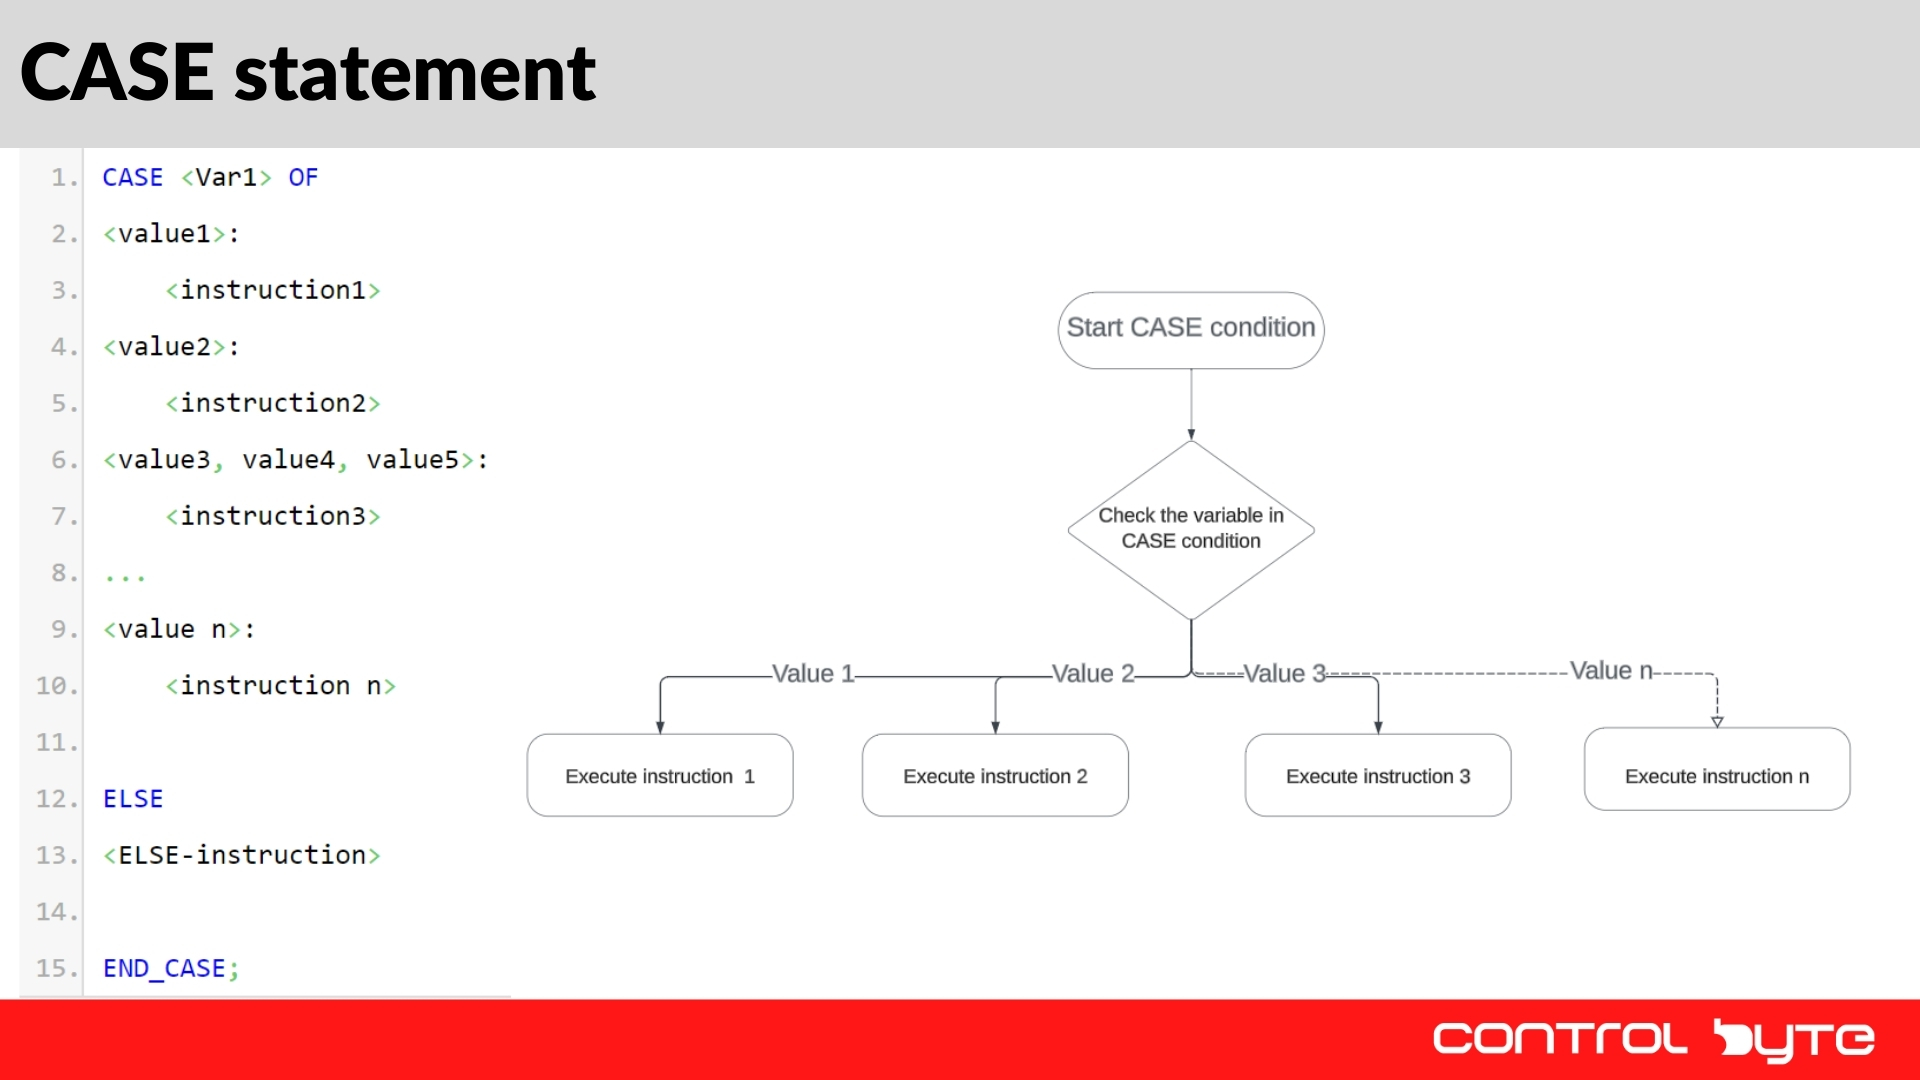
The CASE statement in CODESYS is a structured alternative to multiple IF...ELSE statements. It allows the program to execute different blocks of code based on the value of a single variable, making it particularly useful in automation applications where multiple conditions need to be evaluated.
Syntax of CASE Statement
CASE I_Var OF
   0:
      xLamp1 := TRUE;
      xLamp2 := FALSE;
   1:
      xLamp2 := TRUE;
      xLamp3 := FALSE;
   10..20:
      xLamp1 := TRUE;
      xLamp2 := FALSE;
   ELSE
      xLamp1 := FALSE;
      xLamp2 := FALSE;
      xLamp3 := FALSE;
END_CASE;
Explanation:
- If iVar is 0, Lamp 1 turns ON, Lamp 2 turns OFF.
- If iVar is 1, Lamp 2 turns ON, Lamp 3 turns OFF.
- If iVar is in the range 10 to 20, Lamp 1 turns ON, and Lamp 2 turns OFF.
- If iVar doesn’t match any case, the ELSE condition executes, turning off all lamps.
Testing the CASE Statement in CODESYS
- Log into the PLC simulator.
- Set iVar := 0 → Lamp 1 should turn ON.
- Set iVar := 1 → Lamp 2 should turn ON.
- Set iVar := 15 → Lamp 1 should turn ON.
- Set iVar := 25 → All lamps should turn OFF (ELSE case triggered).
Advantages of Using CASE Statement
- Cleaner and more readable code than multiple IF conditions.
- Improved execution efficiency since only one condition is evaluated.
- Easier debugging due to structured branching.
Implementing the FOR Loop in CODESYS
The FOR loop in CODESYS is used to repeat a block of code for a defined number of iterations. This is useful for handling arrays, repetitive calculations, and automation sequences.
Syntax of a FOR Loop
FOR iCounter := 0 TO 9 BY 1 DO
   aArray[iCounter] := iVar + 10;
END_FOR;
Explanation:
- The loop starts at 0 and ends at 9.
- BY 1 increments the loop counter by 1 in each iteration.
- Each array element aArray[iCounter] is assigned the value iVar + 10.
Declaring the Array
To use arrays in a FOR loop, declare them as follows:
VAR
   aArray : ARRAY[0..9] OF INT;
   iVar : INT;
   iCounter : INT;
END_VAR
Testing the FOR Loop in CODESYS
- Log into CODESYS simulator.
- Initialize iVar with 5.
- Run the loop → Each array element should store iVar + 10 = 15.
- Modify iVar and rerun the loop → Observe changes.

Advantages of Using FOR Loops
- Automates repetitive tasks, reducing manual coding effort.
- Efficiently processes arrays without multiple assignments.
- Ensures structured and optimized execution.
Understanding FOR Loops with Debugging
The FOR loop in CODESYS is used for iterating through a sequence and is commonly applied in automation programming for processing arrays, counters, and structured calculations. Using the debugger in CODESYS, we can analyze how the loop executes step by step. Observing the FOR Loop Execution: to analyze how the loop works in real time, follow these steps.
- Set a Breakpoint: Right-click the first line of the loop and select Toggle Breakpoint. Start the PLC Simulation: log in to the simulator and execute the program. Use Step Over (F10): this allows tracking how each iteration modifies variables.
- Tracking the loop counter in the debugger: the loop counter iCounter starts at 0 and increments with each iteration. The loop continues until iCounter reaches 9. At each step, an operation is performed on an array element.
Original Implementation
FOR iCounter := 0 TO 9 BY 1 DO
  aArray[iCounter] := iVar + 10;
END_FOR;
Each array element aArray[iCounter] stores the value iVar + 10. Modifying the Loop for Dynamic Computation. We can modify the loop to add the counter value:
FOR iCounter := 0 TO 9 BY 1 DO
  aArray[iCounter] := iVar + iCounter;
END_FOR;
Now, each row in the array is incremented by the loop index, producing a different result for each element. Testing the New Loop in Debugger
Execute the modified FOR loop. Observe array changes in real-time as values update dynamically. Reset all variables via Reset Warm to test from the beginning.
Practical Applications of FOR Loops in Automation
Processing sensor data stored in arrays, iterating through multiple actuators for sequential control and implementing structured control logic in industrial processes.
WHILE and REPEAT Loops in CODESYS
Besides FOR, Structured Text in CODESYS offers two more loop types defined by IEC 61131-3. Use them when the number of iterations is not known in advance.
WHILE checks the condition before every pass, so the body may not run at all:
iIndex := 0;
WHILE (iIndex < 10) AND (aArray[iIndex] <> 0) DO
    iIndex := iIndex + 1;
END_WHILE;
REPEAT checks the condition after the pass, so the body always runs at least once:
iIndex := 0;
REPEAT
    aArray[iIndex] := 0;
    iIndex := iIndex + 1;
UNTIL iIndex > 9
END_REPEAT;
Inside any loop you can use EXIT to leave the loop early, for example when the searched value has been found. CODESYS V3 also supports CONTINUE, which skips the rest of the current pass and starts the next one.
Loops and the PLC scan cycle
Remember what you saw in the task configuration: a loop does not wait for the next cycle. The whole FOR, WHILE or REPEAT loop runs inside one scan of the controller. A loop that waits for an input, for example `WHILE NOT xSensor DO ... END_WHILE;`, will never see the input change, because inputs are only updated between cycles. The task stops responding and the watchdog of the task can stop the PLC. Good practice is:
- Use loops only for work that finishes in the same cycle, like processing an array or searching a table.
- Always use a bounded index (FOR, or WHILE with a counter limit).
- Wait for machine events with IF or CASE across many cycles, not with a loop.
CASE as a State Machine
The CASE statement is the standard way to build step sequences in Structured Text. Each step waits for its condition with an IF and then sets the next step number, so the program goes through the sequence over many PLC cycles without blocking. An enumeration for the step names makes the code much easier to read than plain numbers - see enumerations in CODESYS.
CASE iStep OF
    0: // Idle
        IF xStart THEN
            iStep := 10;
        END_IF;
    10: // Fill tank
        xValve := TRUE;
        IF xLevelHigh THEN
            xValve := FALSE;
            iStep := 20;
        END_IF;
    20: // Mix for 5 s
        tonMix(IN := TRUE, PT := T#5S);
        IF tonMix.Q THEN
            tonMix(IN := FALSE);
            iStep := 0;
        END_IF;
END_CASE;
The current step number is also a perfect value to show on an HMI screen, for example in a CODESYS visualization, so the operator can see where the machine is waiting.
Flow Control in Other IEC 61131-3 Languages
IF, CASE and loops are Structured Text keywords, but the CODESYS Development System supports all IEC 61131-3 programming languages in one programming environment, and each of them has its own way to control program flow:
- Ladder Diagram (LD) - conditions are contacts in series (AND) or parallel (OR), and jumps or labels are used instead of IF blocks.
- Function Block Diagram (FBD) and CFC - flow is defined by the connections between blocks; CFC also lets you set the execution order of the blocks.
- Sequential Function Chart (SFC) - the graphical version of the CASE state machine above, with steps, transitions and actions.
Structured Text is usually the best choice for calculations, loops and data handling, while LD and SFC are easy for maintenance staff to read. You can mix them in one CODESYS project, for example an SFC sequence that calls ST function blocks.
Program Flow Control in CODESYS - FAQ
What programming language does CODESYS use?
CODESYS uses the five IEC 61131-3 languages - Structured Text, Ladder Diagram, Function Block Diagram, Sequential Function Chart and Instruction List (the last one is deprecated) - plus Continuous Function Chart (CFC). It also supports object-oriented programming with methods, properties and interfaces in function blocks.
What is the standard of CODESYS programming?
CODESYS is based on the IEC 61131-3 standard, which defines the data types, program organization units and programming languages for PLCs. Because of that, IF, CASE and FOR code written in CODESYS looks almost the same in other IEC 61131-3 tools.
Which PLC can be programmed with CODESYS?
Any controller with a CODESYS runtime, for example devices from WAGO, Schneider Electric, ABB, Festo or Eaton, industrial PCs with CODESYS Control Win, and even a Raspberry Pi with CODESYS Control for Raspberry Pi SL. For learning, the built-in PLC simulation is enough.
Is CODESYS free?
The CODESYS Development System can be downloaded free of charge from the CODESYS Store. Runtimes for real hardware are licensed, but the controller vendor often includes the license. If you want to practice IF, CASE and loops in a structured way, check our Structured Text programming in CODESYS course.
Summary
The article discusses key program flow control instructions in CODESYS, such as IF, IF…ELSE, CASE…OF, and the FOR loop. The IF statement allows executing a specific block of code when a given condition is met, which is useful for real-time decision-making. The IF…ELSE extension enables the execution of an alternative block of code when the initial condition is not met, allowing for more complex decision scenarios. The CASE…OF statement is used to select one of multiple code blocks based on a variable’s value, simplifying the management of multiple conditions. The FOR loop allows a block of code to be executed multiple times for a defined number of iterations, making it efficient for working with arrays or repetitive tasks. The article also highlights the importance of the PLC scan cycle, which includes reading inputs, executing the program, updating outputs, and performing system tasks to ensure continuous process control. Additionally, debugging techniques in CODESYS, such as setting breakpoints, are presented to help identify and resolve issues in the code.