Creating a Codesys Visualization in an application might seem complex, but with this step-by-step guide, it will become simple. In this post, we will show you how to add a visualization manager, create a screen, and connect variables to interface elements.
A CODESYS visualization is the built-in CODESYS HMI. You draw screens in the visualization editor of the CODESYS Development System, inside the same CODESYS project that holds your PLC program, so every button, lamp or text field can read and write PLC variables directly, without tag export or a separate HMI software package. This post is Part #4 of our CODESYS series - if you have not installed the software yet, start with How to install CODESYS.
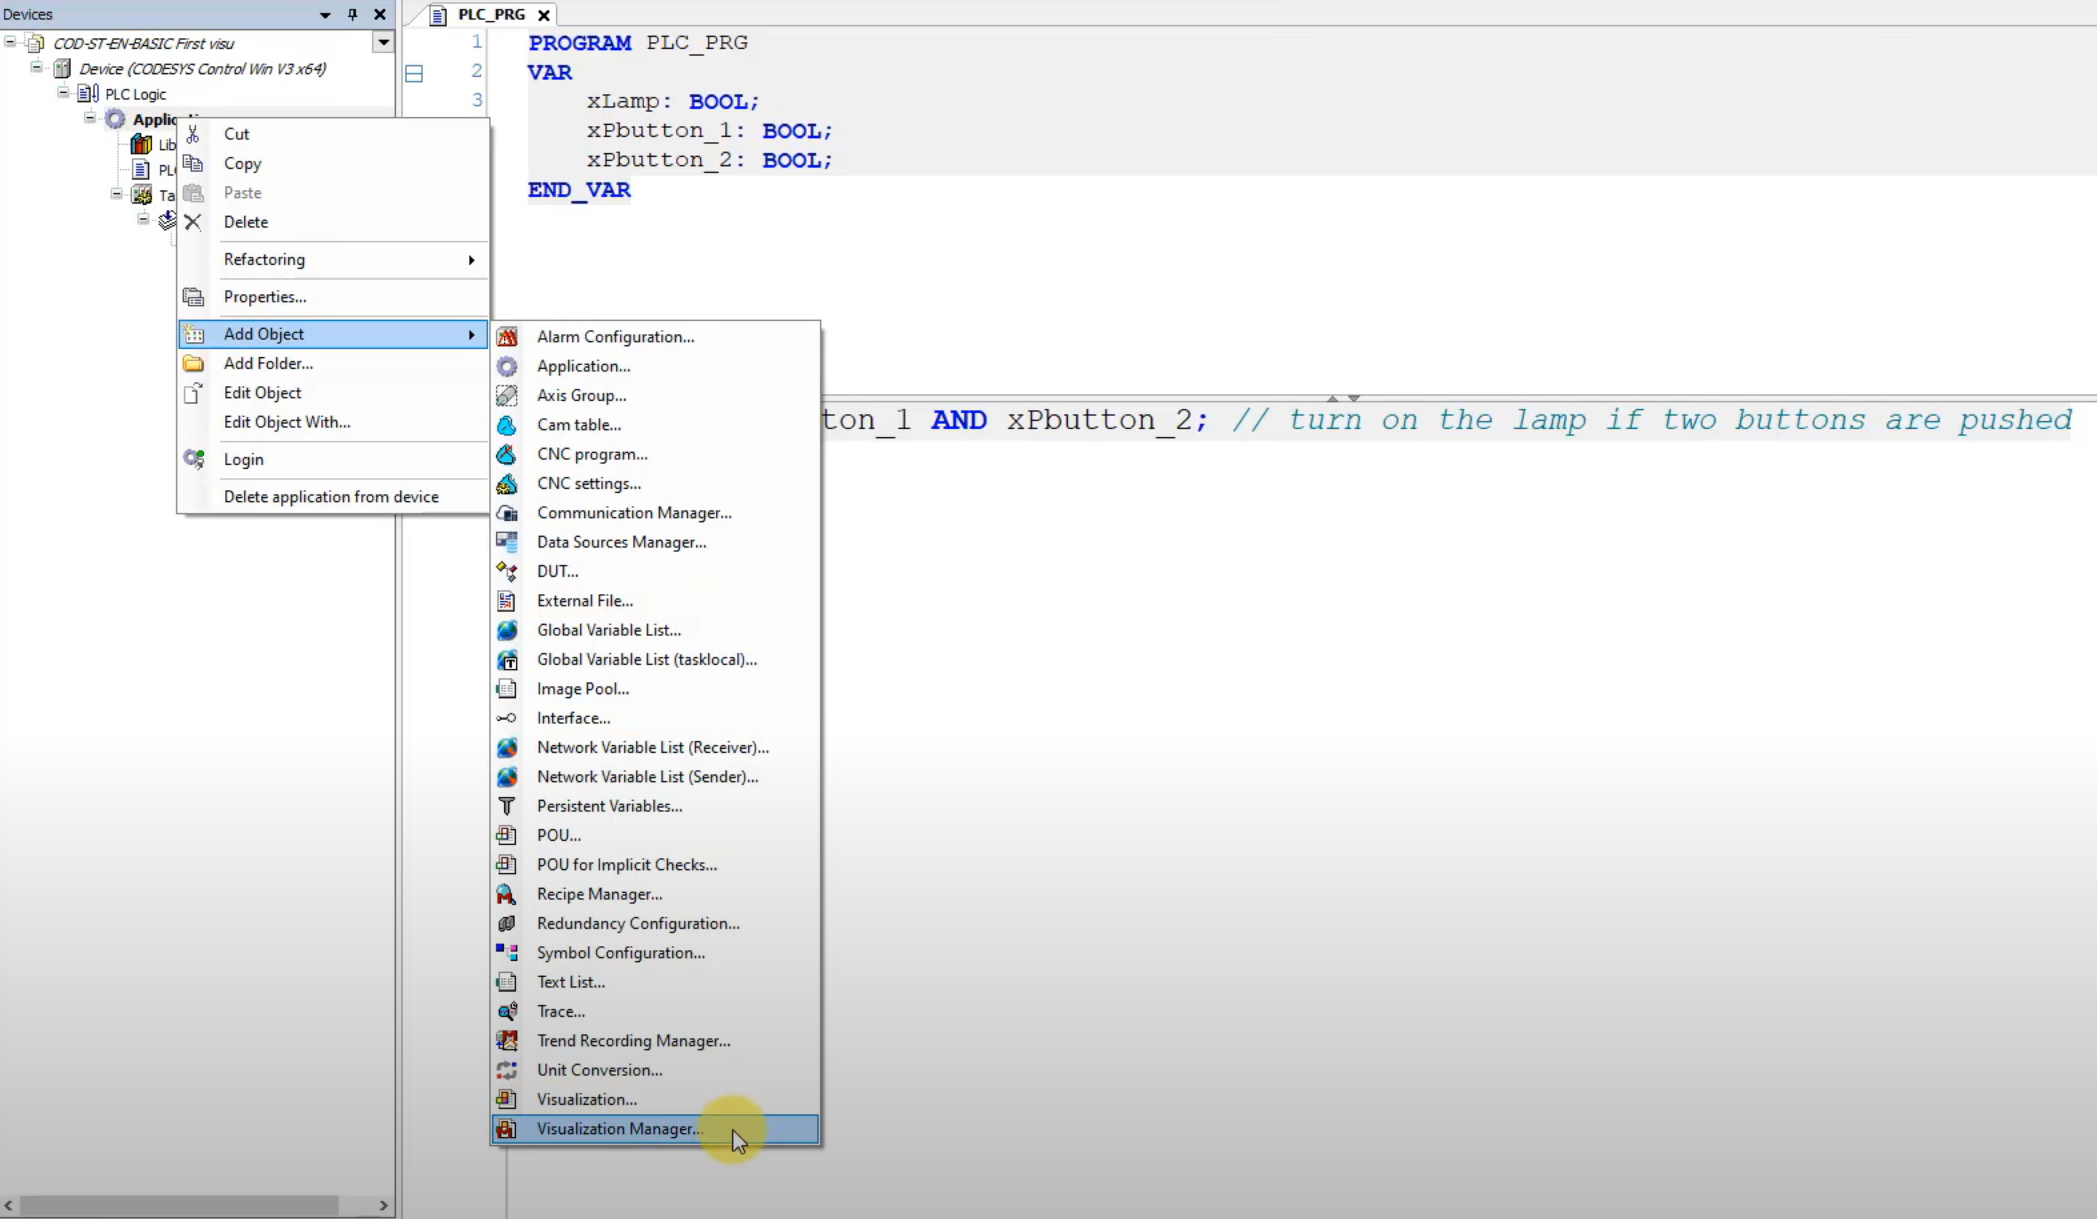
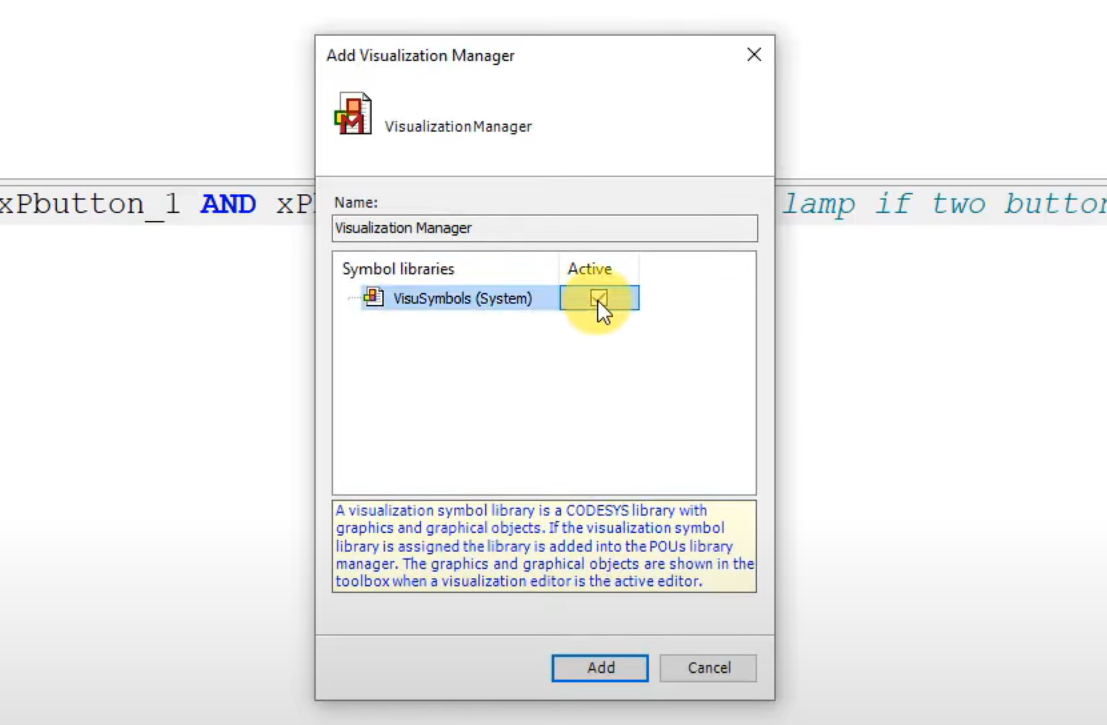
Adding the Visualization Manager
- In the Project Tree, right-click on Applications.
- Select Add Object.
- Choose Visualization Manager.
- In the Visualization Manager window, you will find various options - you can choose a visualization style.
- Click the ADD button to add the visualization manager.
Creating the First Screen
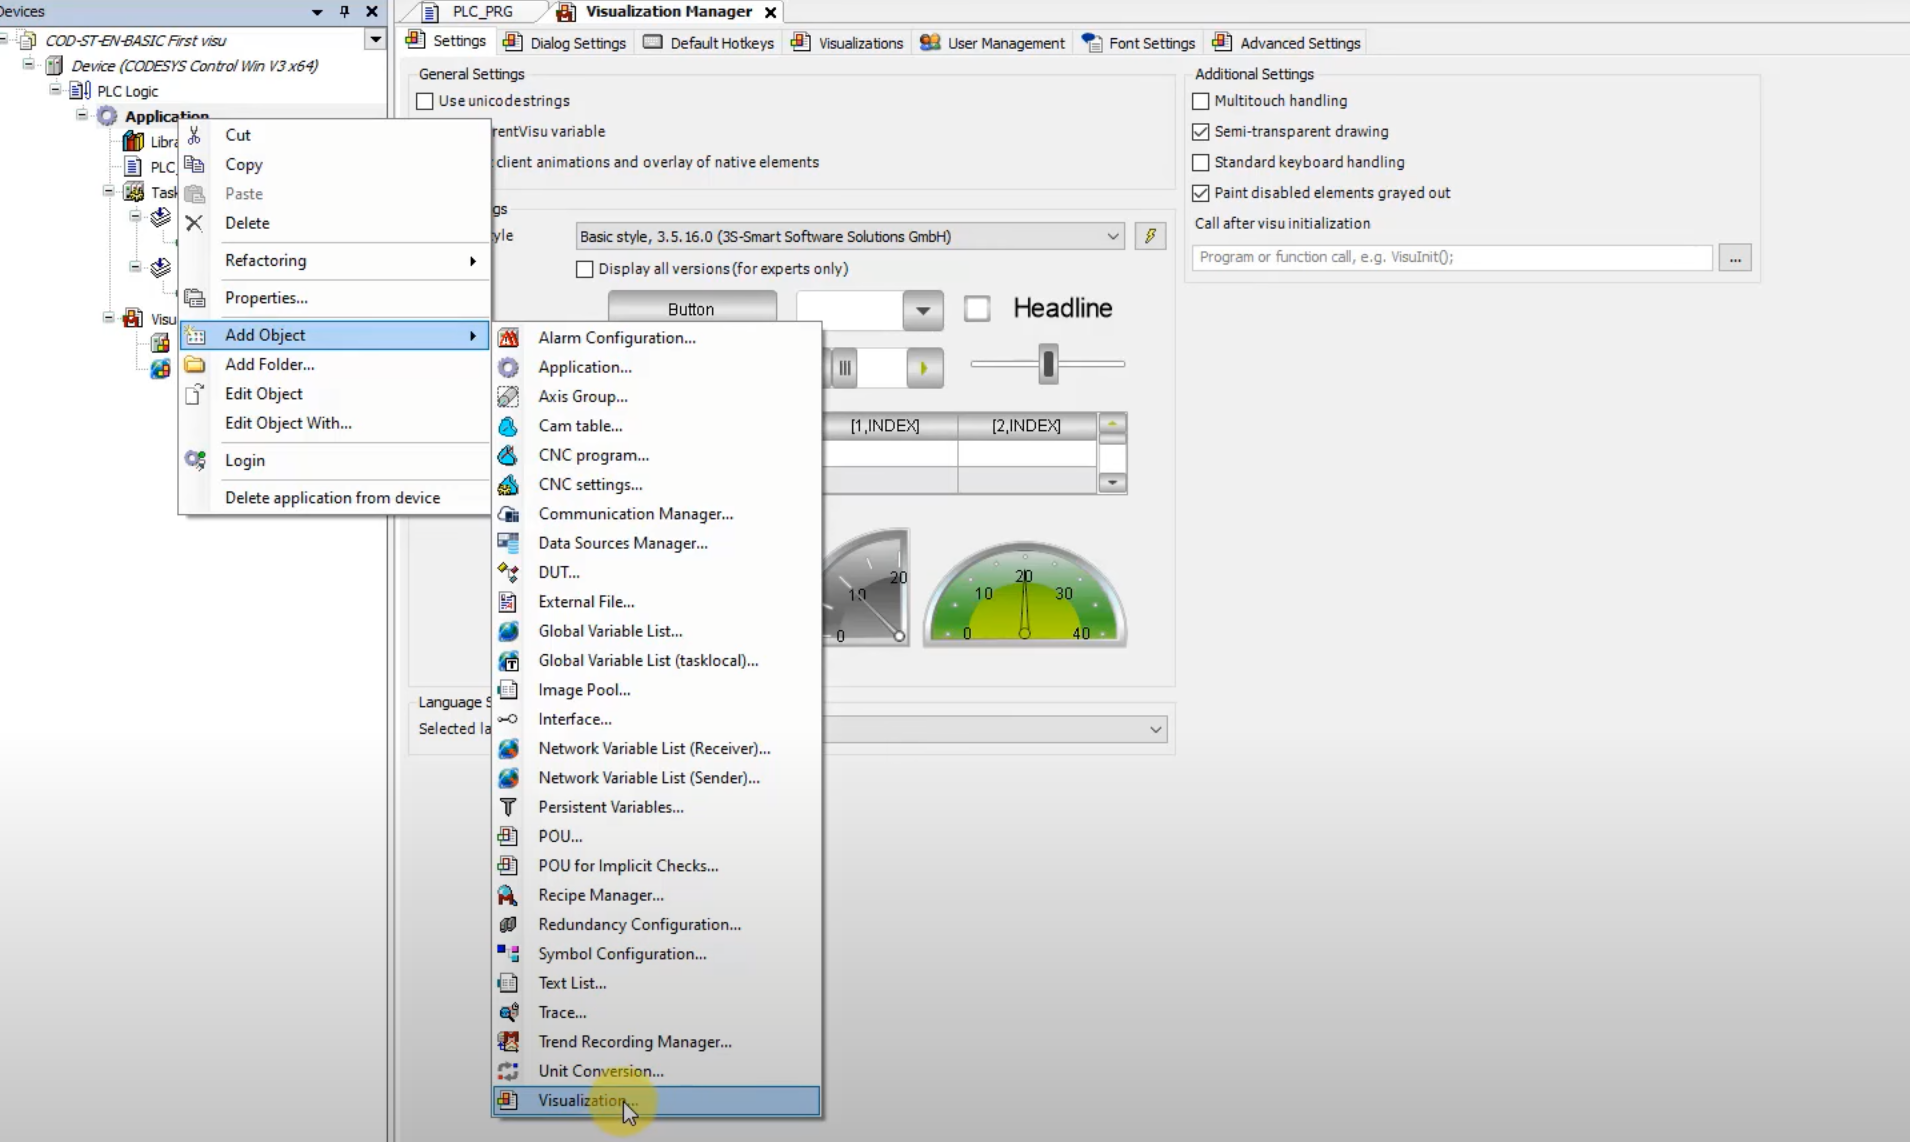
- Go back to the Project Tree and right-click again on Applications.
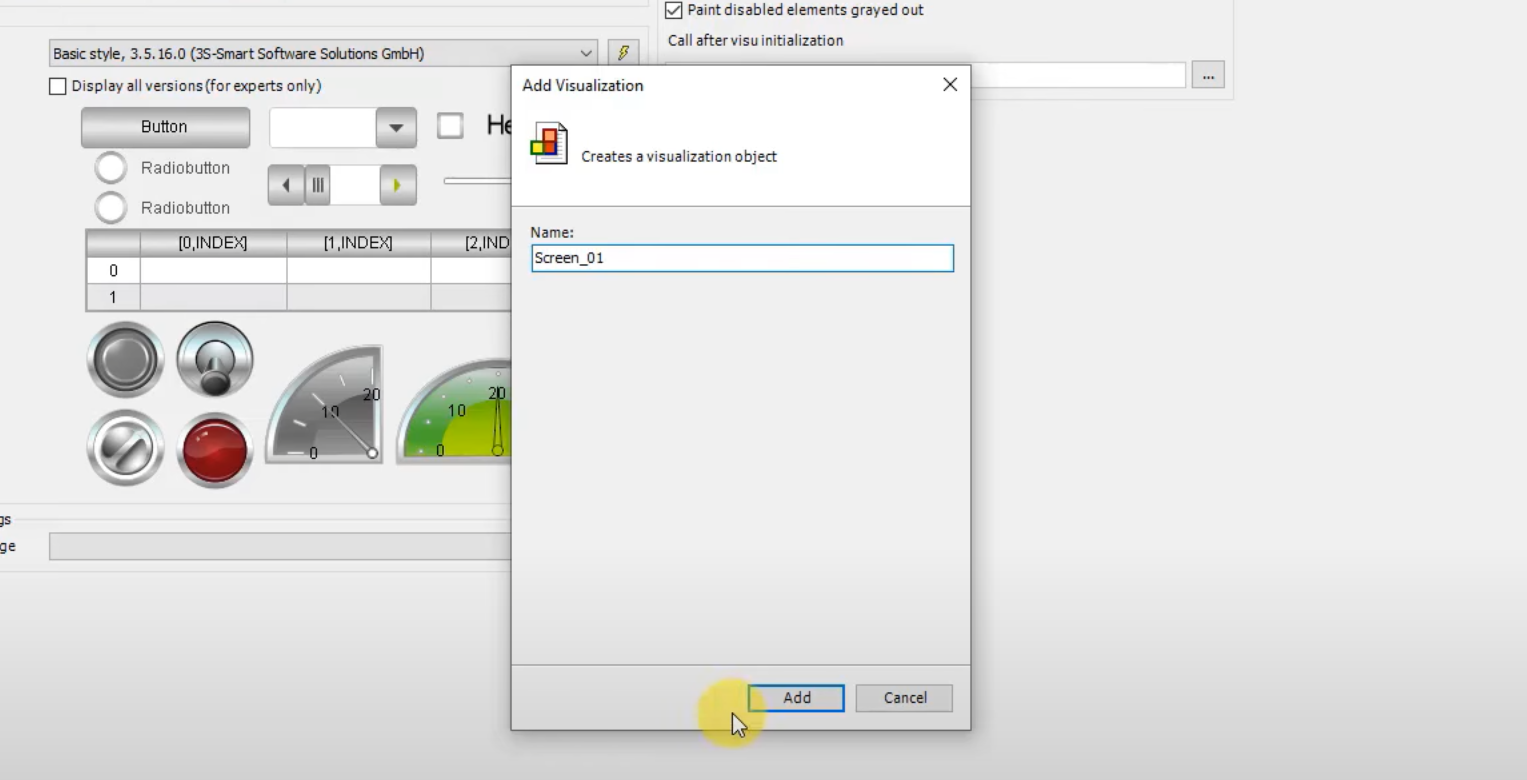
- Select Add Object and add a new Visualization.
- Name the screen, e.g., Screen_01, and confirm.
- Now you have a view of the newly created screen.
Adding User Interface Elements
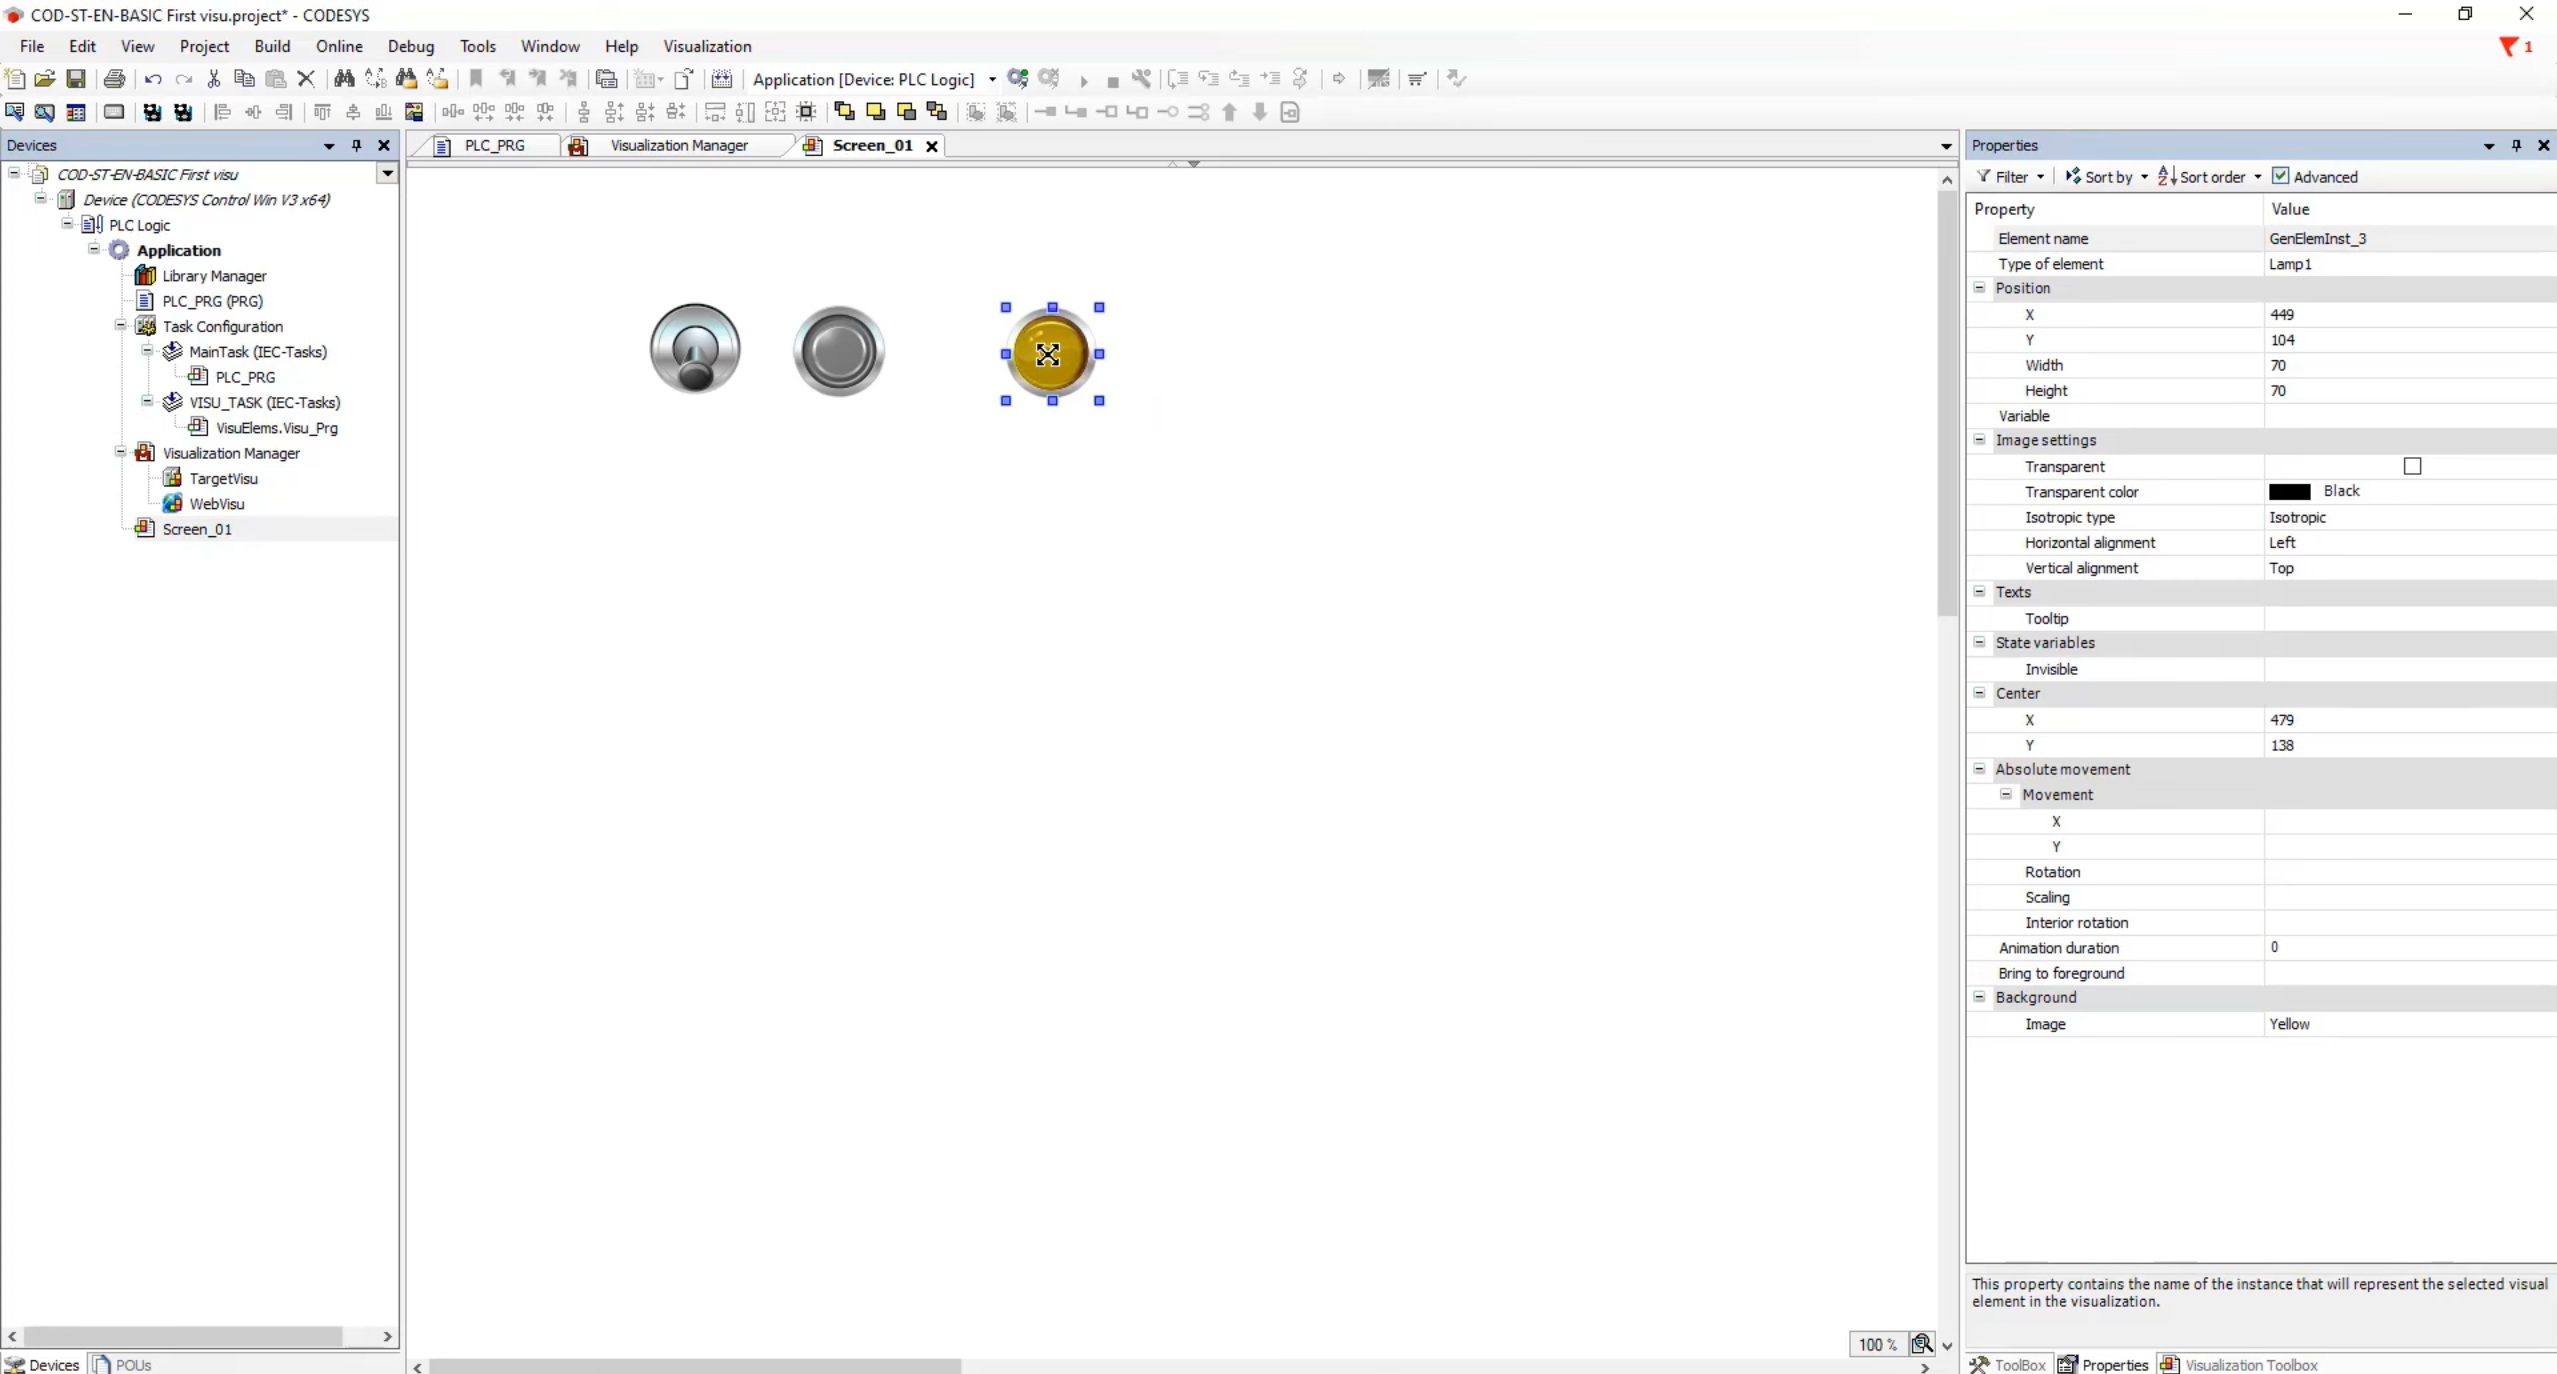
- Go to the Visualization tab.
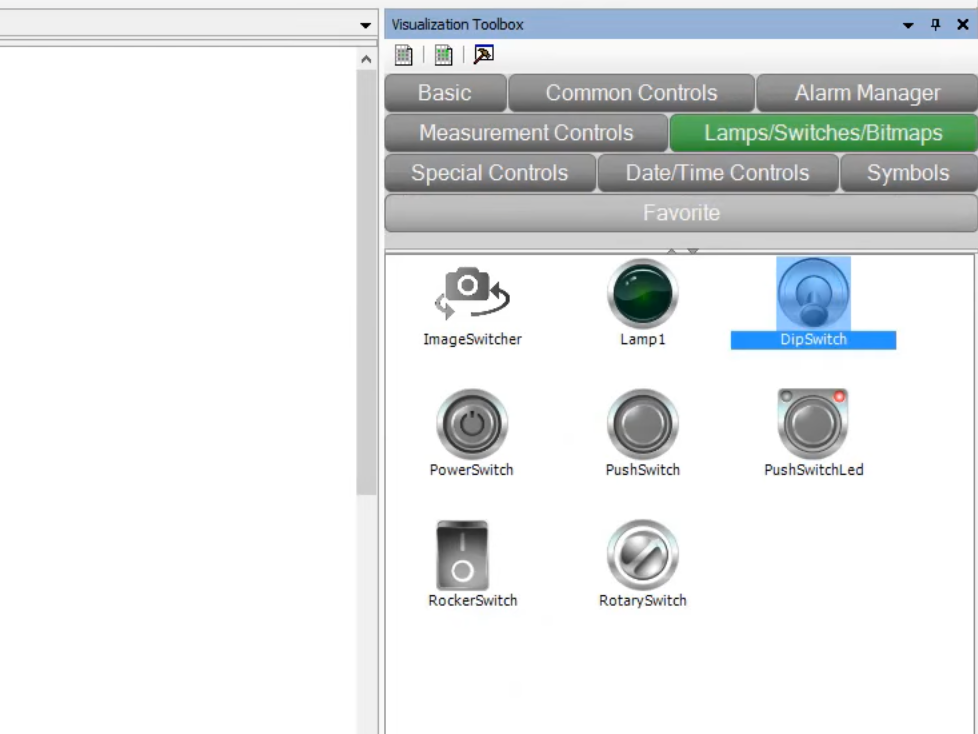
- Select the Lamp and Switches section.
- Drag and drop a Dip Switch on to the screen.
- Return to the Visualization Toolbox.
- Choose Push Switch and drag it onto the screen.
- Add a lamp by dragging and dropping it onto the screen.
Connecting Variables to Visualization Elements
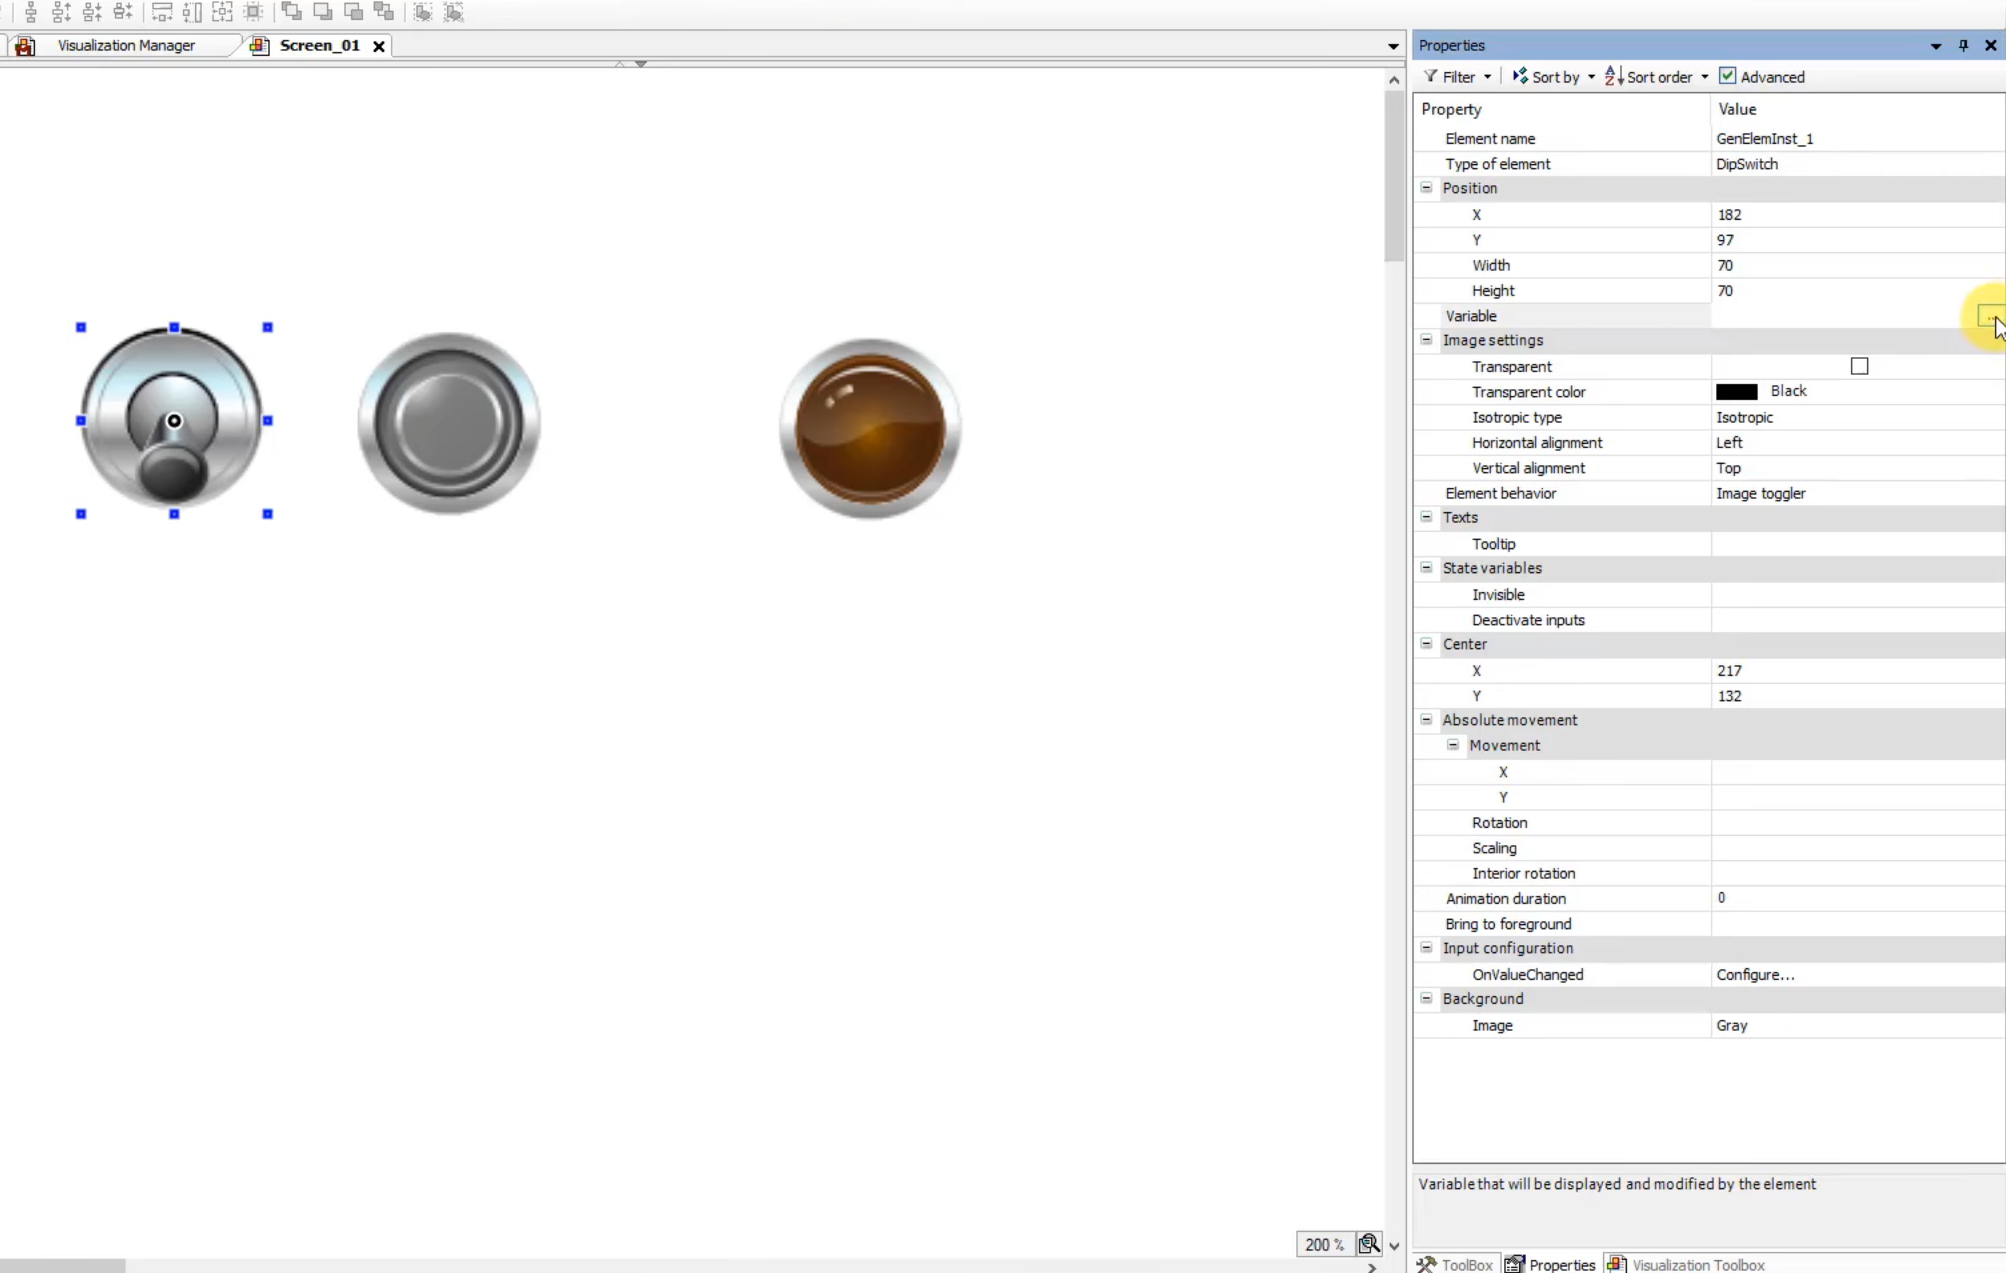
- Click on the first button (Push Switch), go to Properties.
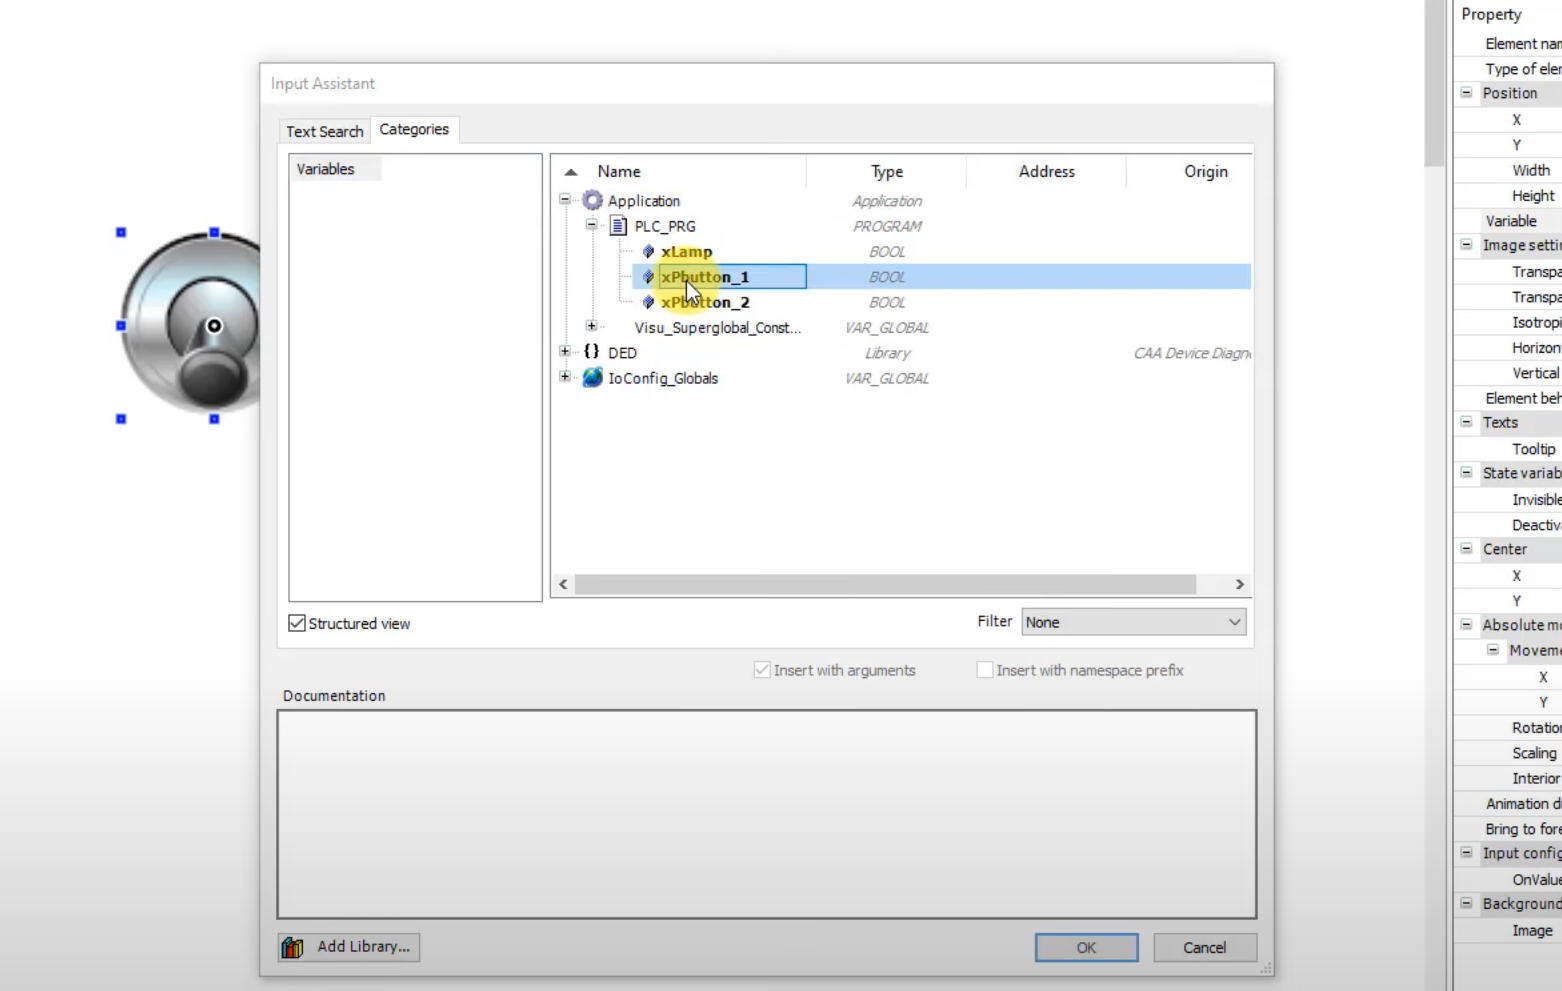
- In the Variable field, double-click and select the three dots (...).
- Expand Application, go to PLC_PRG, and select the xPB_Button1 variable.
- Press Enter to confirm.
- Repeat this process for the next button, selecting the xPB_Button2 variable.
- Connect the lamp to the appropriate variable (xLamp) and confirm by pressing Enter.
Testing the Program in CODESYS
- Close the Visualization Manager.
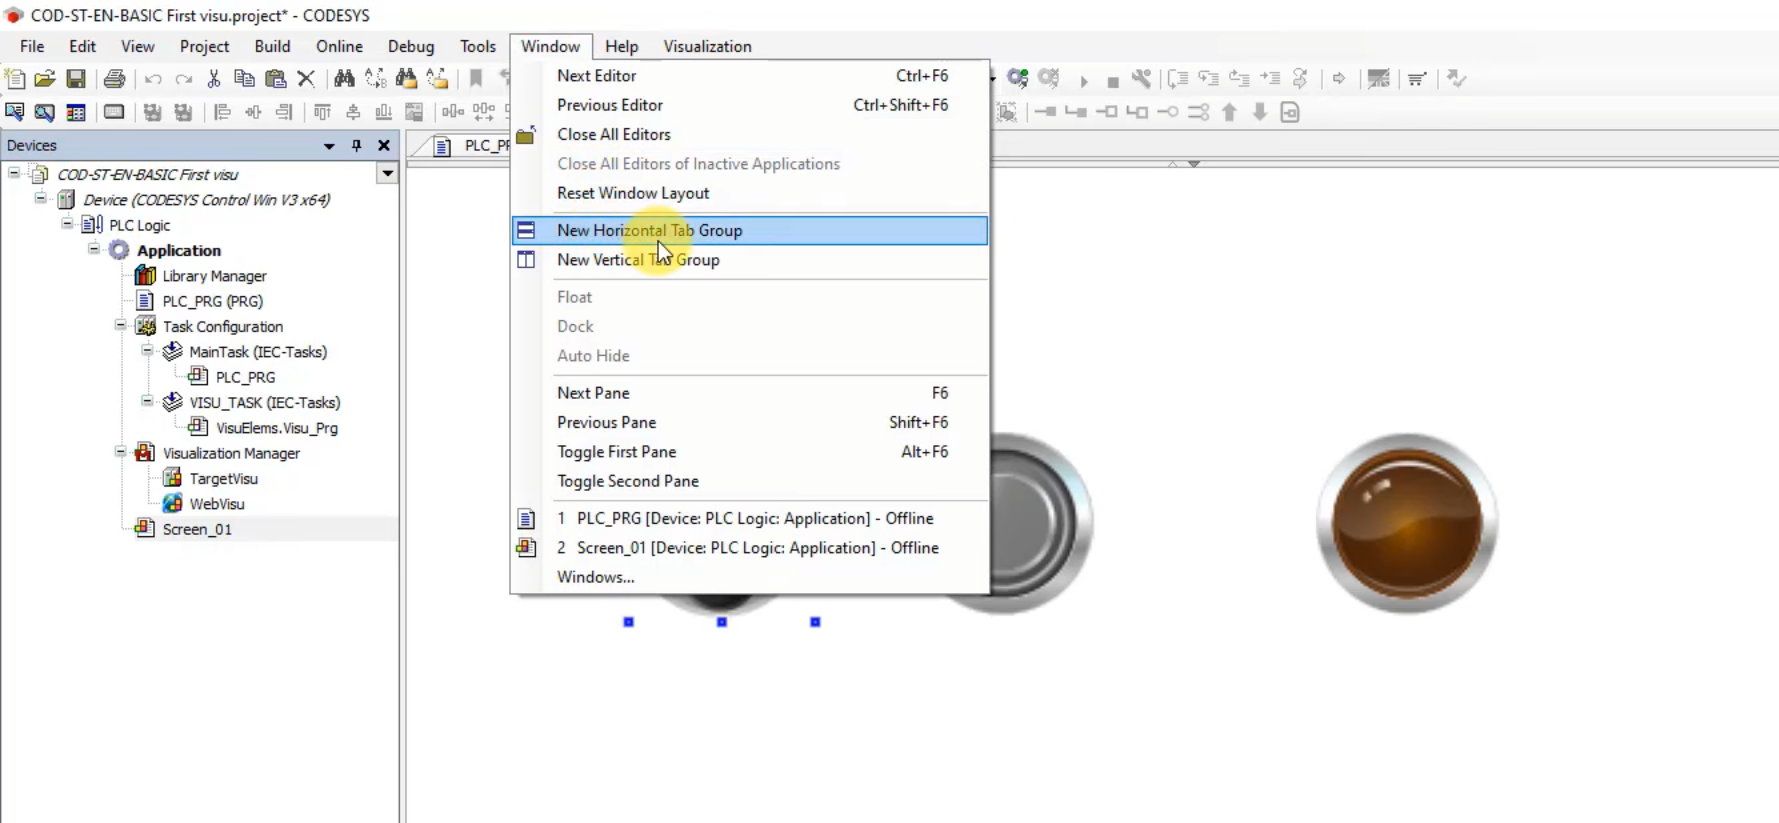
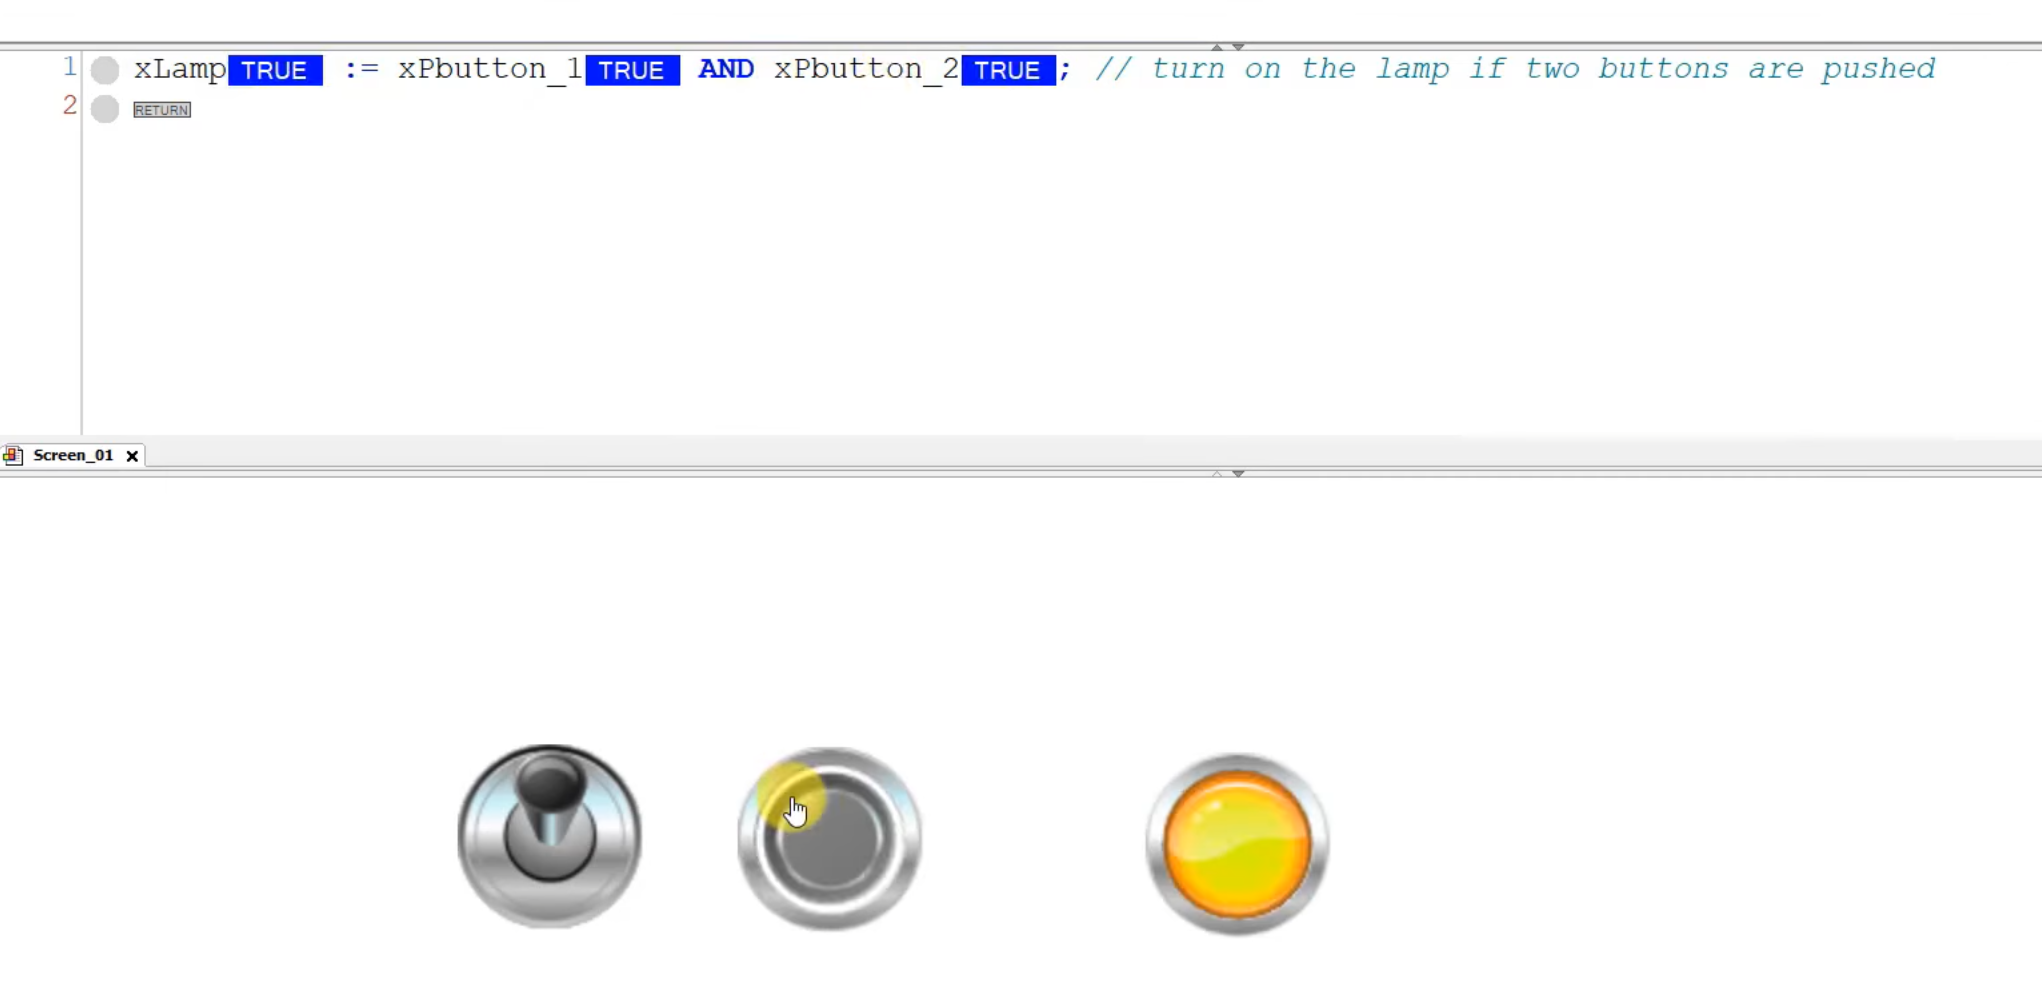
- Make sure you have two screens open - PLC_PRG and Screen_01.
- Go to Window and set them as New Horizontal Tab Group.
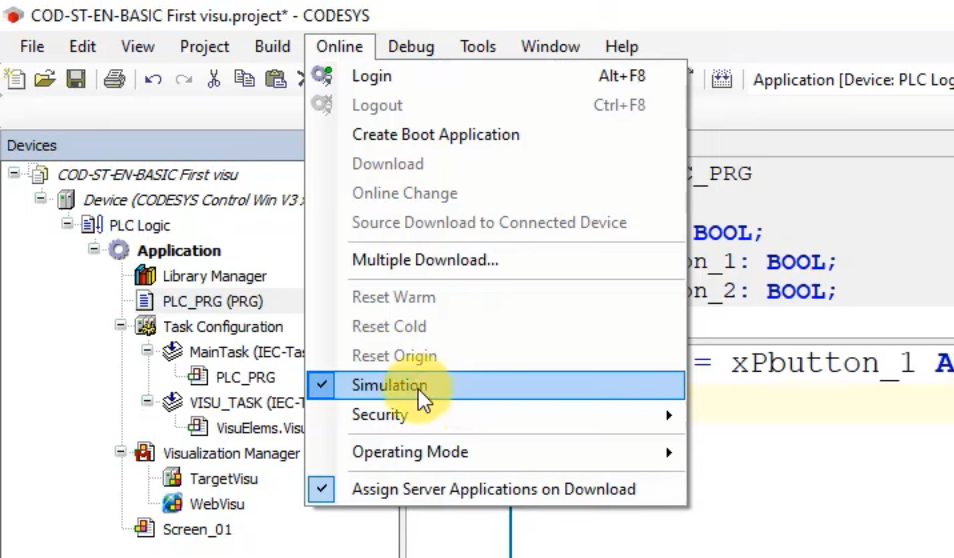
- Navigate to Online and select Download Program to Simulation.
- Ensure that you have checked the Simulation option.
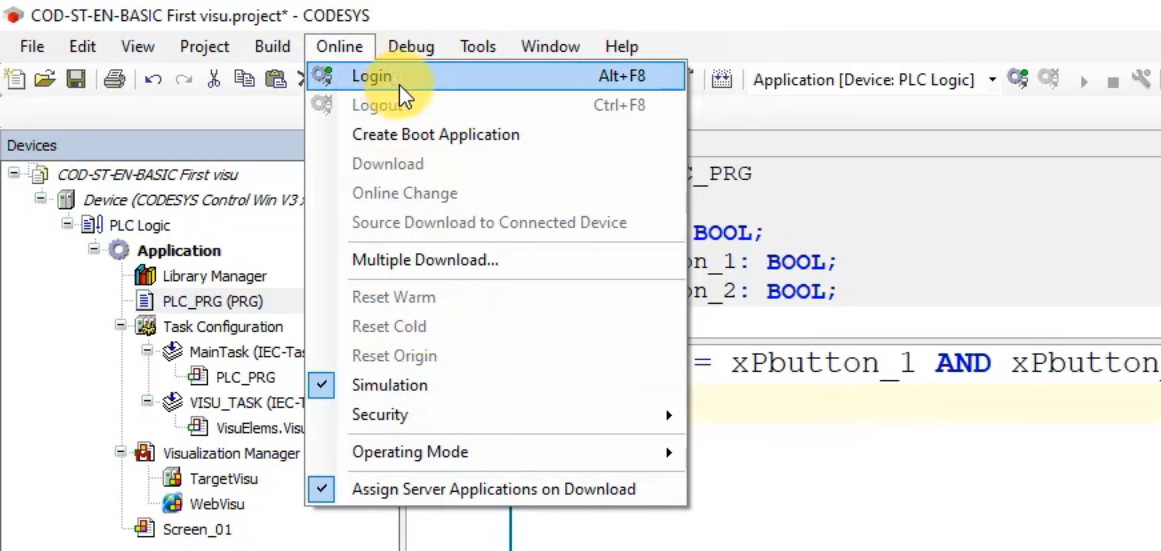
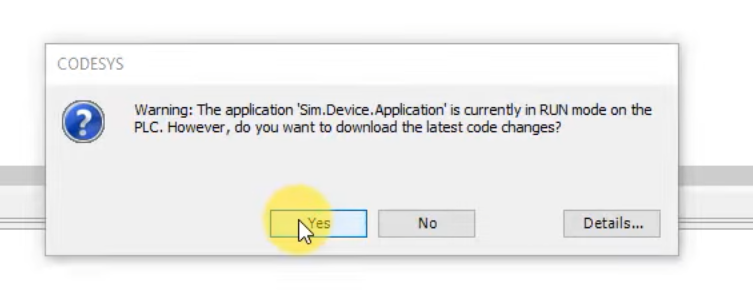
- Click Login, confirm by clicking Yes, and start the program.
Checking the Buttons and Lamp Functionality
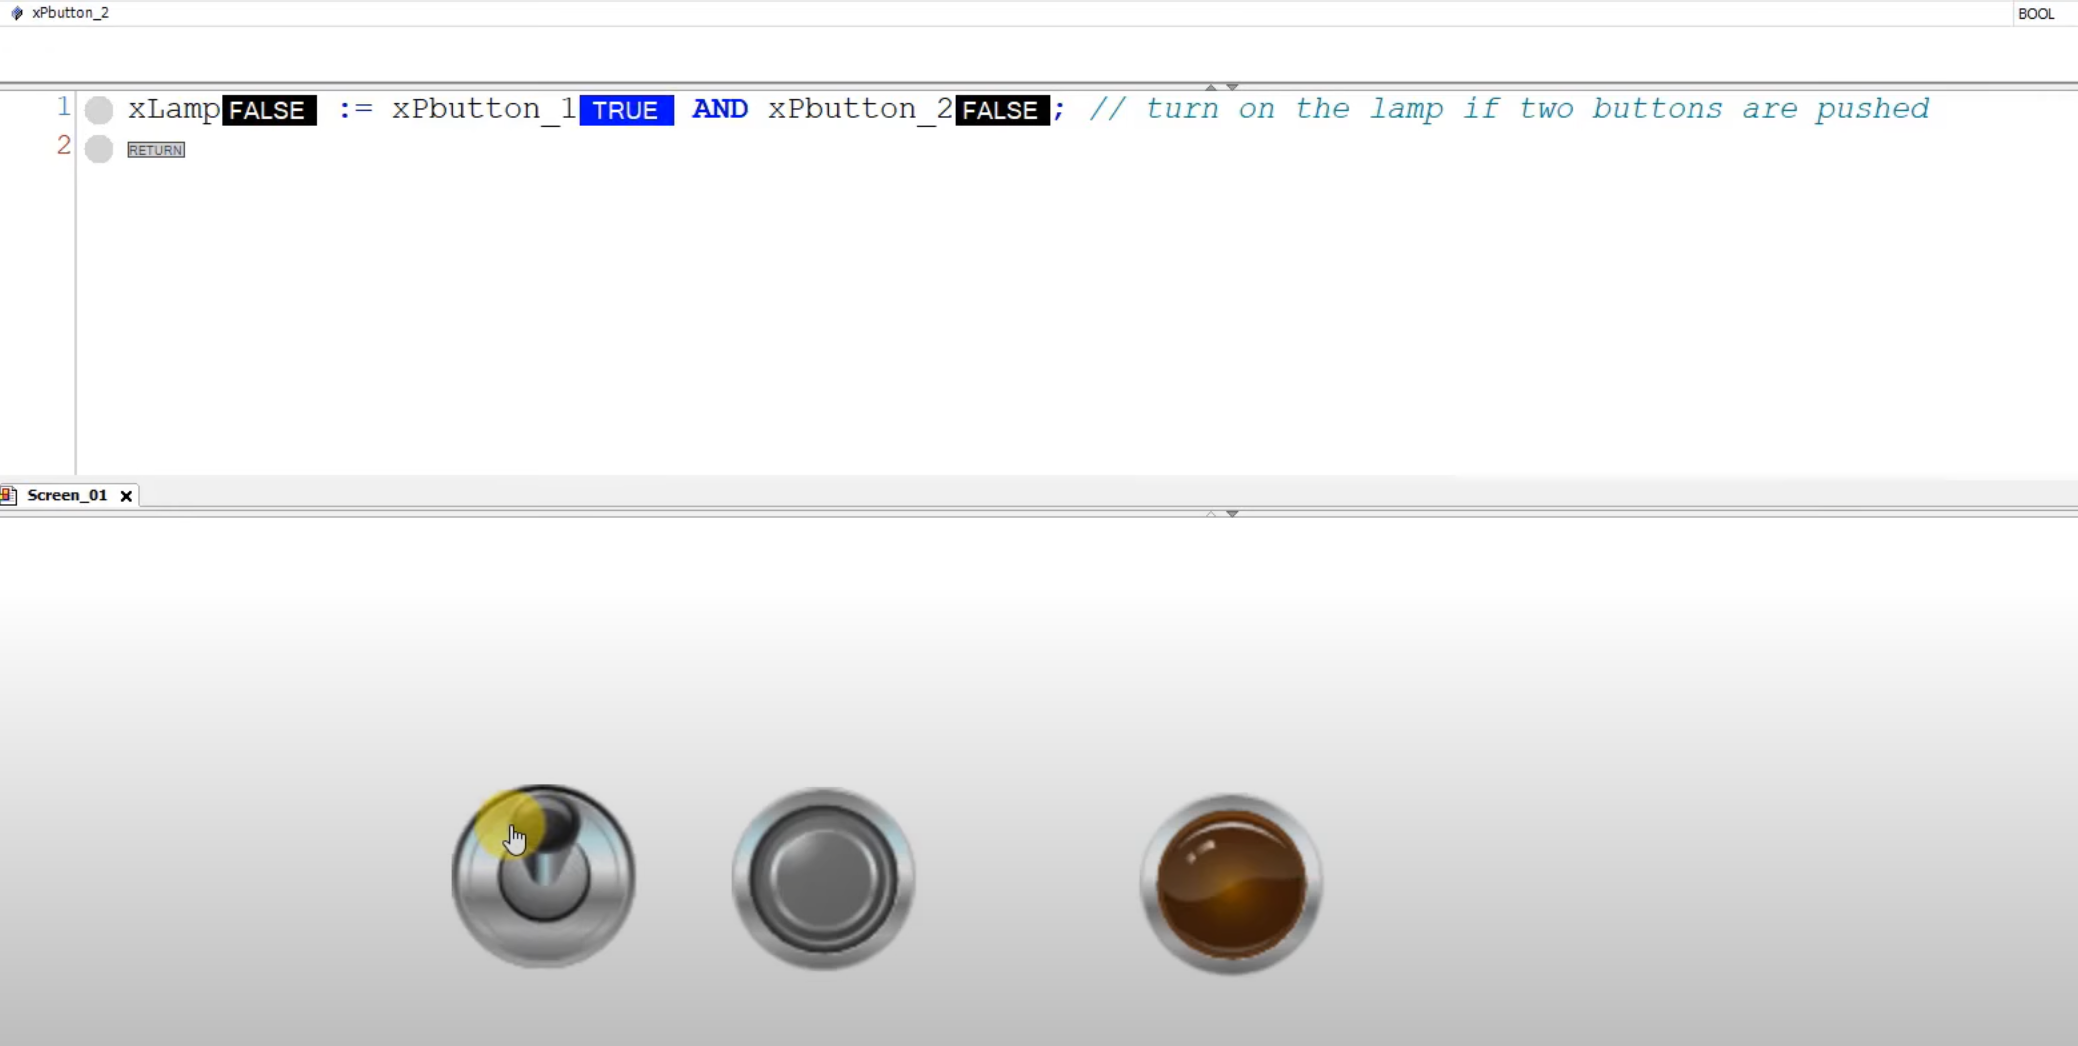
- Turn on the first button - the xPB_Button1 variable will change to True.
- To turn on the lamp, press the next button - the lamp should light up.
Display Variants: Integrated Visualization, CODESYS TargetVisu and CODESYS WebVisu
The screen you created is a single visualization object. Where it is shown depends on the display variants added under the Visualization Manager. CODESYS supports three of them:
- Integrated visualization - the screen runs inside the CODESYS Development System in online mode. This is what you used above to test the buttons and the lamp. It is perfect for commissioning and debugging, but it is not meant for operators.
- CODESYS TargetVisu - the visualization is rendered on a display device connected directly to the controller, for example a panel PC or a touchscreen attached over HDMI. The runtime system draws the screens locally, so no extra PC is needed.
- CODESYS WebVisu - the CODESYS Control runtime system starts a web server and sends the screens to any HTML5 web browser on a PC, tablet or phone. On CODESYS Control runtimes the default address is usually `http://
:8080/webvisu.htm`, but the port and start page can be changed in the WebVisu object.
You can add TargetVisu and WebVisu objects next to each other, so the same visualization elements are available on the machine panel and in a browser at the same time. In the Visualization Manager you also choose the start visualization, the style (colors and fonts of the visualization objects) and options such as user management, which lets you create user groups and lock selected screens or elements behind a login.
How the Visualization Talks to the PLC Program
Visualization elements are linked to PLC variables of the application, just like you did with *xPB_Button1*, *xPB_Button2* and *xLamp*. A few practical rules make larger projects easier to maintain:
- Keep HMI signals in one place, for example a global variable list or a structure for each machine module, instead of linking elements to internal variables of many function blocks.
- Use a push switch (tap) for momentary commands like Start and a dip switch (toggle) for states that should stay on. The PLC logic, not the screen, should decide what is safe to run.
- Do not use the screen as the only stop function. Emergency stop circuits are hardwired or handled by a safety controller, never by an HMI button.
- Use frames and visualization templates (interfaces) when the same faceplate repeats for several motors or valves.
If you also need to share data with a SCADA system or an external HMI, the same variables can be published through the CODESYS OPC UA server once you enable them in the symbol configuration of the project.
Licensing and Versions of CODESYS
The CODESYS Development System (the IEC 61131-3 programming tool with LD, FBD, ST, SFC and CFC editors) is developed by the CODESYS Group, is free of charge and can be downloaded from the CODESYS Store International. It programs programmable logic controllers, industrial PCs and embedded devices from many vendors. The CODESYS Visualization add-on is installed with it, so you can build and test screens in simulation and in online mode without buying anything.
Licensing becomes important when the application runs on real hardware. The CODESYS runtime (for example CODESYS Control Win or CODESYS Control for Raspberry Pi SL) runs in a time-limited demo mode without a license, which is enough for learning and testing. WebVisu and TargetVisu on a target device may also need a license. Many PLCs from manufacturers that use CODESYS, such as WAGO, Schneider Electric, ABB or Festo, already include the runtime and visualization licenses with their controllers, so always check the documentation of your device. The screenshots in this guide were made in CODESYS V3.5 - menus may look slightly different in another version of CODESYS.
CODESYS Visualization - FAQ
How to create a visualization in CODESYS?
Right-click Application in the project tree, add a Visualization Manager and a Visualization object, drag elements from the Visualization Toolbox onto the screen and assign a PLC variable to each element in its properties. Then log in to the controller (or the simulation), start the application and the screen becomes active.
Is CODESYS visualization free?
Creating and testing a CODESYS visualization in the development system is free. A license may be needed for WebVisu or TargetVisu on the target controller, unless your hardware vendor already ships it with the device.
Can a CODESYS visualization be used as an HMI for a third-party PLC?
Yes. You can run a CODESYS Control runtime on an industrial PC, read and write data of another PLC through a fieldbus or Ethernet protocol such as Modbus TCP, and show the screens with TargetVisu on a touchscreen or with WebVisu in a browser. The CODESYS application then acts as a gateway and HMI at the same time.
What can I do with CODESYS besides visualization?
CODESYS covers PLC programming in all IEC 61131-3 languages, object-oriented programming with function blocks, fieldbus configuration (EtherCAT, PROFINET, Modbus, CANopen), motion control, OPC UA communication and debugging with breakpoints and online changes. If you want to learn it step by step, see our Structured Text programming in CODESYS course.
Conclusion
Congratulations! You have successfully created a simple CODESYS visualization and connected interface elements to PLC variables. From here you can add WebVisu to open the same screen in a web browser, or TargetVisu to show it on a panel next to the machine. In industrial automation, good HMI screens start with well-structured variables, so in the next part we explore variables in CODESYS.