Free PLC course outline
- Lesson #1: What Is It and Why Should Every PLC Programmer Know It? Part #1
- Lesson #2: How to install Codesys? Part #2
- Lesson #3: Write your first program in Codesys: Structured Text – Part #3
- Lesson #4: How to Create a Codesys Visualization in an Application? – Part #4
- Lesson #5: Introduction to Variables in CODESYS – Part #5
- Lesson #6: Data Structures in CODESYS: Practical Use of Arrays and Structures – Part #6
- Lesson #7: Advanced Data Types. Enumerations and Local vs. Global Variables – Part #7
- Lesson #8: Operators – Introduction and Practical Applications – Part #8
- Lesson #9: Program Flow Control: IF, CASE, and Loops – Part #9
What is Codesys?
CODESYS (COntroller DEvelopment SYStem) is a widely used development environment for programming controller applications in the industrial automation sector. It provides a comprehensive platform for engineering control systems, with support for a wide range of PLCs (Programmable Logic Controllers) and other industrial devices. In this article, we will guide you through the process of installing the CODESYS development environment on your system, step by step.
Step 1: System Requirements
Before you begin the installation process, ensure that your system meets the minimum requirements for running CODESYS. These typically include:
- Operating System: Windows 10/Windows 11 (64-bit or 32-bit version)
- Free Disk Space: Minimum 10 GB
- Processor: 2.5 GHz or faster
- RAM: 8 GB recommended
- .NET Framework 4.7.2 or later
Check the official CODESYS website for the most up-to-date system requirements.
Step 2: Downloading CODESYS
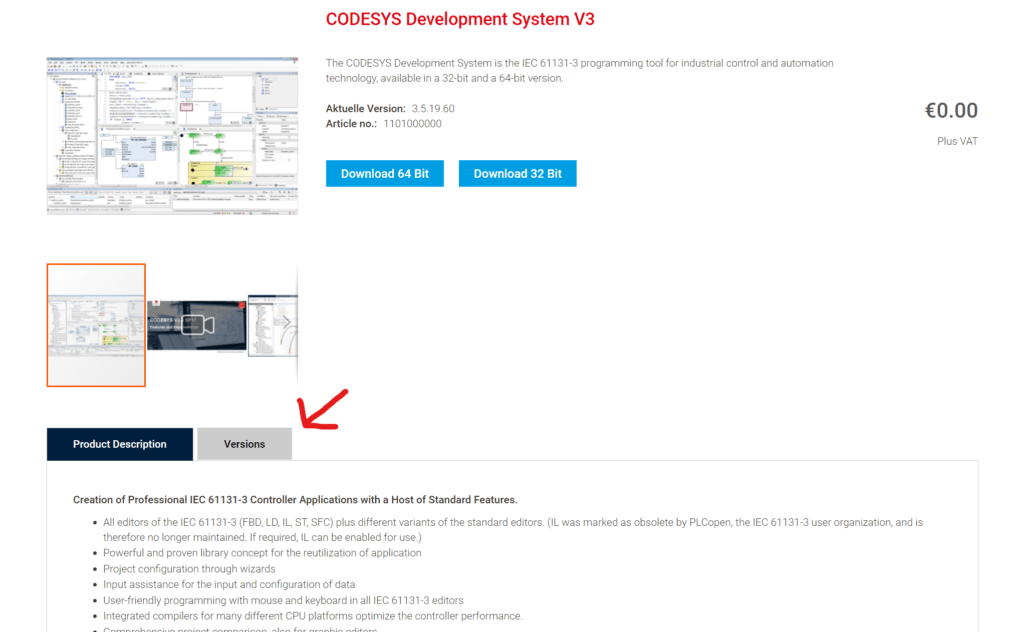
- Navigate to the CODESYS website (https://store.codesys.com/en/codesys.html).
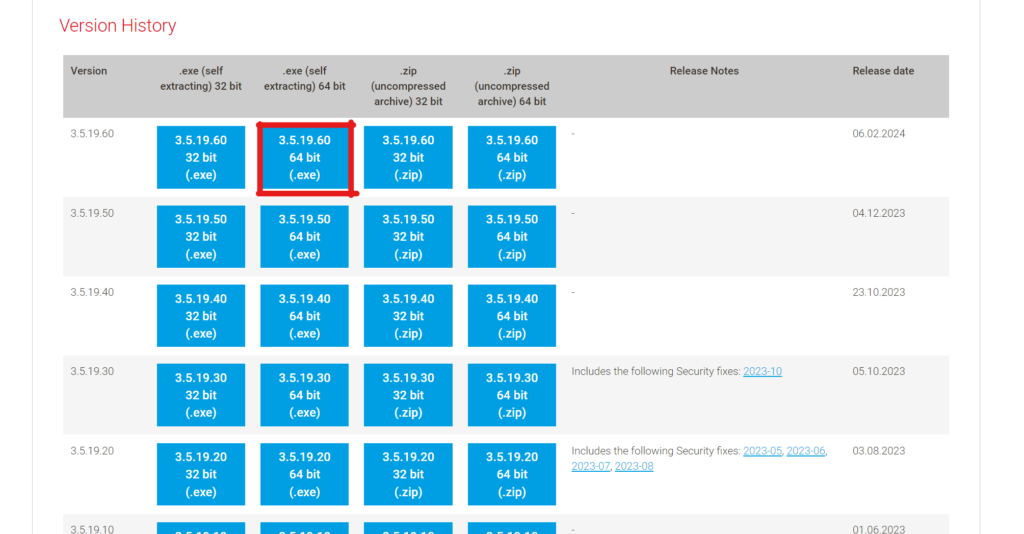
- Select the latest version of the CODESYS Development System. Be sure to choose the version that corresponds with your operating system.
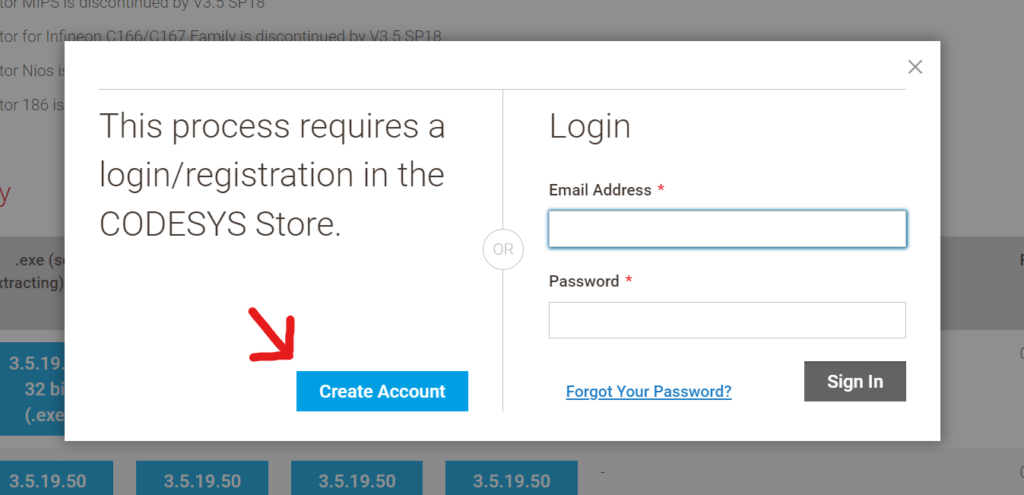
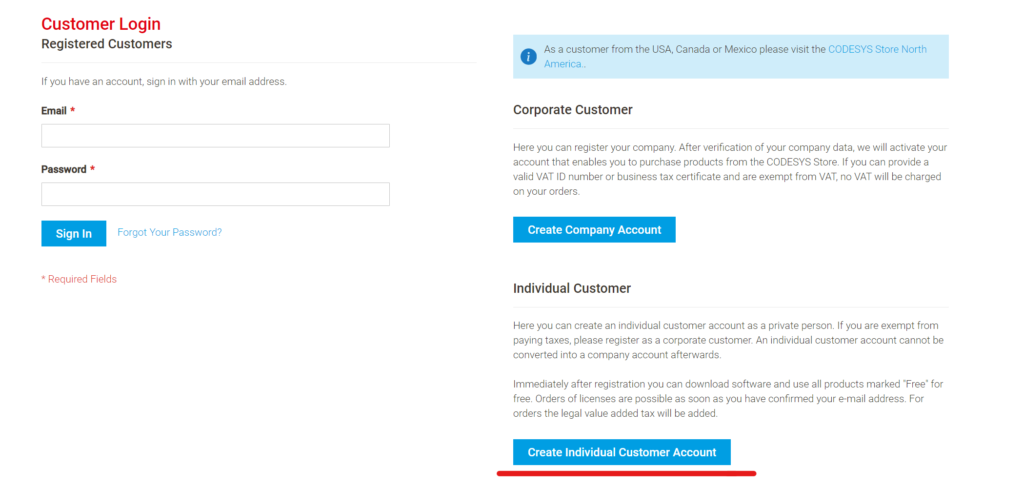
- You may need to create an account or log in to proceed with the download. Follow the prompts to do so.
- Once logged in, download the installer to your computer.
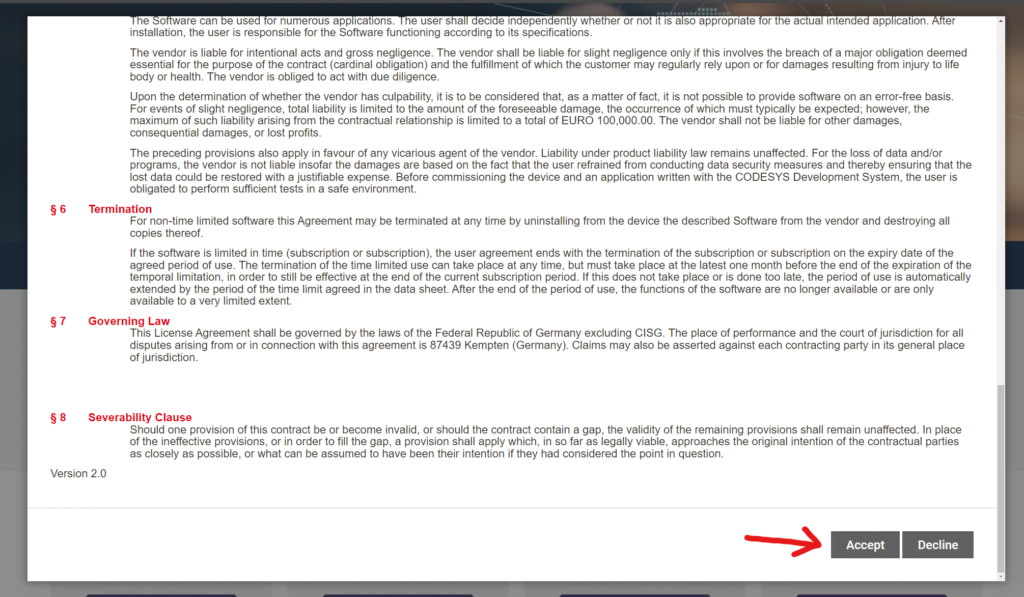
Step 3: Installing CODESYS
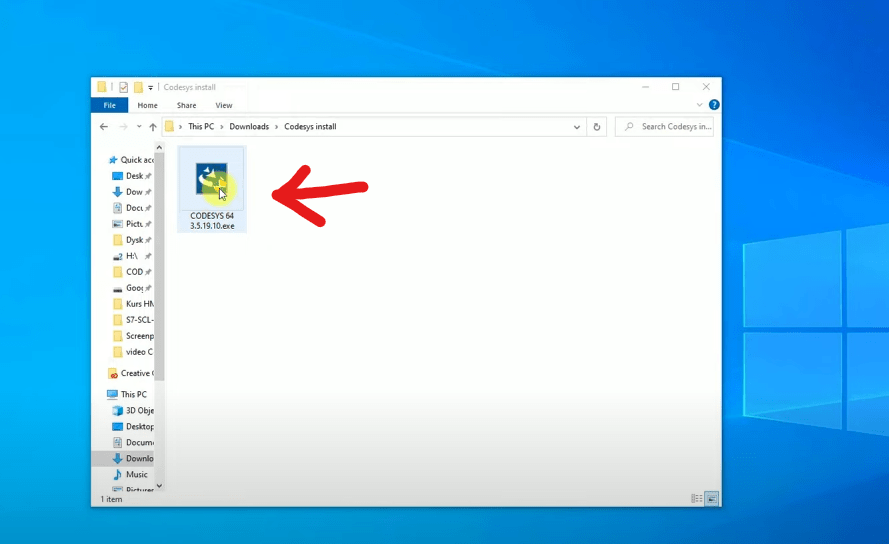
- Locate the downloaded installer file on your computer, usually in the Downloads folder.
- Double-click the installer to begin the installation process. You may receive a security prompt asking for permission to run the installer; click “Yes” or “Allow” to proceed.
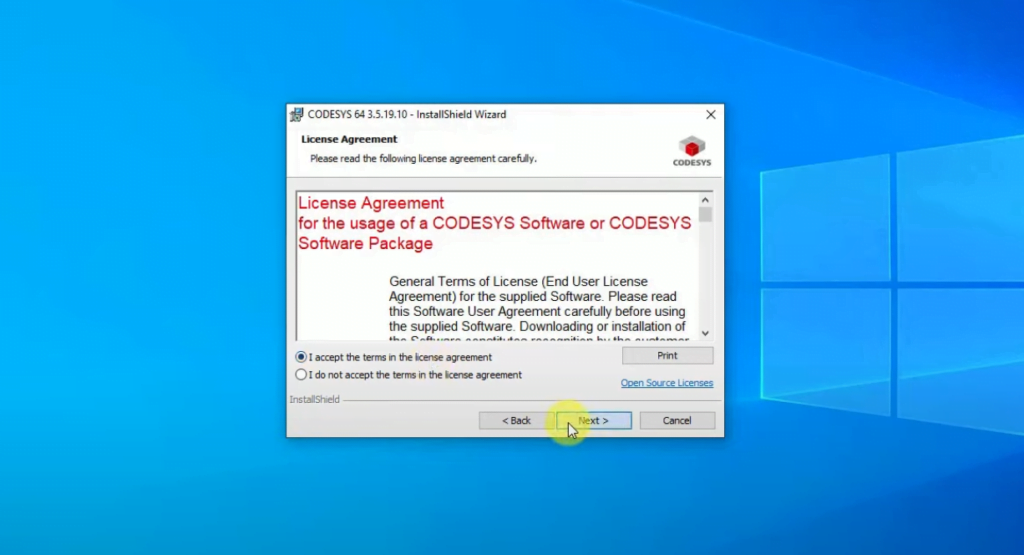
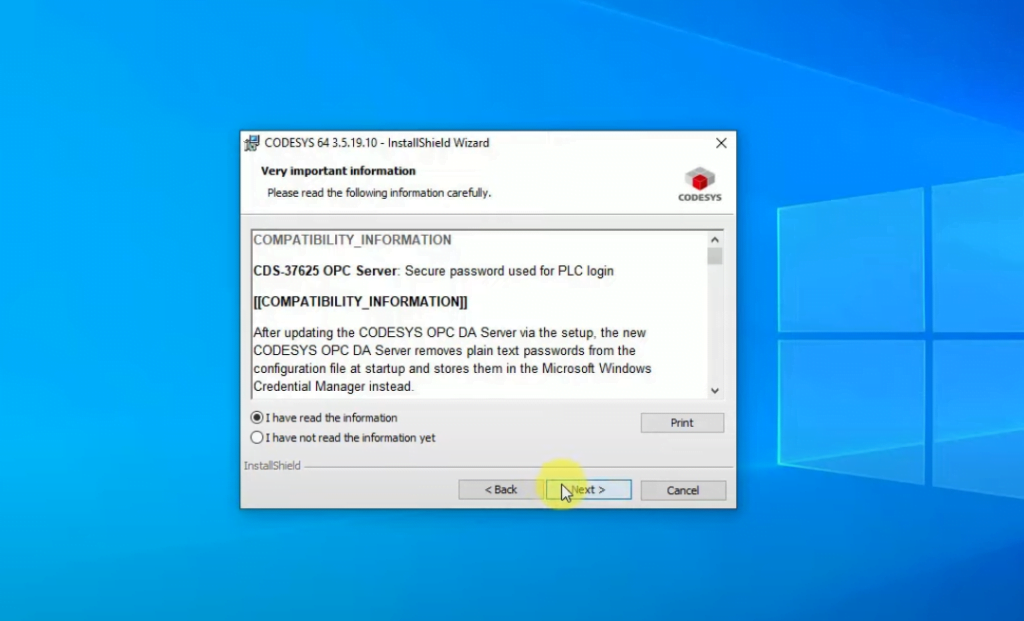
- The CODESYS Setup Wizard will open. Click “Next” to continue.
- Read and accept the license agreement, then click “Next”.
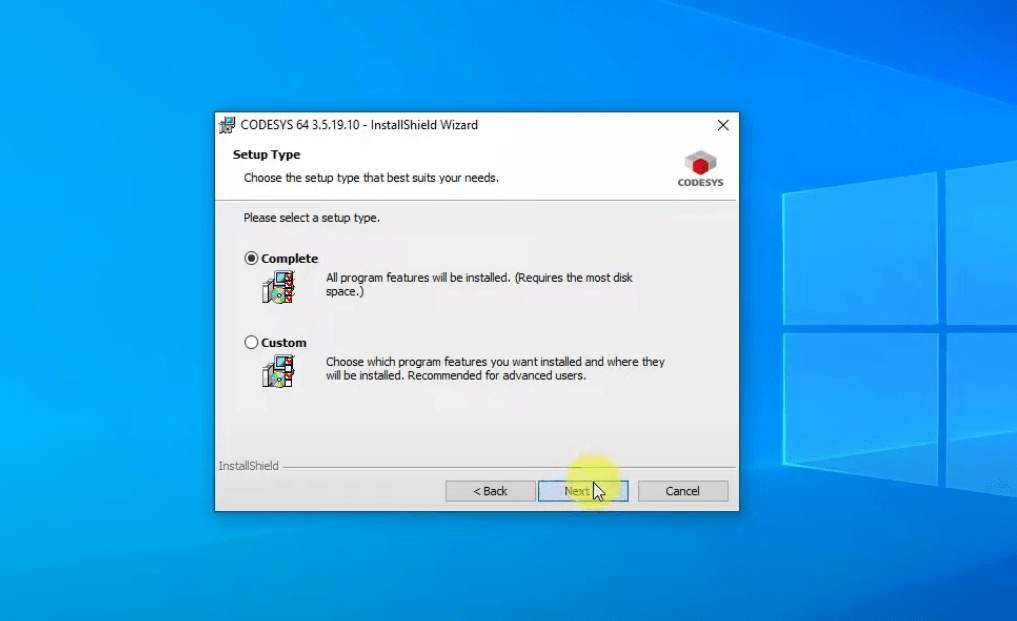
- Choose “Complete installation”.
- The installation will now begin. This process may take several minutes, depending on your system’s specifications.
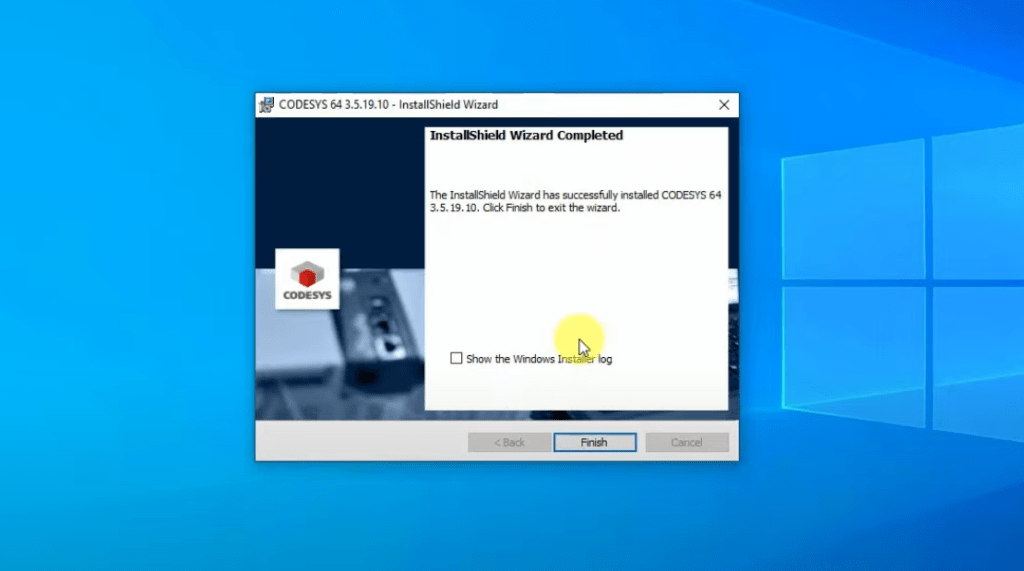
- Once the installation is complete, click “Finish” to exit the Setup Wizard.
Step 4: Launching CODESYS
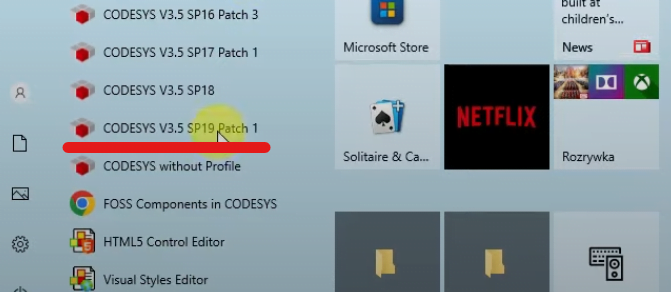
After installation, you can launch CODESYS from the Start menu (Windows) depending on your operating system. Upon the first launch, you may be prompted to configure certain settings or update components. Follow the on-screen instructions to complete these steps.
Conclusion
You have now successfully installed the CODESYS Development Environment on your computer. With CODESYS installed, you’re ready to start developing and testing your PLC applications in a comprehensive and versatile platform. Remember to regularly check for software updates to ensure you have the latest features and security enhancements.
Happy programming!
Free PLC course outline
- Lesson #1: What Is It and Why Should Every PLC Programmer Know It? Part #1
- Lesson #2: How to install Codesys? Part #2
- Lesson #3: Write your first program in Codesys: Structured Text – Part #3
- Lesson #4: How to Create a Codesys Visualization in an Application? – Part #4
- Lesson #5: Introduction to Variables in CODESYS – Part #5
- Lesson #6: Data Structures in CODESYS: Practical Use of Arrays and Structures – Part #6
- Lesson #7: Advanced Data Types. Enumerations and Local vs. Global Variables – Part #7
- Lesson #8: Operators – Introduction and Practical Applications – Part #8
- Lesson #9: Program Flow Control: IF, CASE, and Loops – Part #9

