Wiring diagrams and electrical schematics are an essential tool for electricians, engineers, and automation technicians. Proper interpretation is crucial for understanding the operation of devices, diagnosing faults, and working safely with installations. If you want to learn how to read a wiring diagram, this beginner guide is the first step toward mastering technical skills in this field.
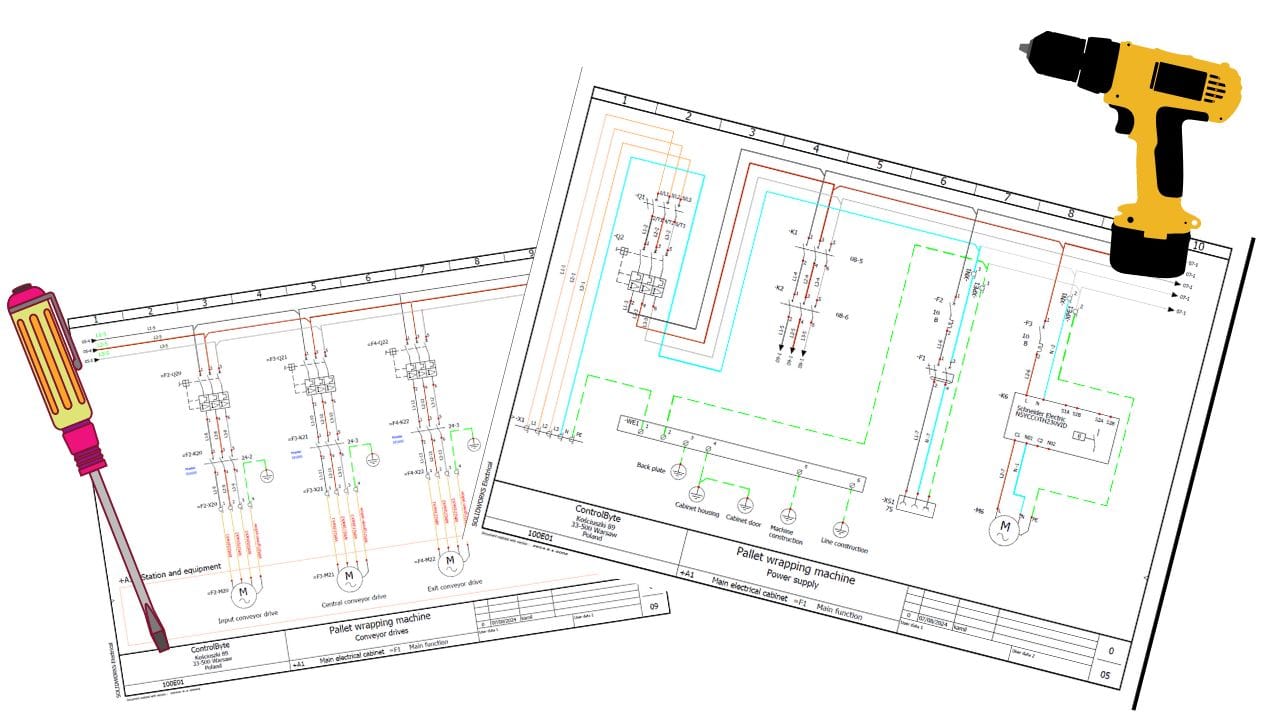
A wiring diagram is a graphical representation of a system that shows how the components are connected and how the current flows through each wire. Examples of such systems include lighting circuits, machine controllers, and even advanced industrial automation systems. In this guide, we will explain how to read wiring diagrams, understand symbols, and apply this knowledge in practice.
What is a wiring diagram and why is it important?
A wiring diagram is a map of an electrical system that allows tracking how current flows through a device or installation. It represents both mechanical and electrical elements, such as motors, switches, relays, fuses, and other devices that make up the entire system.
Reading wiring diagrams is crucial for several reasons:
- Diagnostics: When a failure occurs, the diagram helps identify problematic components and understand why a particular part of the system is not working properly.
- Safety: Proper diagram interpretation allows understanding which parts of the system are energized, helping to avoid accidents.
- Design and installation: Wiring diagrams are crucial when installing new systems, as they allow precise placement and connection of components.
Wiring diagram vs schematic - types of wiring diagrams
People often use "wiring diagram", "schematic" and "circuit diagram" as synonyms, but in technical documentation they are different drawings. Knowing which one you are holding makes the diagram easier to read:
- Schematic (circuit diagram) - shows how the circuit works. Components are drawn as symbols and arranged by function, not by their physical position. This is the drawing you use to understand logic and to troubleshoot.
- Wiring diagram (connection diagram) - shows how the components are physically connected: which terminal goes to which terminal, wire numbers, colors and cross-sections. This is what you use to build or repair a cabinet.
- Block diagram - a simplified drawing of the whole system with boxes and arrows, useful as a roadmap before you dive into details.
- Terminal and cable diagrams - lists of terminals and cables showing where every wire leaves the cabinet and which field device it reaches.
In the automotive world the same ideas apply. A typical automotive wiring diagram shows the power source (battery), fuses, a relay, the control module and the load, for example a lighting system, plus the ground side of the circuit. Automotive wiring uses its own symbols and wire color codes, but the reading technique is the same as for an industrial control panel.
Basic elements of a wiring diagram
Each wiring diagram consists of several basic elements represented by graphic symbols. Understanding these symbols is the foundation for reading diagrams of any kind.
Wire lines
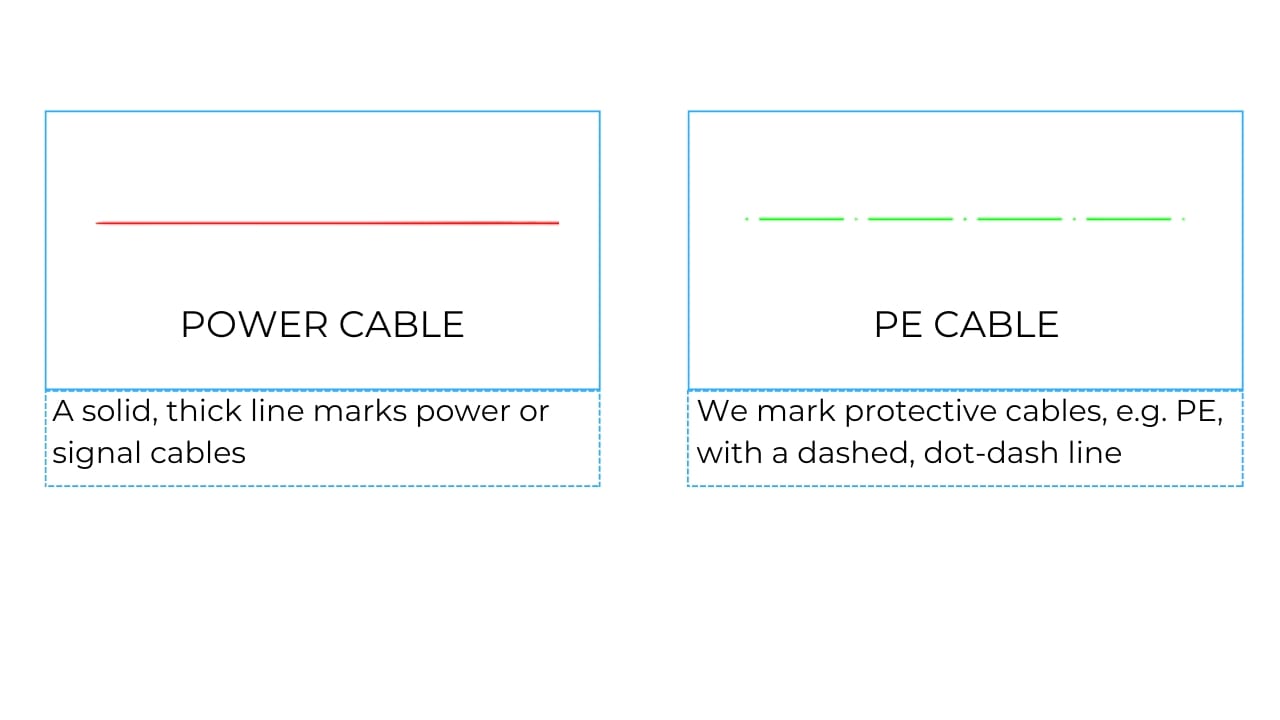
The lines in the diagram represent wires that connect different components. A solid line usually symbolizes power wires and signal wires, while a dashed line may indicate protective wires (PE). Each individual wire is often given a number or color code, so you can find the exact conductor in the cabinet.
Nodes and connections
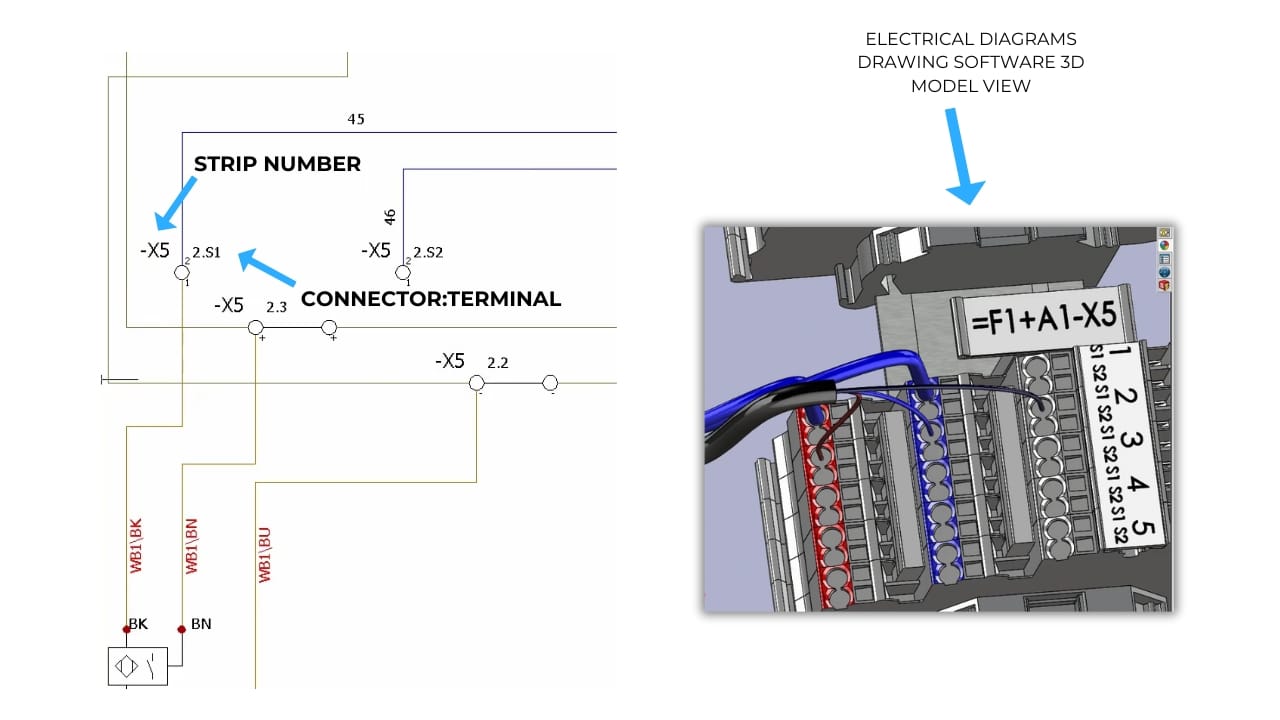
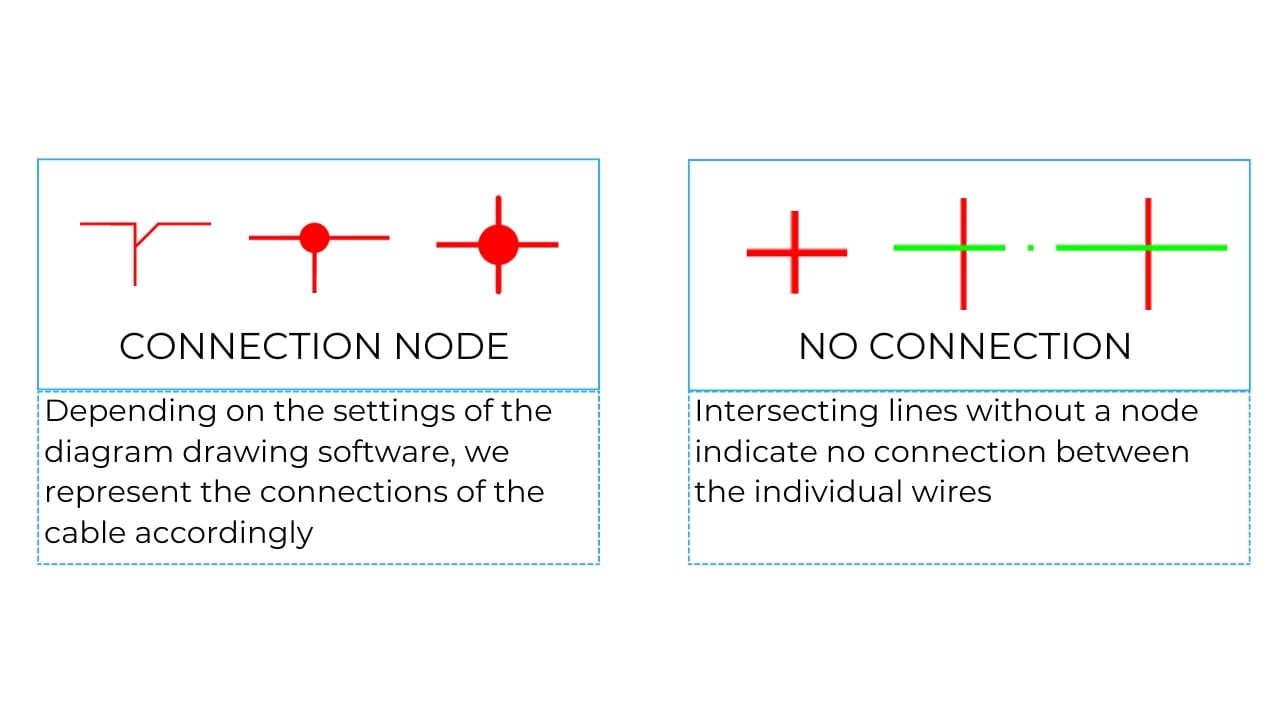
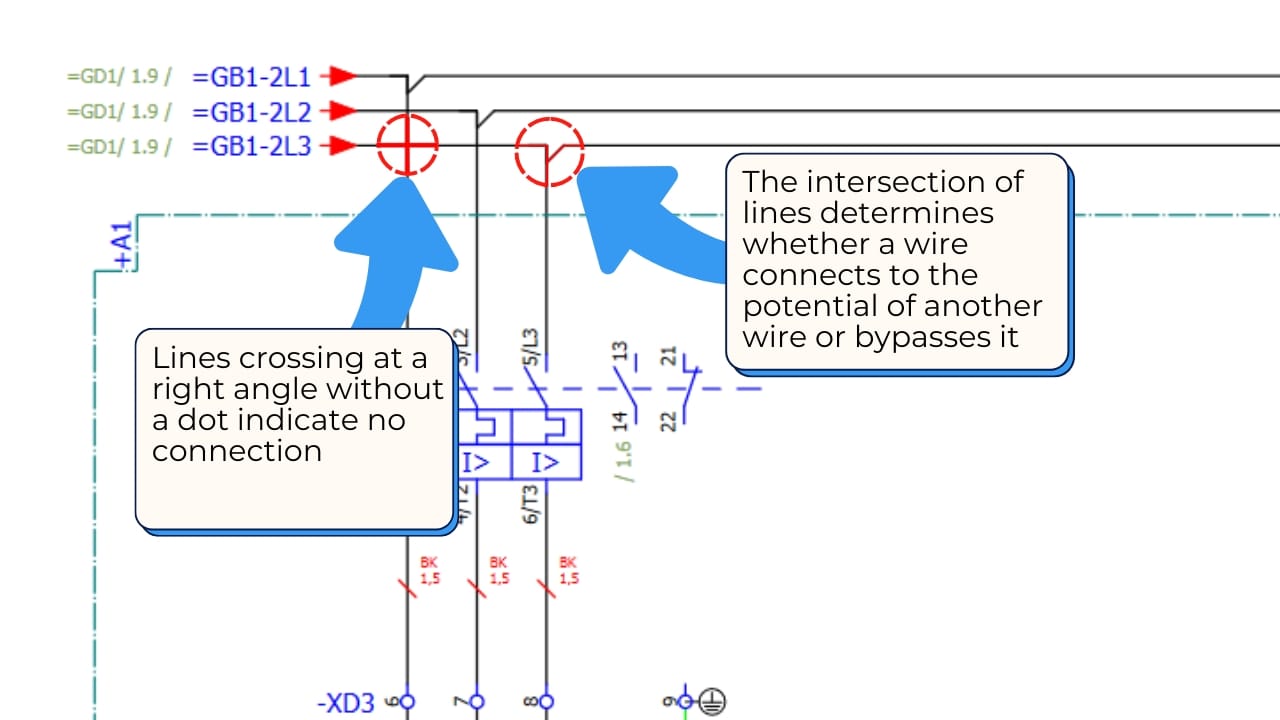
These elements indicate where wires are physically connected. A filled dot (node) means that crossing lines are joined, while lines that cross without a dot are not connected. A terminal is shown as a small circle or square with a label. Terminals are crucial as they allow connection of wires, sometimes coming from different parts of the installation.
How to interpret symbols on wiring diagrams?
Every electrical component, such as a switch, fuse, relay, or resistor, has its graphic symbol that makes it easy to identify on the diagram.
Symbols on schematics are intended to simplify and standardize the way components are represented. This ensures that regardless of the device manufacturer, the person working with the diagram can quickly understand what components they are dealing with.
Here are the most commonly encountered symbols:
| Element | Actual | Symbol |
|---|---|---|
| Push button | 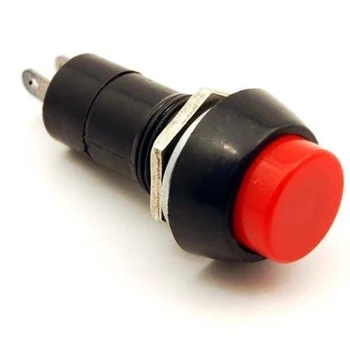 | 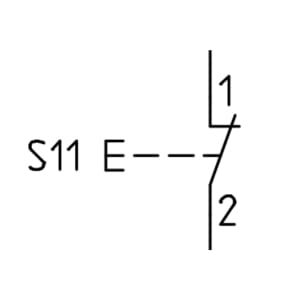 |
| Motor switch | 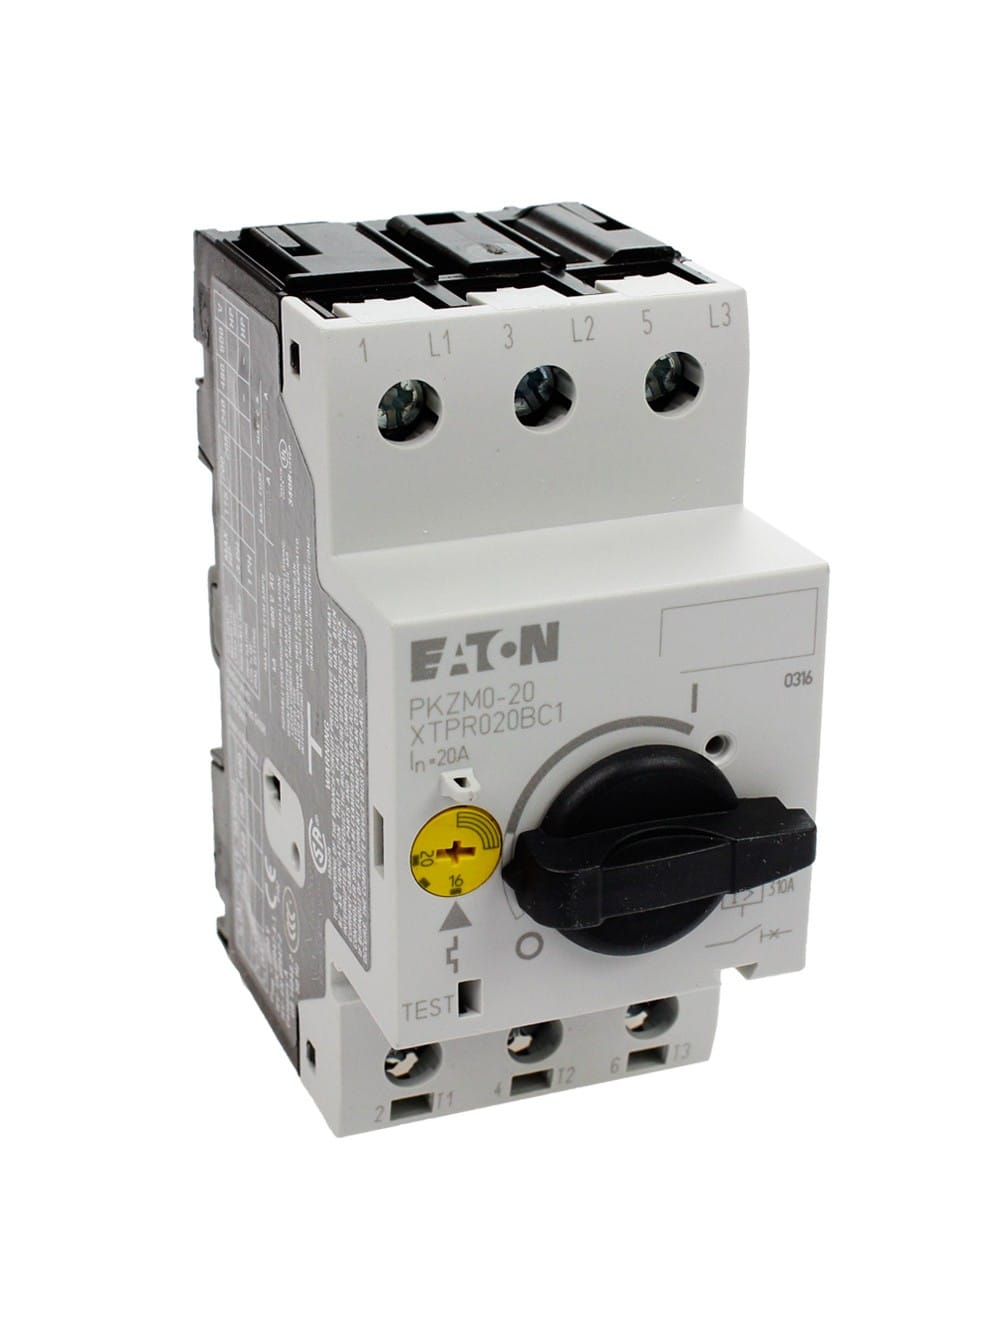 | 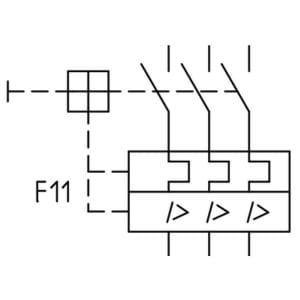 |
| Relay | 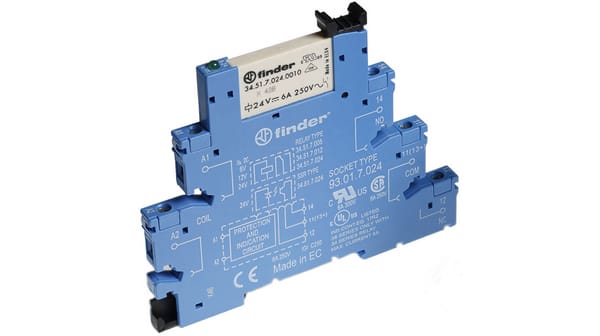 | 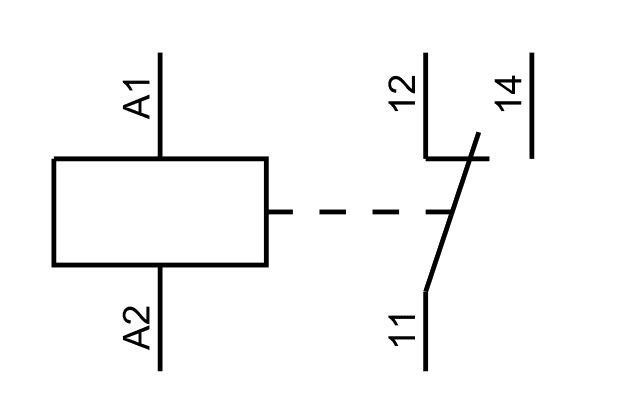 |
| Resistor | 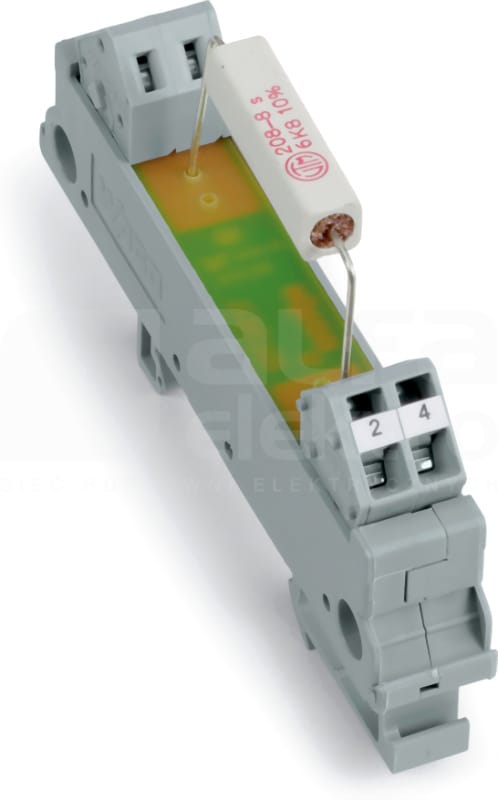 | 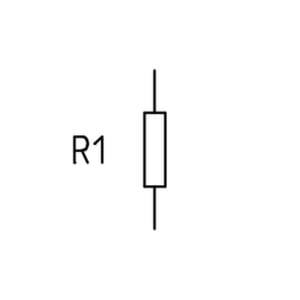 |
Switch on the diagram
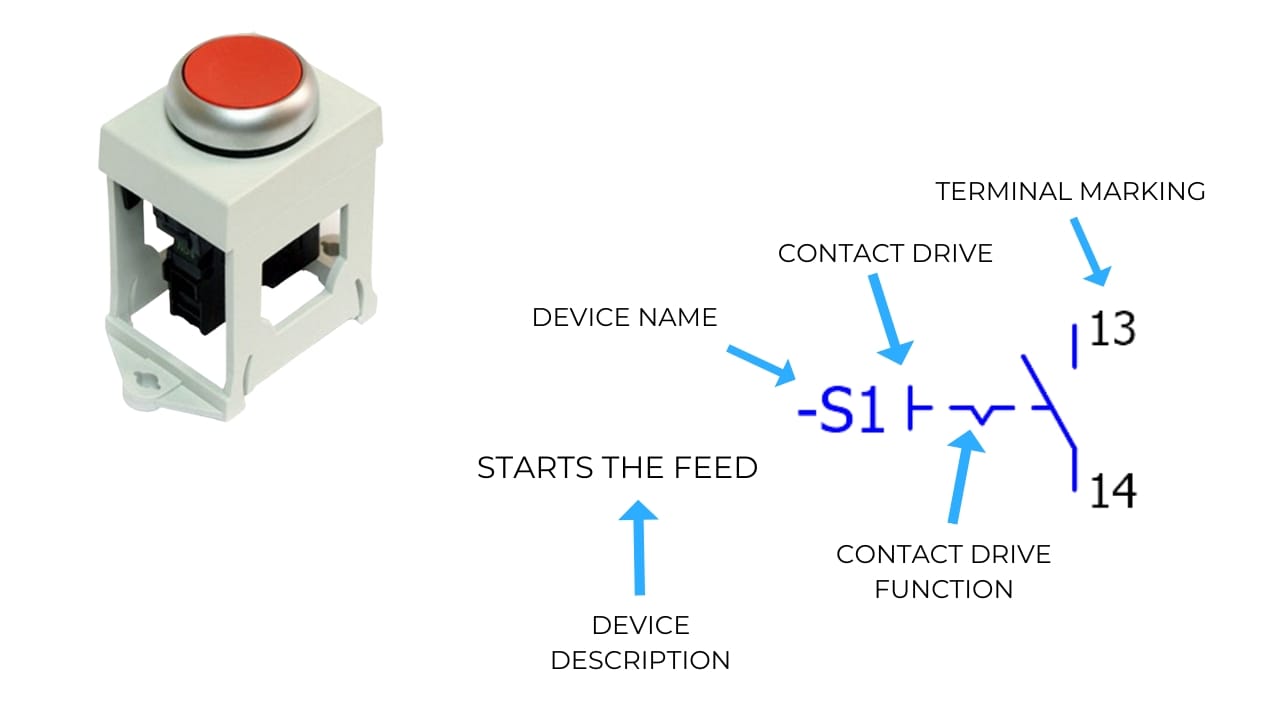
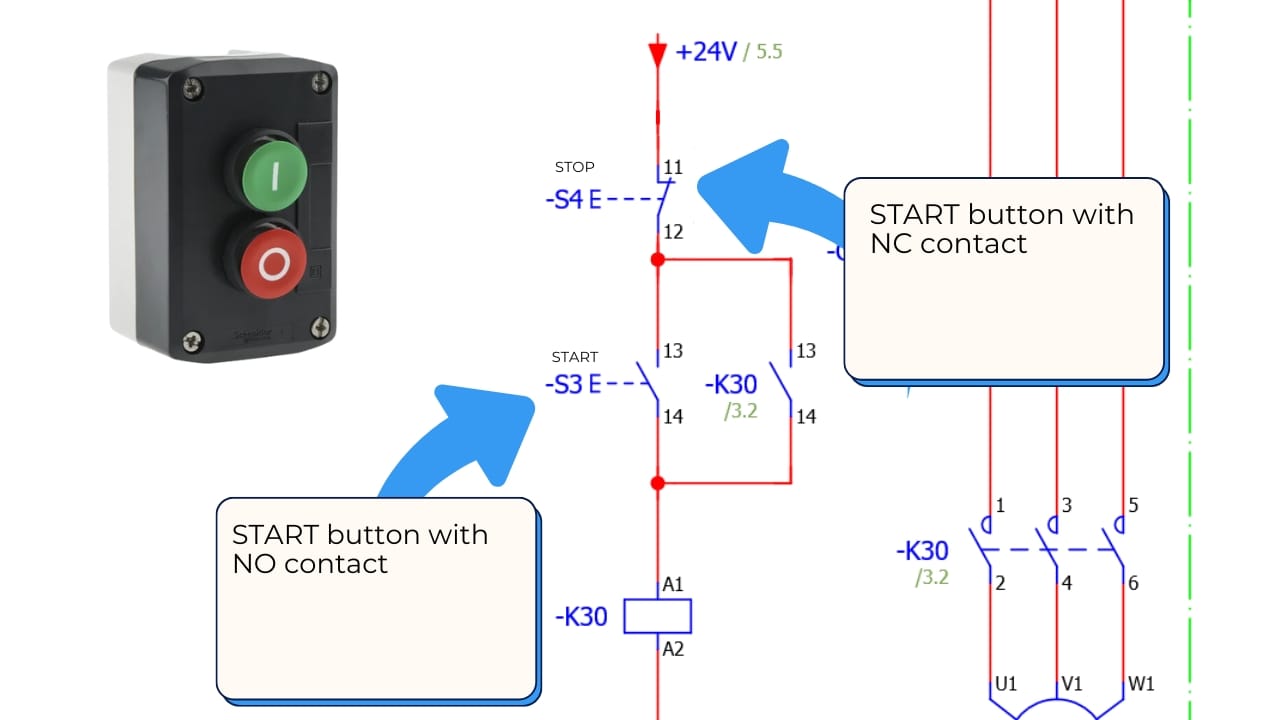
A switch is one of the basic elements controlling a circuit. In diagrams, it is drawn as a contact (a short angled line between two connection points). A dashed line attached to the contact shows the mechanical link to the actuator, for example a push button or a rotary knob.
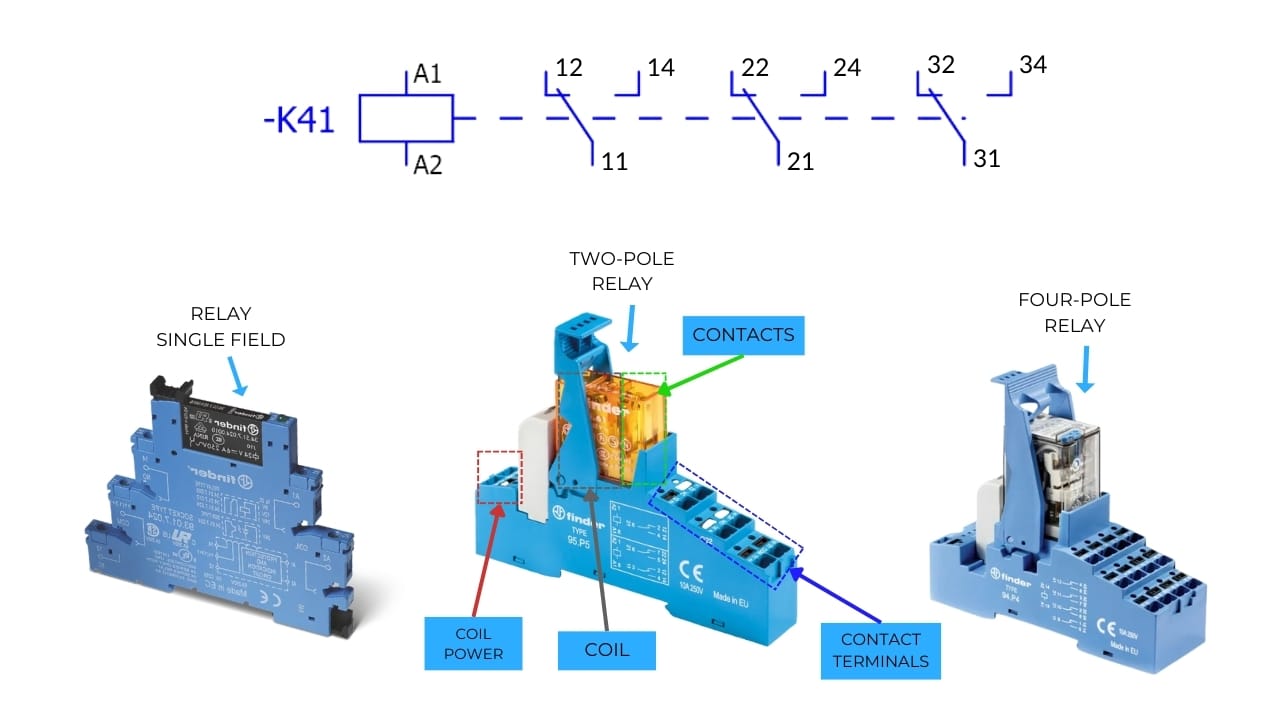
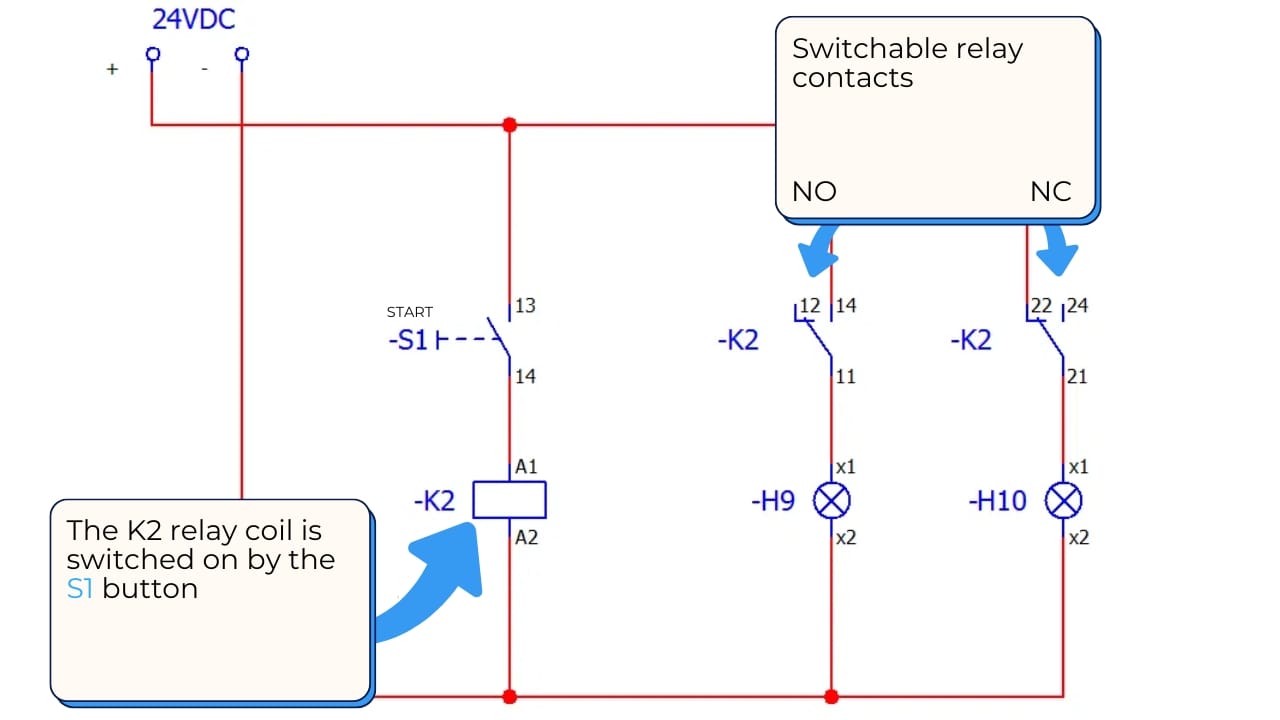
Relay on the diagram
A relay is a component that can open or close an electrical circuit in response to a signal. The relay symbol typically includes both a coil and contacts.
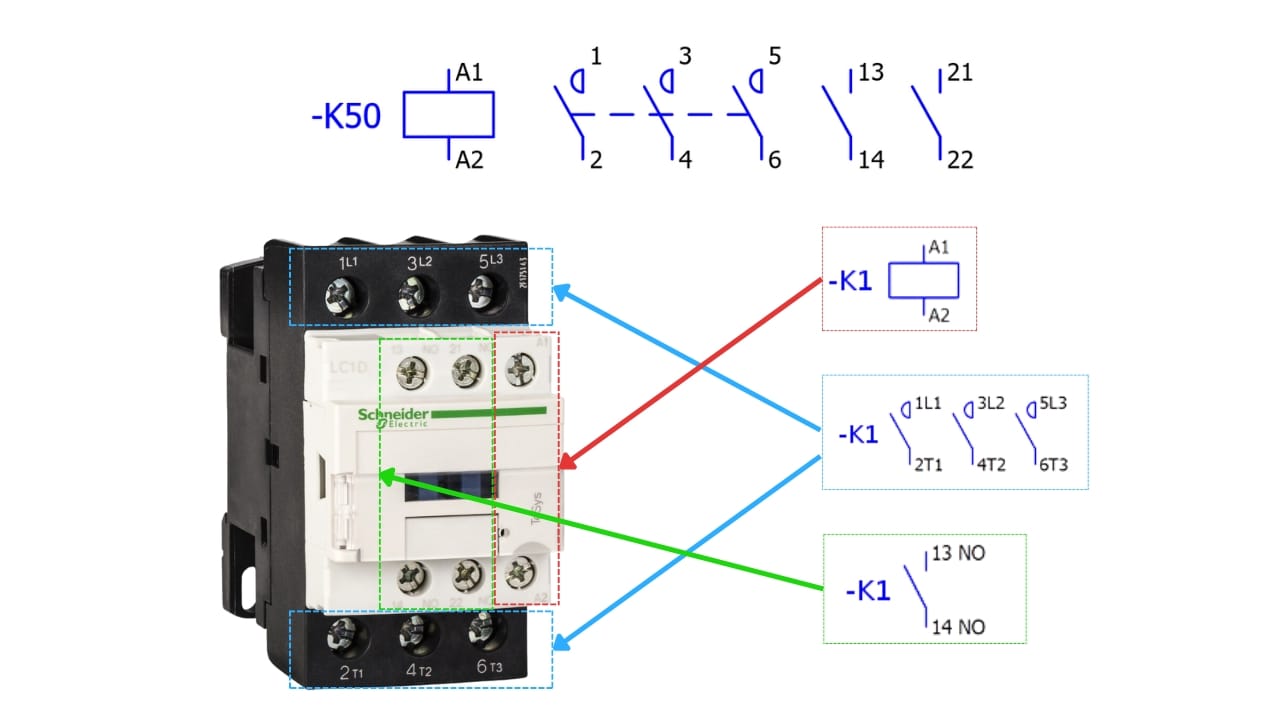
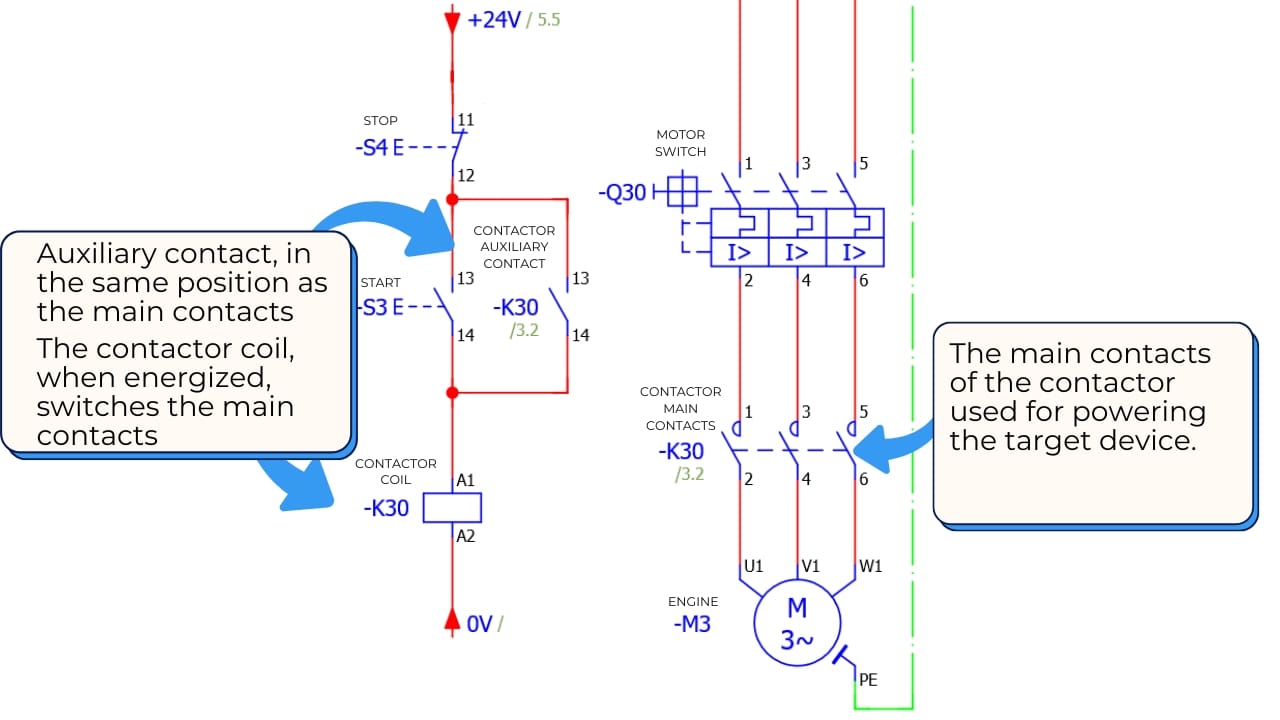
Contactor on the diagram
A contactor switches power circuits, especially in industrial installations. The diagram symbolizes contactors with a set of contacts and a coil, similar to relays.
Fuses on the diagram
In IEC diagrams the fuse symbol is a small rectangle with a line running through it. It indicates that the circuit will be interrupted in case of overcurrent, preventing damage to the installation.
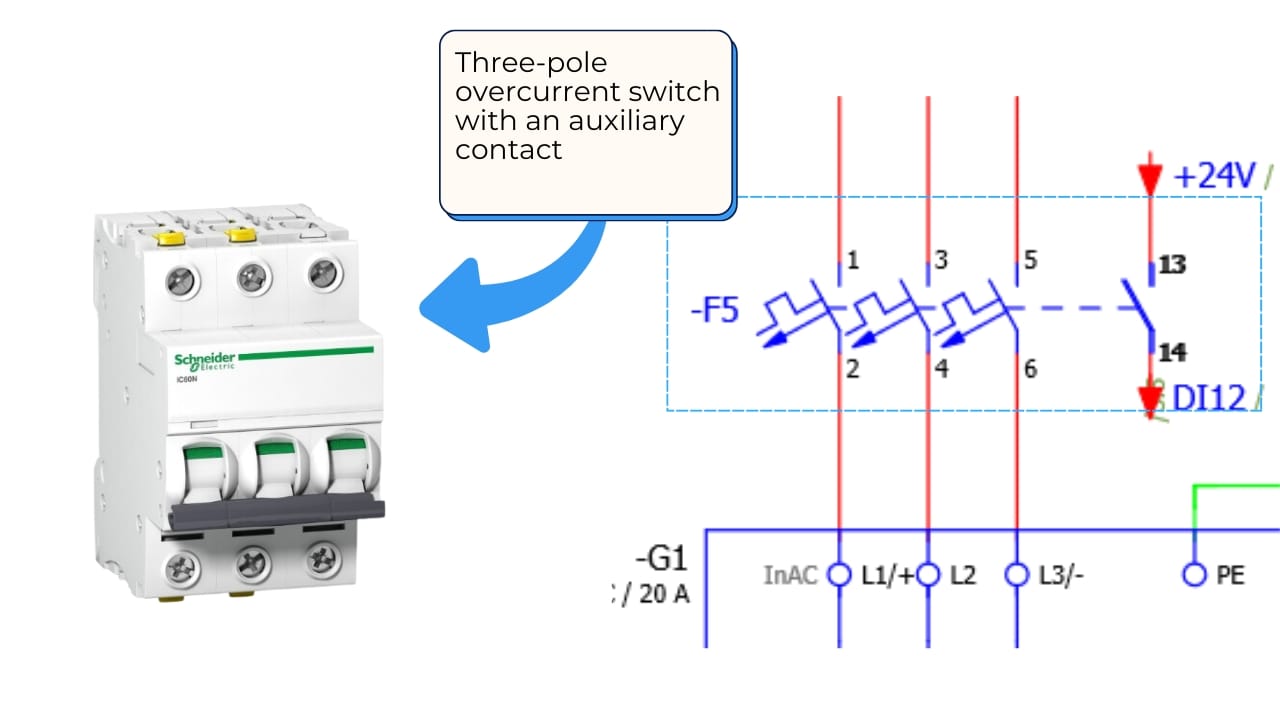
Cross-references and potential lines
Cross-references are markings on diagrams that help locate connections between different pages of documentation. In more complex systems, diagrams often span several pages, with cross-references showing the location of the next part of the connection.
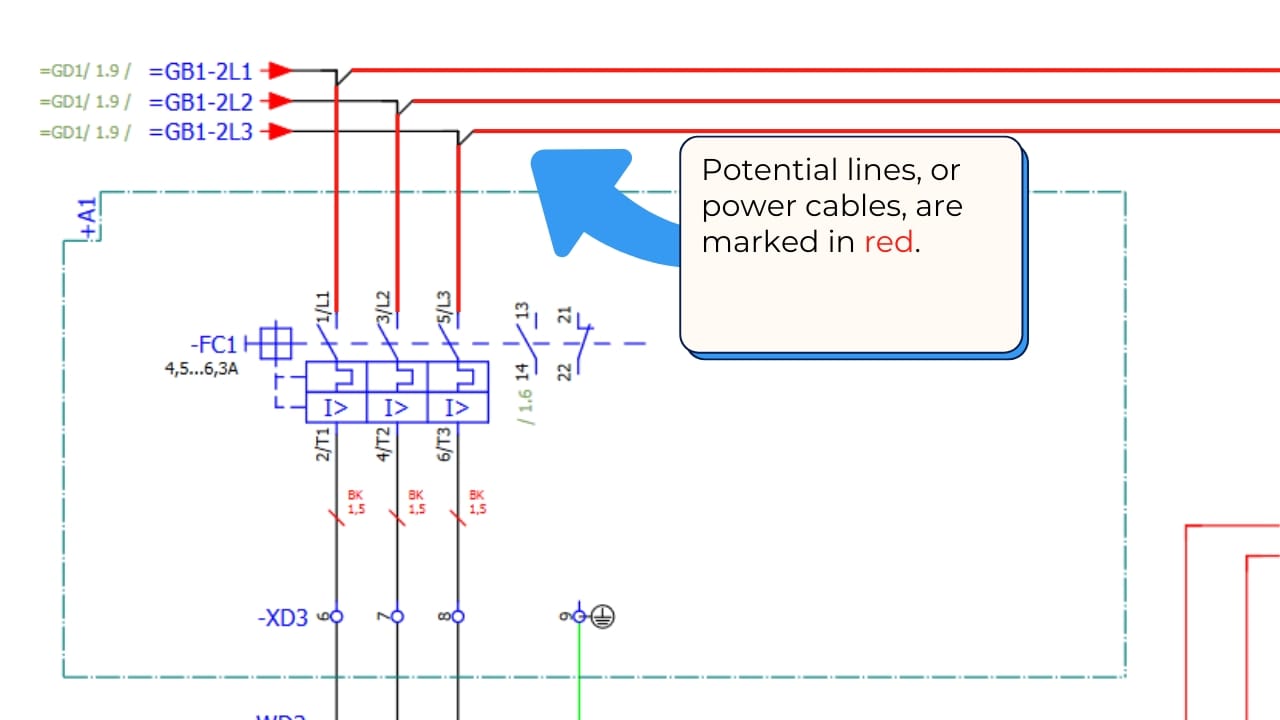
Potential lines, on the other hand, indicate the voltage level in a given circuit. It is important to understand these markings as they can indicate different power levels, e.g., +12V, +24V, or circuit ground (GND). The ability to interpret potential lines is crucial, especially in complex multi-voltage systems.
How to read a wiring diagram step-by-step
Use this simple roadmap every time you open a new set of drawings:
- Start with the title block and legend. Check the project name, revision, sheet number and the symbol standard (IEC or ANSI). Read the label of each device, for example -K1 for a relay or -F2 for a fuse.
- Find the power source. Locate the supply (for example 230 V AC or 24 V DC) and follow it through the main switch and protective devices.
- Follow the current path. Read the drawing from left to right and from top to bottom, the same way the current flows from the supply line to the load and back to 0 V or ground.
- Check what energizes each coil. When a contact closes, the coil of the relay or contactor is energized and its contacts change state. Use cross-references to find where those contacts are drawn, which may be on another sheet or may control a second relay.
- Mark the potentials. Note which wires receive power from which supply. This shows you where voltage is present when the machine is switched on.
- Compare with reality. Match wire numbers and terminal labels with the real cabinet before you touch anything.
Electricity flows only through a closed loop, so for every load you should be able to trace a complete path from the supply, through the contacts and the load, to the return conductor. If you cannot close the loop on paper, you have probably missed a cross-reference.
Practice - how to exercise reading wiring diagrams?
Regular practice is necessary to master the skill of reading diagrams. Start with simple circuits, such as lighting circuits or basic home installations. Over time, as you gain proficiency, you can move on to more complex projects like industrial automation systems or advanced machine control systems.
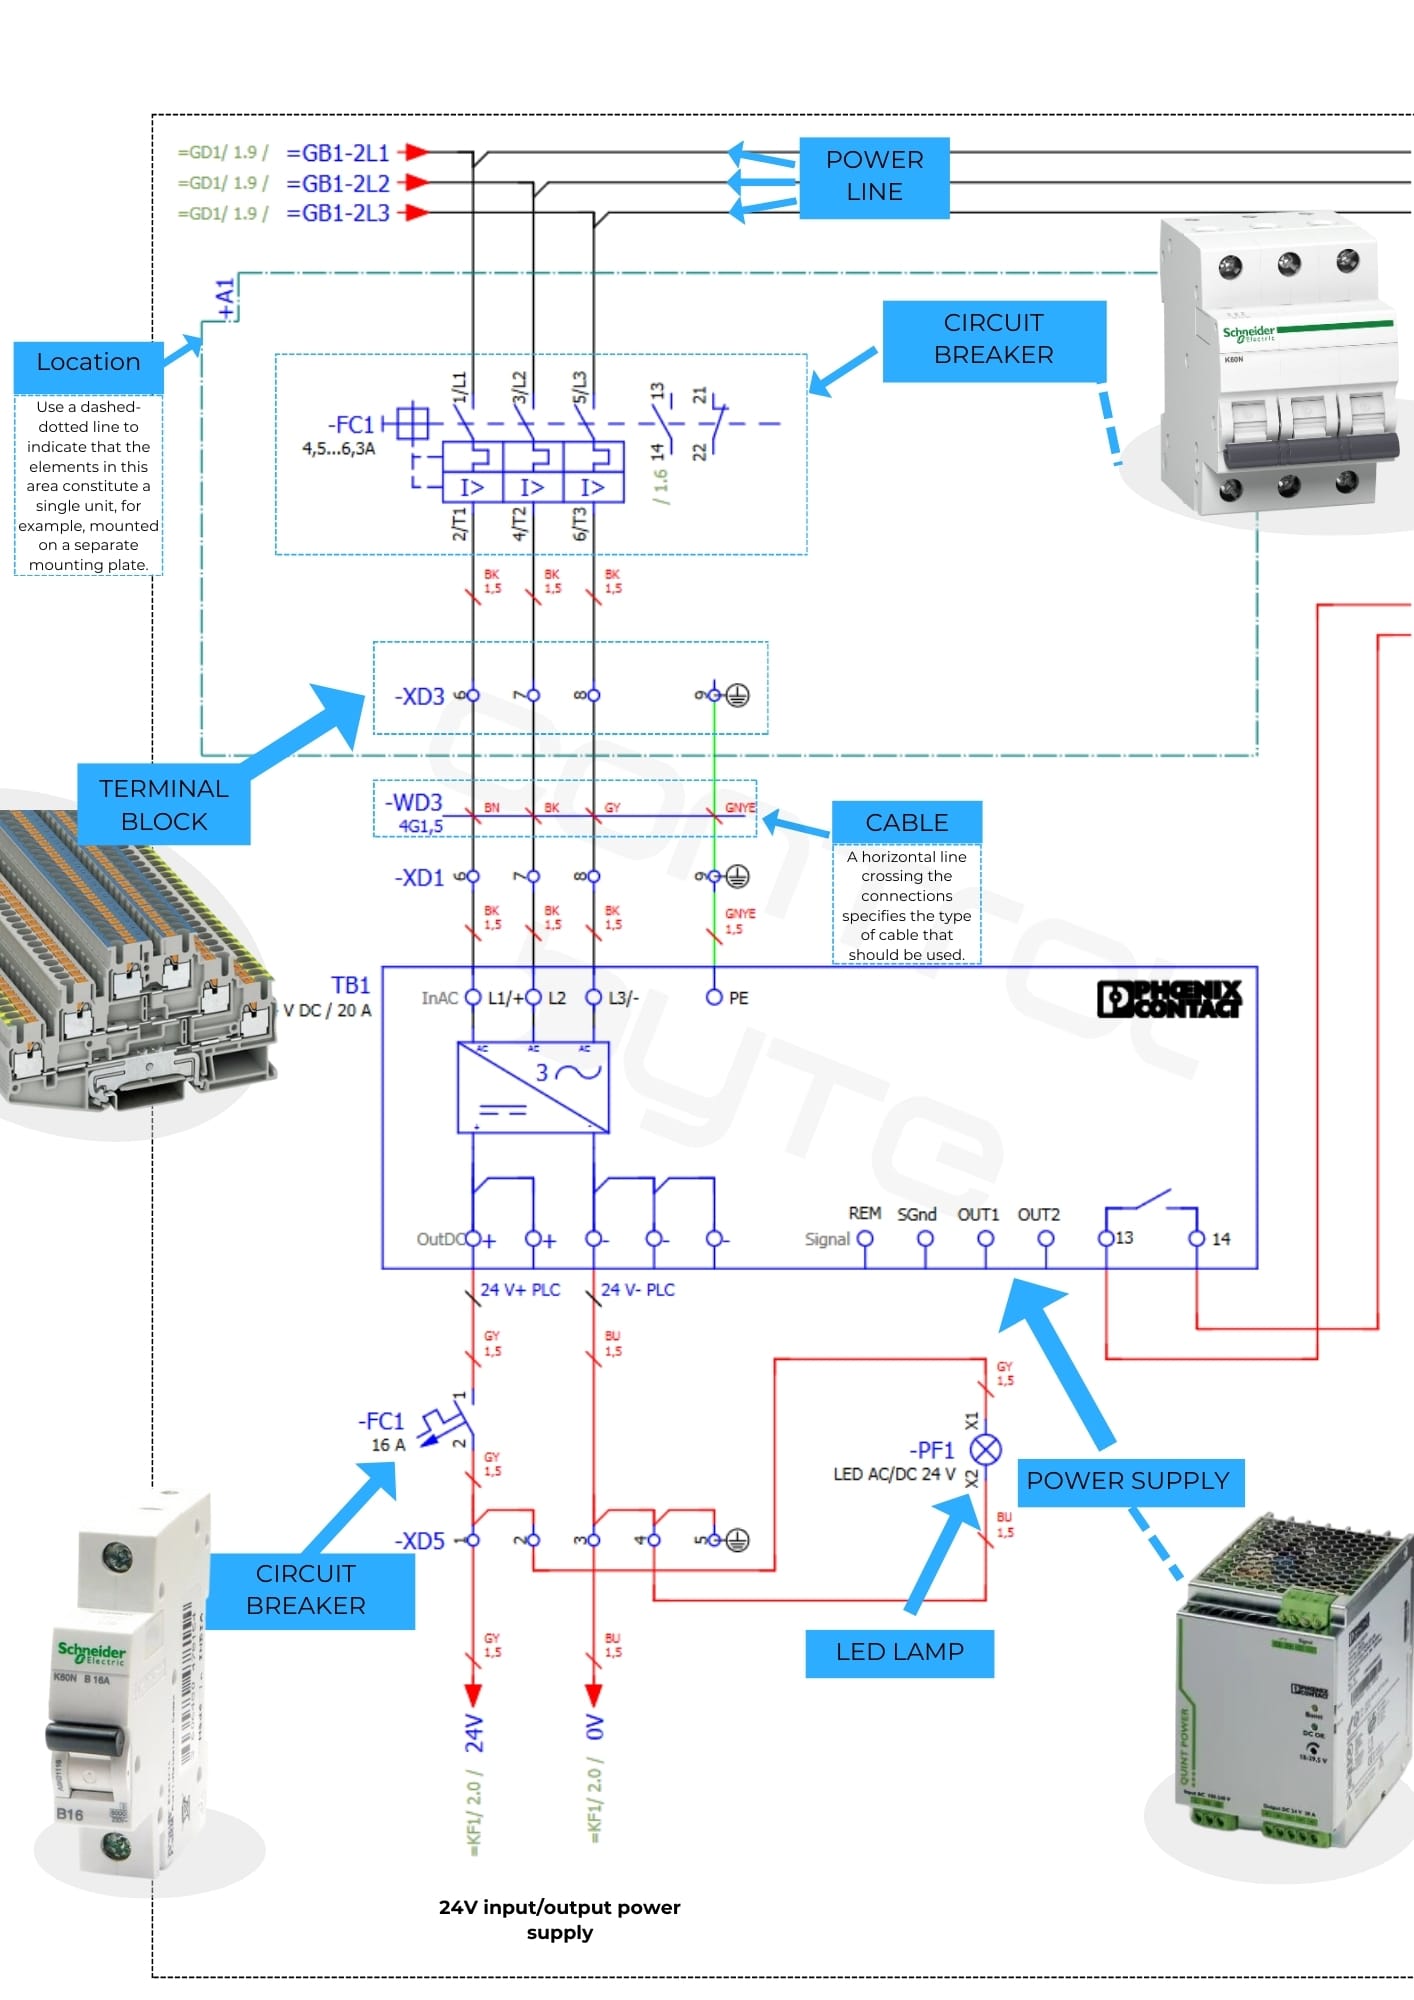
It is also helpful to work with the technical documentation of devices. Manufacturers often provide full wiring diagrams in user manuals. Analyzing these diagrams can help you learn to identify individual system components and understand their functions.
You can sign up for our Industrial Automation Basics and How to Read Electrical Diagrams Course, and we will send you a ready-made diagram to work on, after which you will design your own control cabinet.
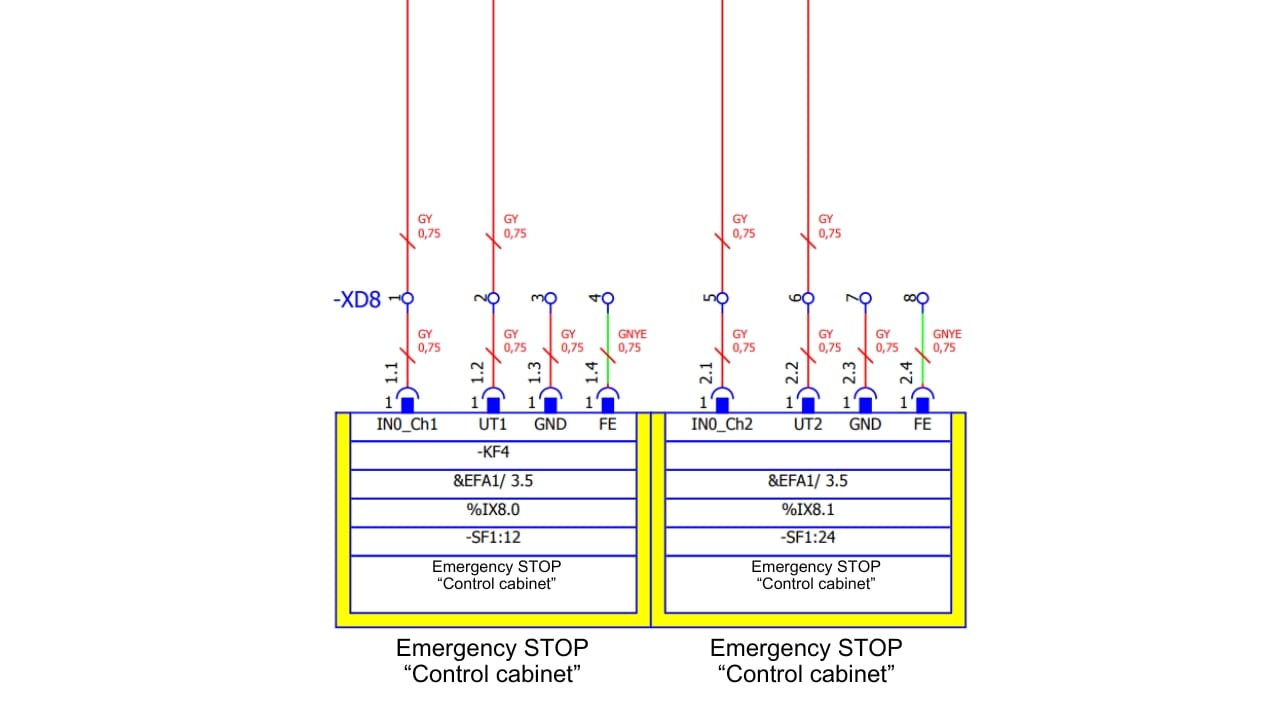
Additionally, in more complex systems, such as power systems in industrial production lines, diagrams include sections on protections, time relays, signaling, and emergency shutdown. Practicing with such diagrams will help you understand how complex systems work together and how important the proper connections and protections are.
Advanced diagrams
Schematics are becoming more complex in industrial applications, forcing designers to use various markings and structures to facilitate analysis and maintain order in the documentation. One important aspect is the identification of function, location, and product for each element in the diagram, according to standards like IEC 81346-1.
Using such markings significantly increases readability, especially when diagrams span dozens of pages and are part of larger systems with thousands of connections. This requires marking each element according to its function (equals sign), location (plus sign), and product type (minus sign).

- = FUNCTION - defines the function of an element, e.g., control circuits, 24VDC power supply
- + LOCATION - defines the location of the element, e.g., main switchboard +RG1, cross-connect cabinet +KS1
- - ELEMENT - target device, e.g., motor -M1, relay -K2
An example from actual documentation could show a control system for a production machine, where markings on different pages indicate specific workstations. For instance, if we are controlling a packaging machine, the function marking could show that the element is responsible for PLC power, the location indicates a specific place in the factory, and the product refers to a specific relay or motor in the system.
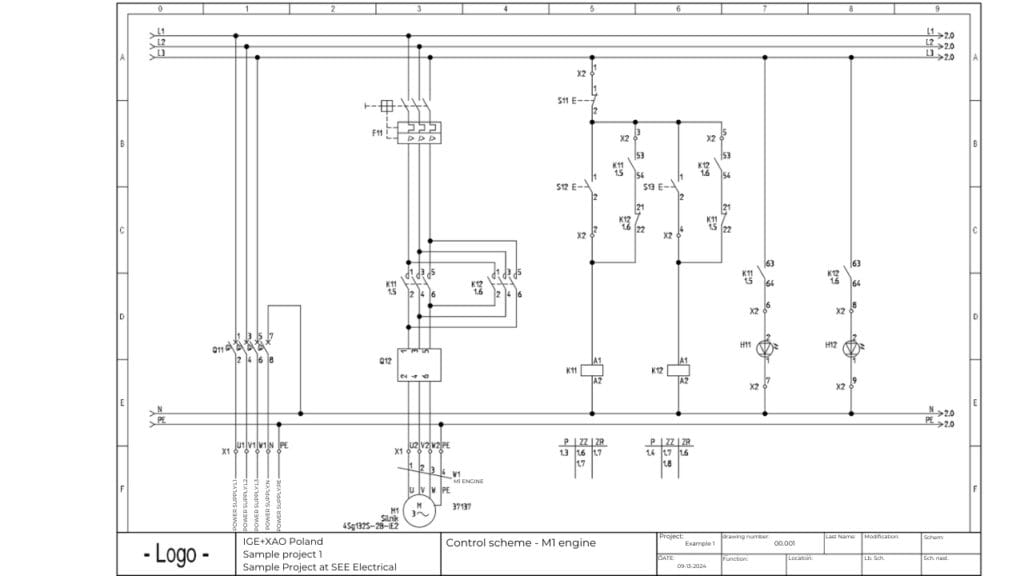
In advanced diagrams, such as transport systems or industrial production lines, the structure of diagrams is even more complex, as systems encompass many functions simultaneously. For each production station, it is necessary to design diagrams that allow precise tracking of all connections between automation, power, and protection elements. This helps avoid misunderstandings and errors during the operation or servicing of these complex systems.
Using wiring diagrams to troubleshoot and repair
Diagrams are most valuable when something stops working. To analyze and troubleshoot a fault, find the exact current path for the device that does not work, then measure step by step along that path with a multimeter: supply, fuse, contacts, coil, load and the return wire. The first point where the voltage disappears shows you the faulty section. Always confirm the diagram matches the latest revision, because undocumented changes are a common reason why a drawing seems "wrong". In a PLC-controlled machine you also need to read the PLC input and output pages, which show which sensors and push buttons go to which input terminal. See our guide to digital inputs of the Siemens S7-1200 PLC for an example.
How to read wiring diagrams - FAQ
How do you read wiring diagram symbols?
Start with the legend on the first sheets of the documentation. Most industrial drawings use IEC symbols, while North American drawings often use ANSI or NFPA symbols. Contacts, coils, fuses, motors and terminals have standard shapes, and each one carries a label that identifies the device.
Is it hard to learn how to read a wiring diagram as a beginner?
No. If you understand the basics of a closed circuit, simple circuits such as a lamp with a switch or a motor starter with a contactor are easy to understand. Move to multi-page industrial schematics once you can follow a single current path without help.
Can AI read wiring diagrams?
AI tools can describe a clear image of a simple schematic and help explain symbols, but they can misread wire numbers and cross-references. Treat the answer as a hint, not as a verified analysis, and always check the original drawing before you work on a live installation.
Are automotive wiring diagrams read differently?
The method is the same: find the power source, follow the circuit through the fuse, switch or relay to the load, and check the ground side. Automotive technicians who want formal proof of skills often take ASE certification tests in the US, while in industry the skill is usually learned on the job or in a course. To learn how to read and understand industrial drawings with real exercises, see our Industrial Automation Basics course.
Summary
Knowing how to read a wiring diagram is a fundamental skill for every electrician and automation technician. By correctly interpreting diagrams, you can diagnose faults, understand how installations work, and design new systems. The key to proficiency in this field is regular practice and understanding the basic symbols and connections.
Check out our course related to wiring diagrams:
Familiarity with schematics is also invaluable when working with more advanced technologies, such as PLC controllers or industrial automation systems. As you gain experience, interpreting diagrams will become easier, and you will be able to analyze even the most complex systems with ease.